sewing for sissy maids
Chapter 11: How to make a maid's petticoat
A petticoat does much more than simply add shape to a sissy maid's skirt, as pleasing as it is to see puffed out satin where there might otherwise only be unwomanly hips. As well as shrouding his sex beneath its feminine fabric and preventing any unseemly lines from his lingerie, the subtle rustle of its material reminds the male maid of his submission with every movement he makes, teasing him by tickling his thighs as he goes about his domestic duties.
In this chapter, we'll be making a simple petticoat with an elasticated waistband and ruffled hem, gathering three separate lengths of fabric to give it sufficient volume to flare out your skirt. In terms of sewing techniques, making a petticoat provides plenty of opportunity for practice skills you've already used in previous chapters - by the time you've finished, you'll be well on the way to being proficient!
Pieces for the petticoat
To make a maid's petticoat, we'll need the following pieces of fabric:
-
top half
A strip from selvedge to selvedge. To calculate its height, start with half your waist to mid-thigh measurement, then subtract 2.5cm / 1” to allow for the height of the ruffle. To this, add 5cm / 2” for the casing for the elastic at the top, plus your seam allowance for the seam at the bottom.
-
bottom half
Two strips from selvedge to selvedge. To calculate their height, once again start with half your waist to mid-thigh measurement, subtracting 2.5cm / 1” for the ruffle as before (deliberately double counting it to make the petticoat slightly shorter than the skirt), but this time adding twice your seam allowance - once for the top seam, and once for the bottom.
-
ruffle
Four strips from selvedge to selvedge, each 7.5cm / 3” in height. These will be folded in two, which, allowing for the seam, makes the petticoat's final ruffle approximately 2.5cm / 1” in height.
Once the seam allowances have been used for seams, and the casing and ruffle folded, you'll see that the combined height of the top, bottom and ruffle comes to just short of your waist to mid-thigh measurement, meaning that the hem of your petticoat will sit slightly higher than that of your skirt. The numbers of each piece needed assume you're using fabric of the standard 150cm / 60” from selvedge to selvedge, with the petticoat's elasticated waistband allowing a lot of leeway with regard to your waist circumference. If you're using substantially narrower fabric, you may wish to increase the number of strips accordingly - doing so is simply a case of sewing more together, as you'll see shortly.
Preparing the strips
We'll start by turning the various strips into a smaller number of longer ones.
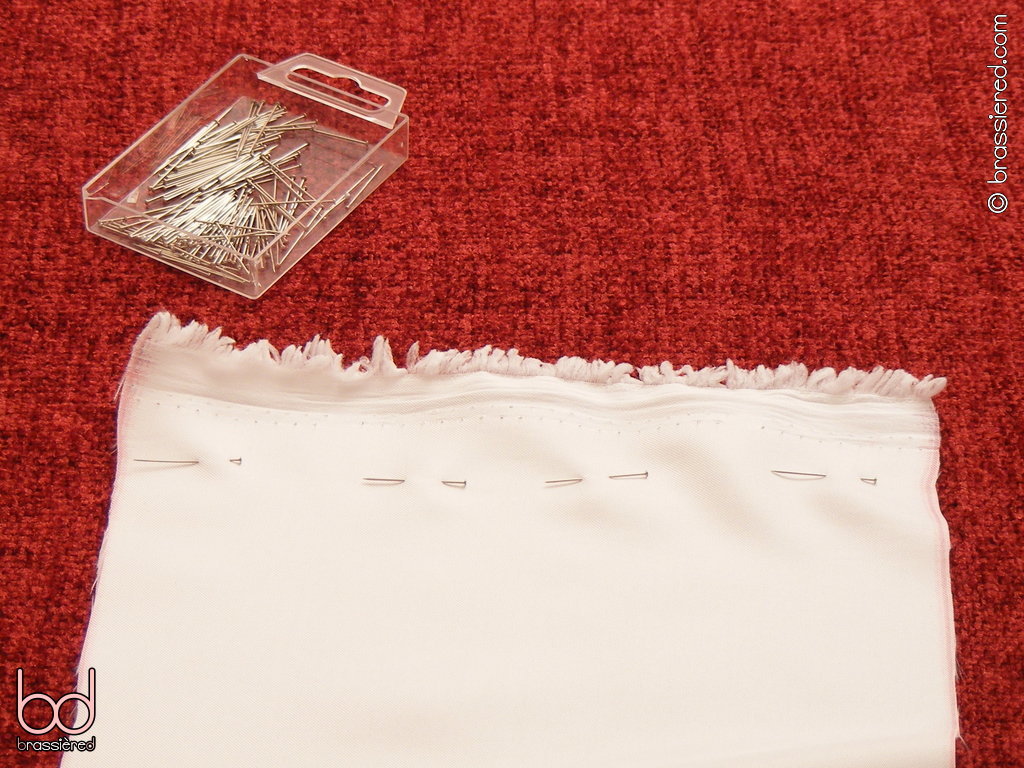
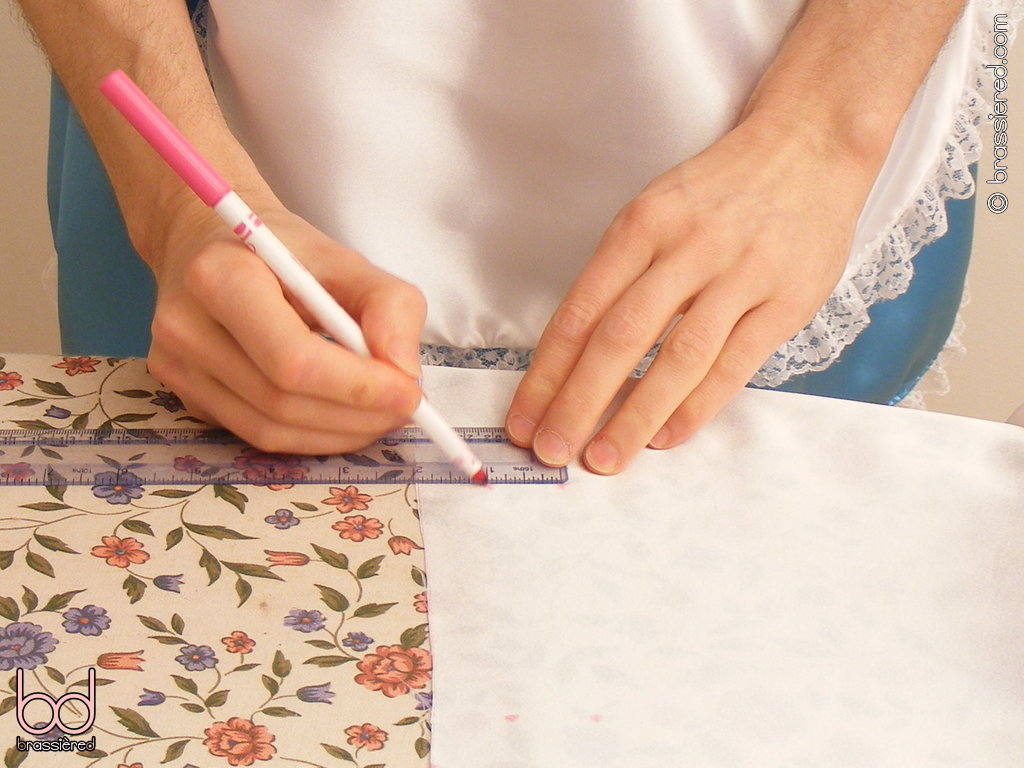
Mark and cut the various strips of fabric, in the same way as you did for your apron in Chapter 4 (Figure 11.2).
Preparing the bottom half
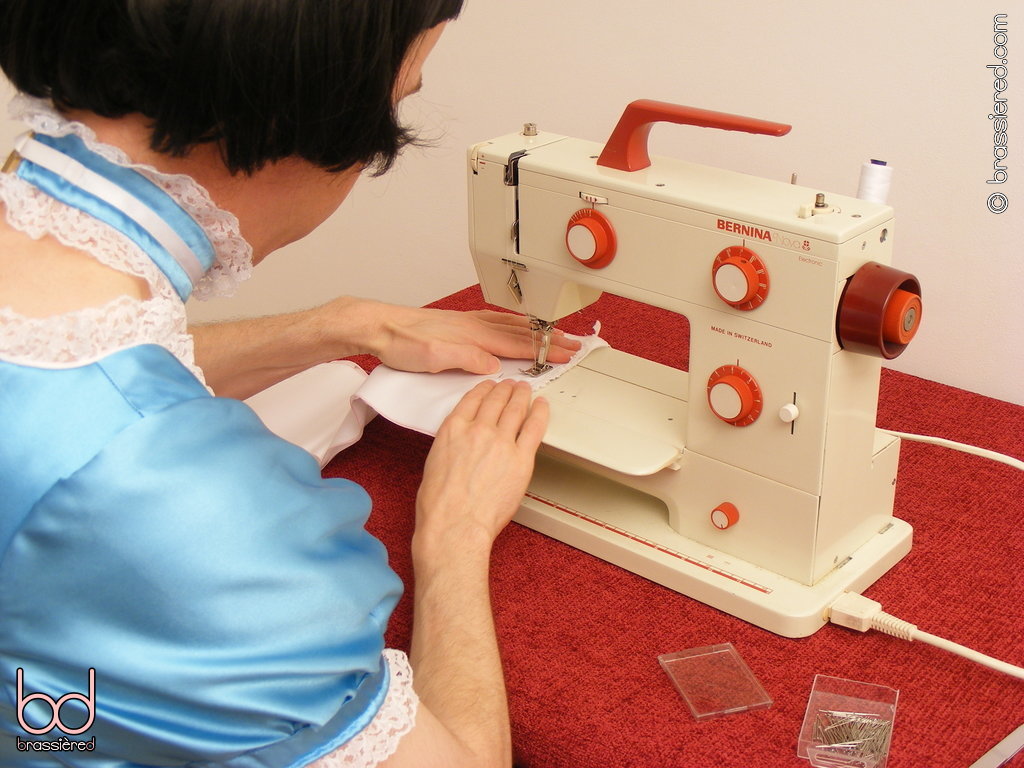
With their right sides together, turn the two bottom half strips into a single piece by pinning, then sewing along one of their short edges. In Figure 11.3, my husband has left the selvedge in place as he does this, placing the seam a little inside the start of the fabric proper.
Trim the seam, then overlock the edge (Figure 11.4). Put your longer bottom half to one side for now.
Preparing the ruffle
Sew the four ruffle strips into a single piece in a similar way, again so that the rough edges of the seam are on the wrong side of the fabric (Figure 11.5). Trim, but do not overlock this time - the seams will soon be folded inside the fabric. Take care not to inadvertently create a loop - making two separate pairs, then joining these helps avoid getting confused by the amount of material.
Open out each of the seams and press flat (Figure 11.6).
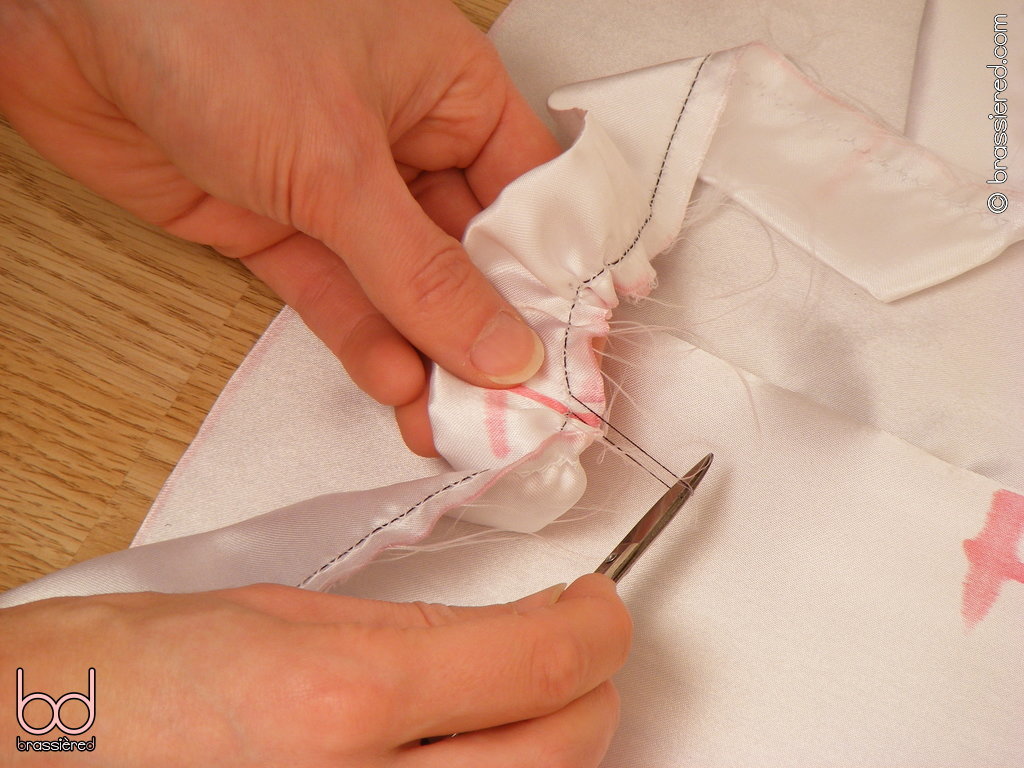
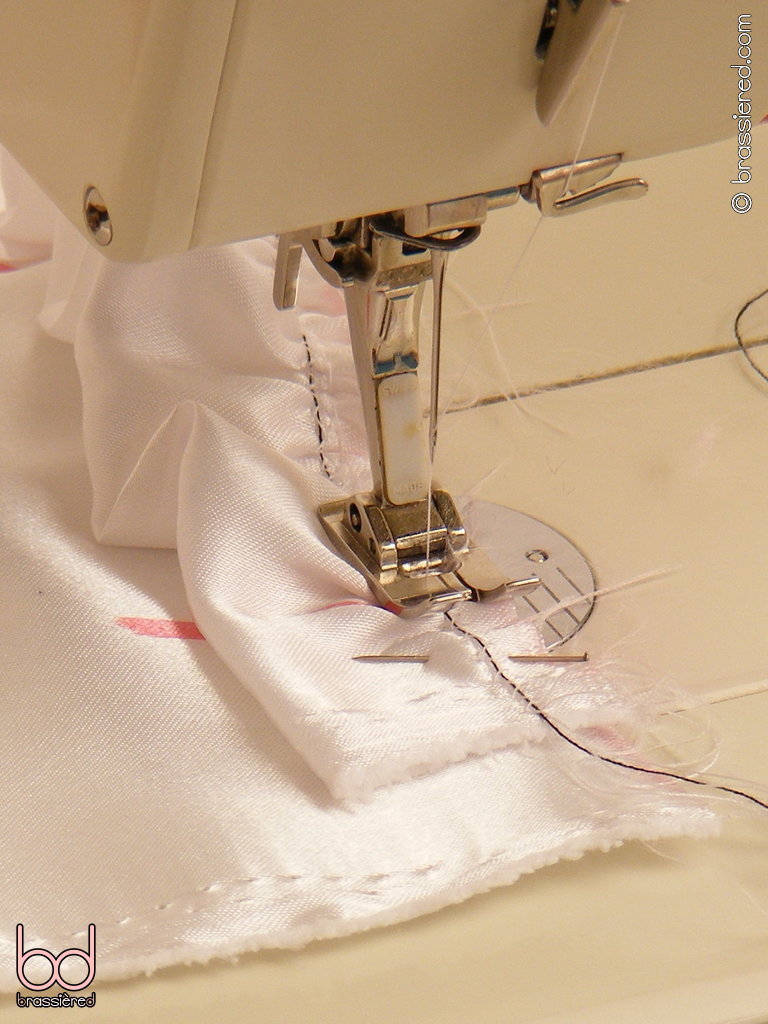
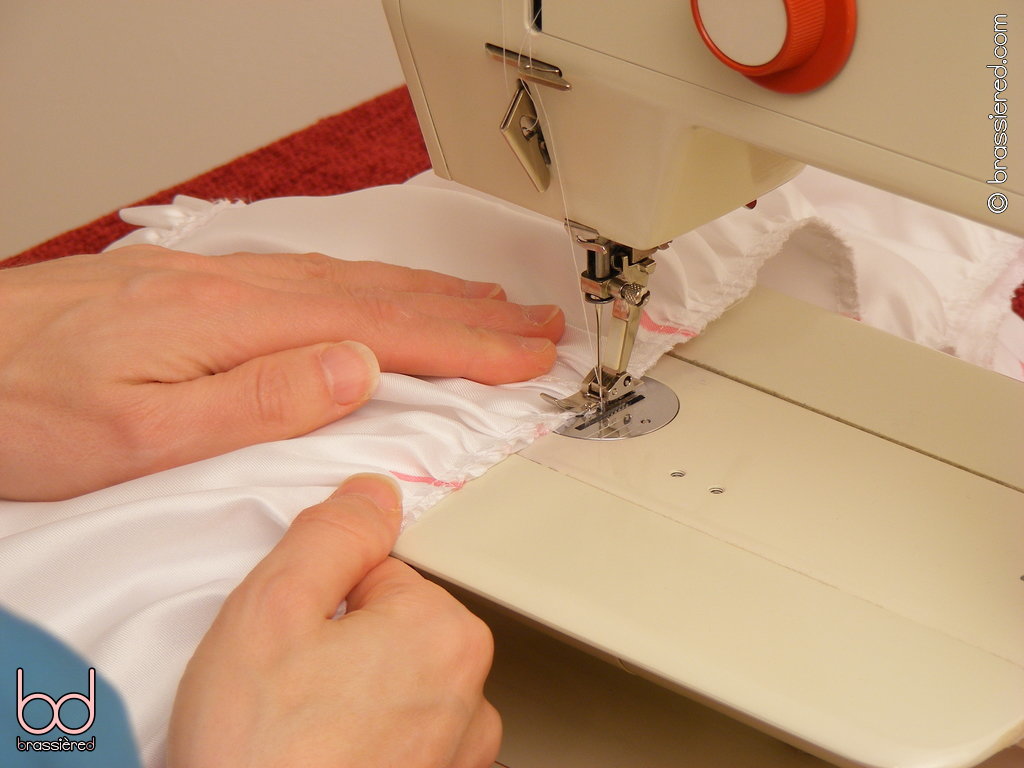
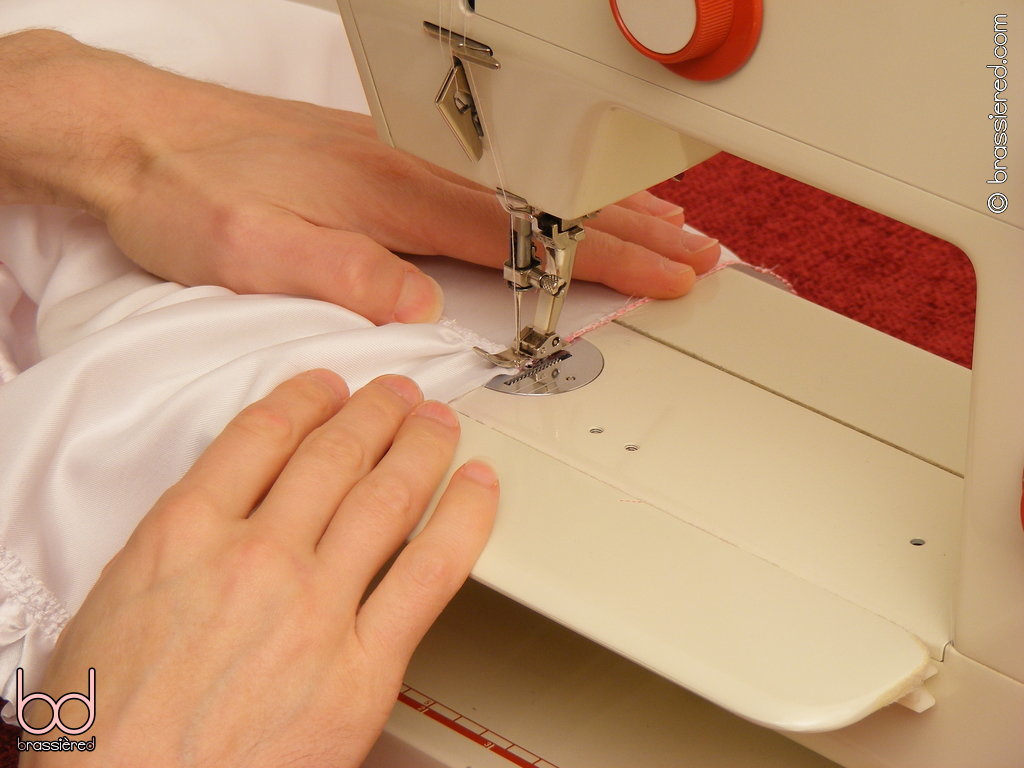
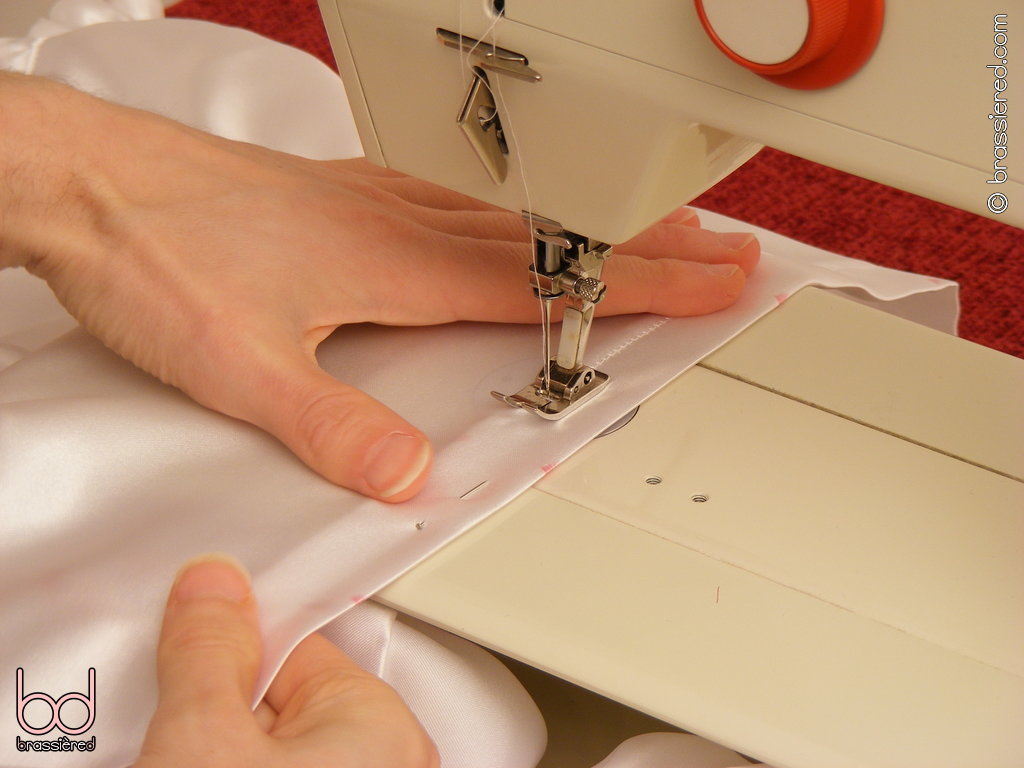
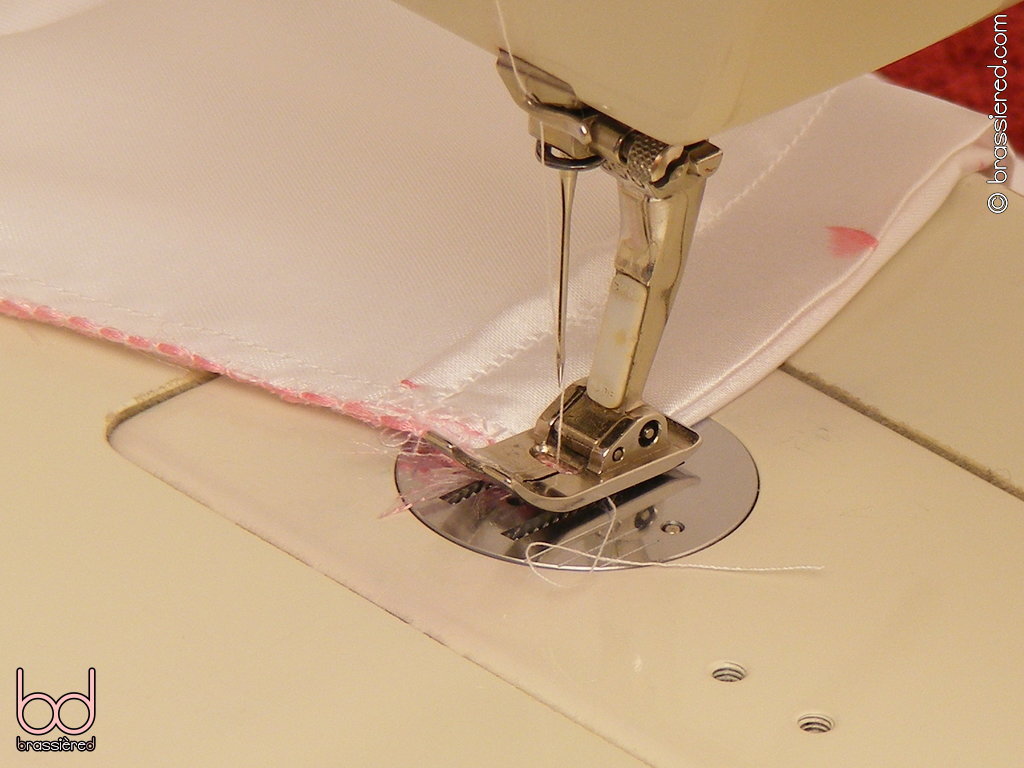
Fold the resulting strip in half along the entirety of its length so that its wrong sides are together, pinning it as you go. Like everything else you'll be doing with the petticoat, this will take you some time, but don't be tempted to cut corners - the pins will stop the fabric becoming misaligned as you sew along its length. Do so with a basting stitch, slightly nearer to the raw edge of the material than your seam allowance. In Figure 11.7, my husband uses the edge of the presser foot to keep the stitch a consistent distance from the edge.
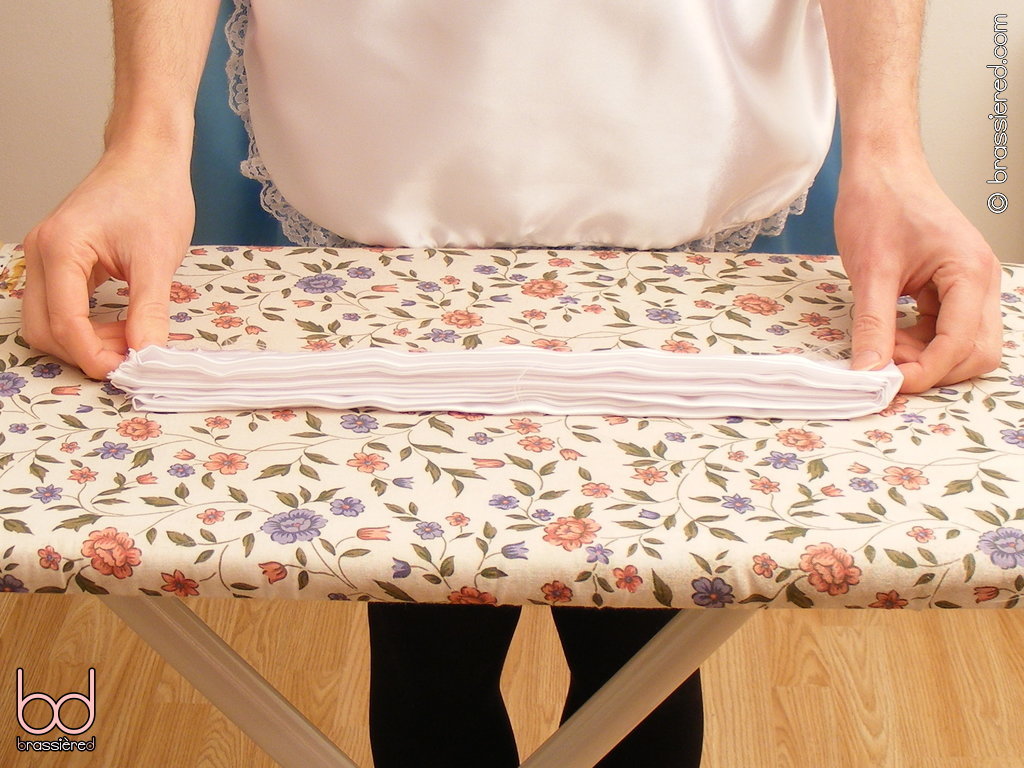
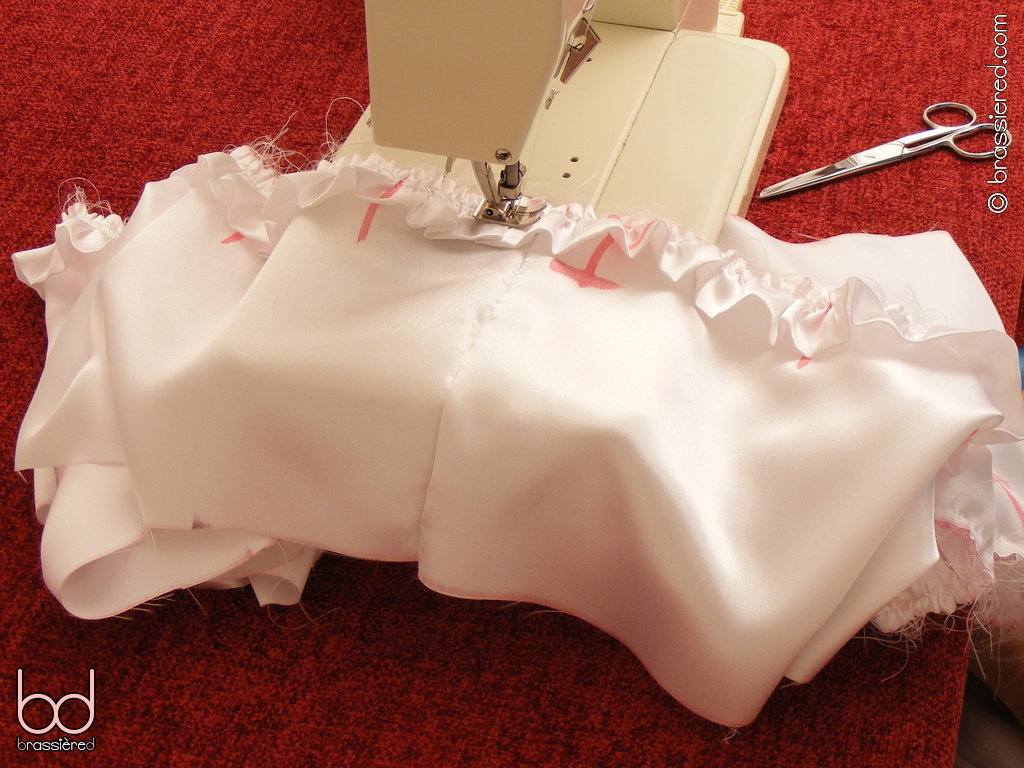
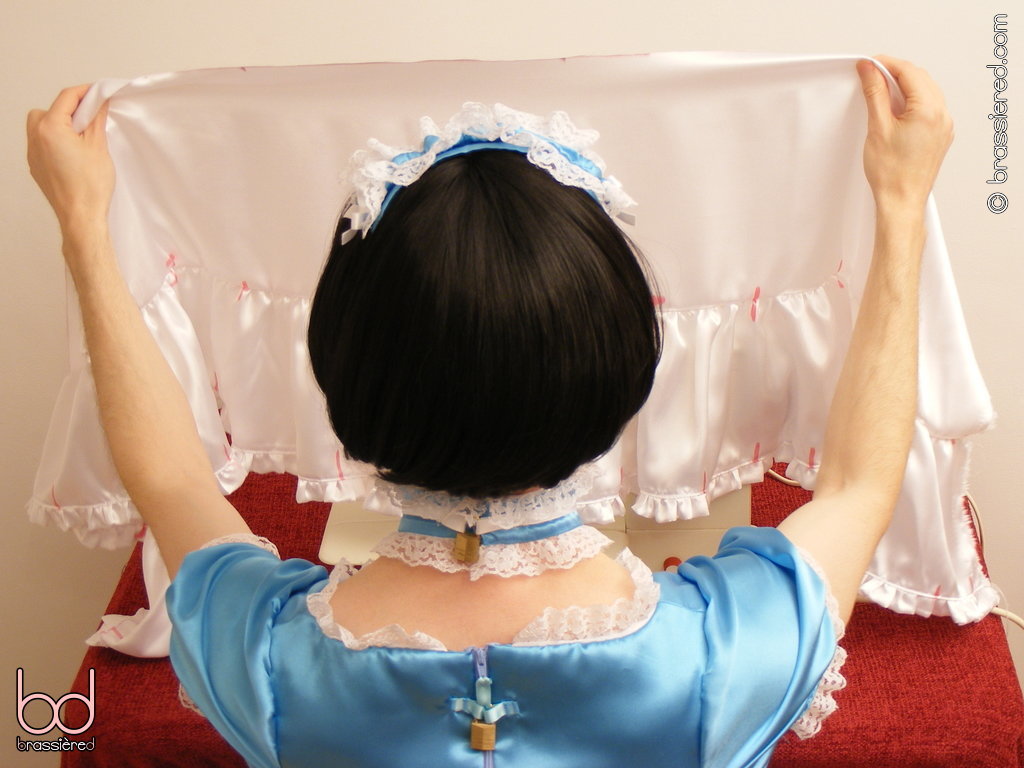
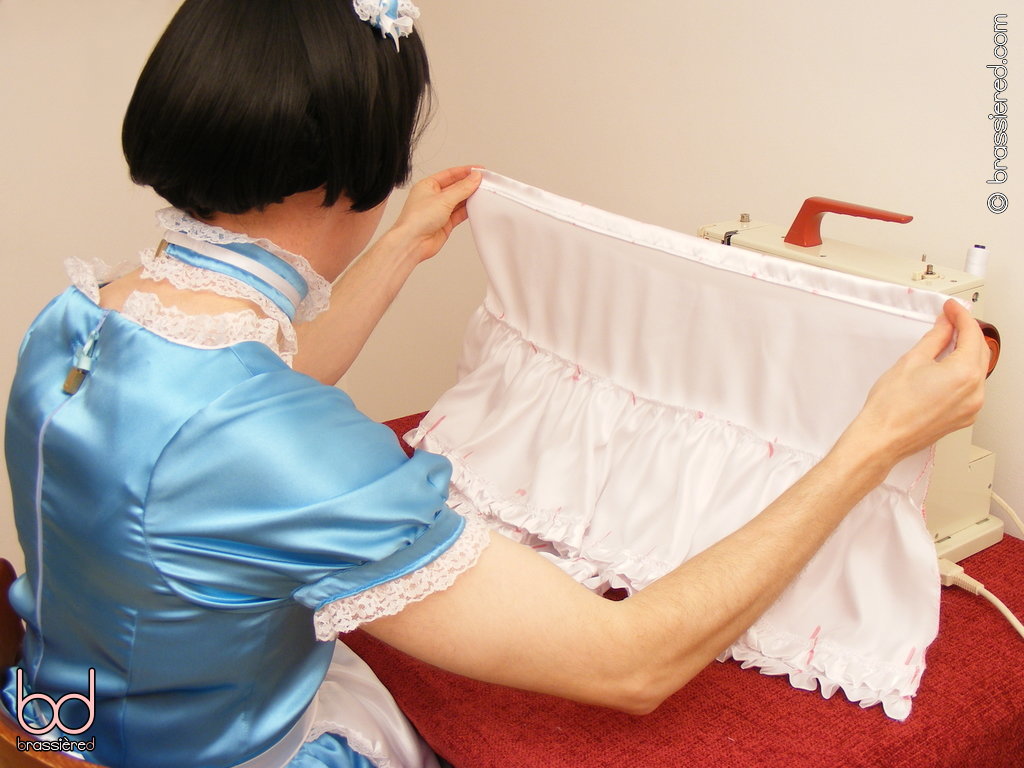
Press the strip flat to yield a very long length of double-sided satin (Figure 11.8). If it feels far too long to ever fit under your skirt, think again - as Figure 11.9 illustrates, it looks far less when folded up! When gathered, the folds of fabric will serve to give your petticoat volume, puffing out your maid's dress in the process.
Gathering the ruffle
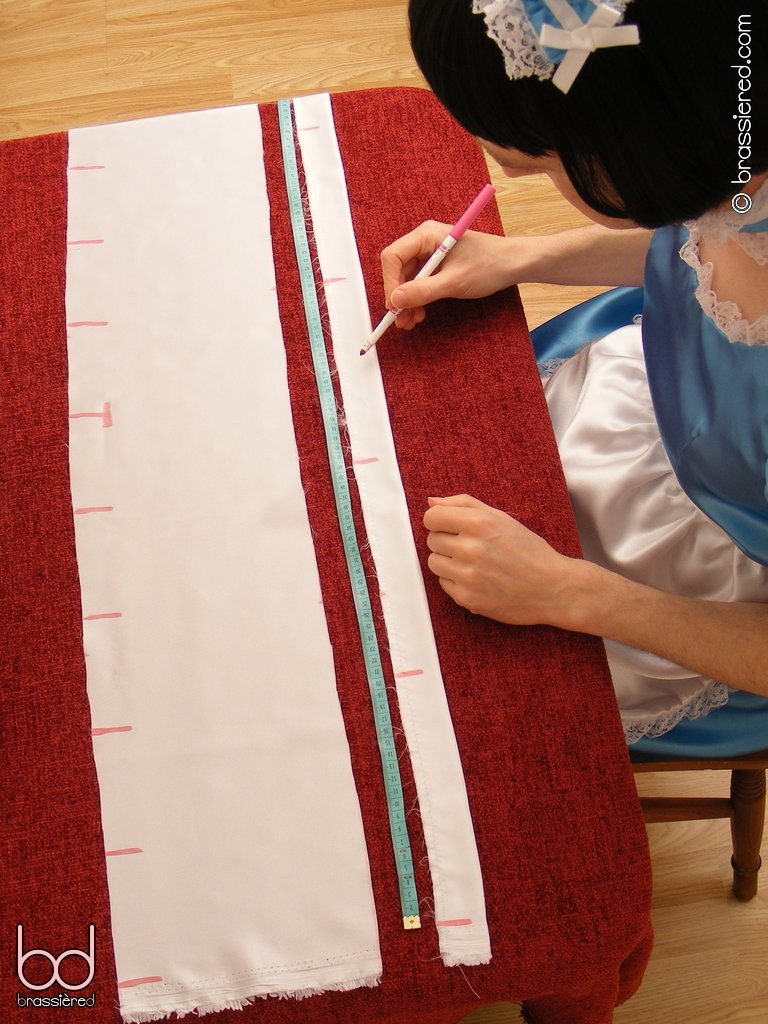
We're now going to gather the ruffle, sewing it onto the bottom half of the petticoat in a 2:1 ratio. Begin by laying the bottom strip out flat, with its right side facing up. Starting just after the left-hand selvedge, mark lines every 10cm / 4” along the top edge. Next, lay the ruffle out flat, with its fold to the bottom. Once again starting just after the selvedge, this time mark lines every 20cm / 8” along the top edge. In Figure 11.10, my husband makes every fifth line different, which will allow him to make sure he's aligning them correctly in due course.
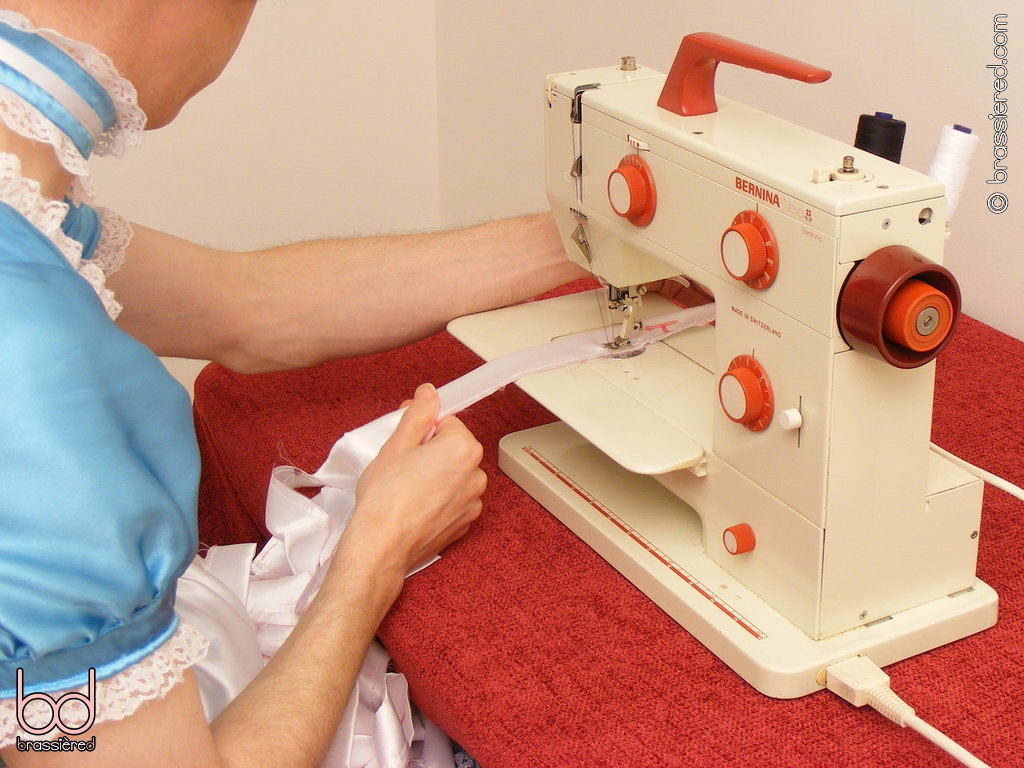
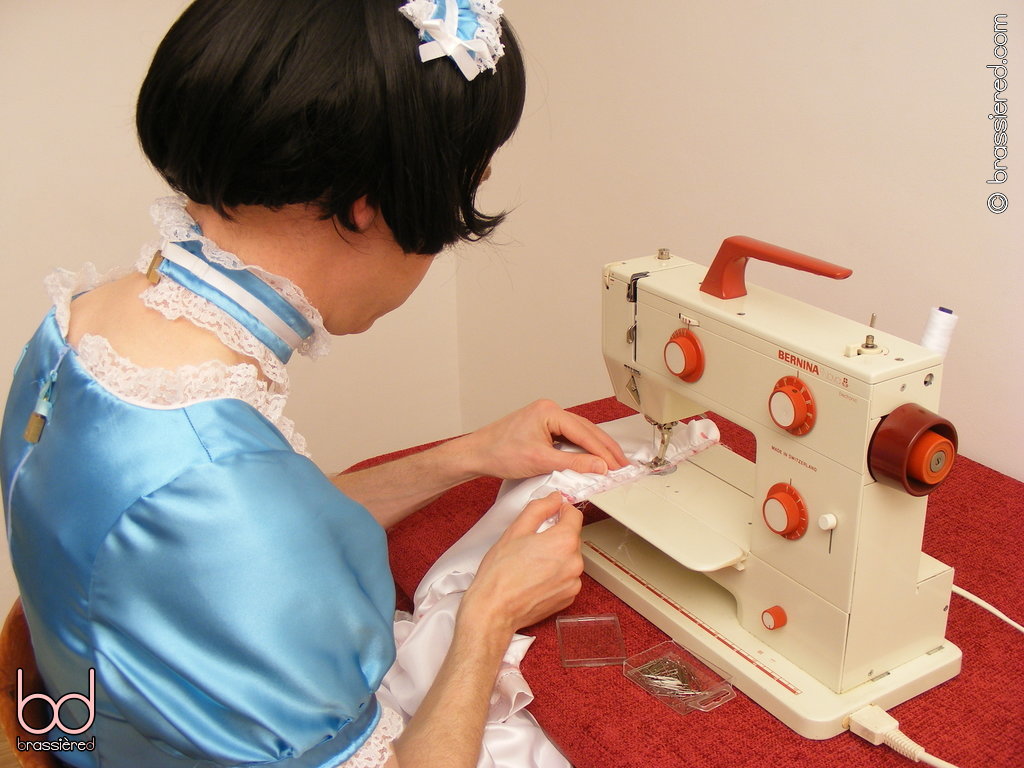
Sew a gathering stitch along the rough edge of the ruffle. In Figure 11.11, my husband is using the same double thread approach that he adopted for the skirt of his maid's dress, putting the thread that he will pull on the same side as his marks. The length of material involved here makes things more difficult, so if you're doing things the way we did for the apron, you may with to break it down into several sections. Using contrasting coloured thread is very helpful!
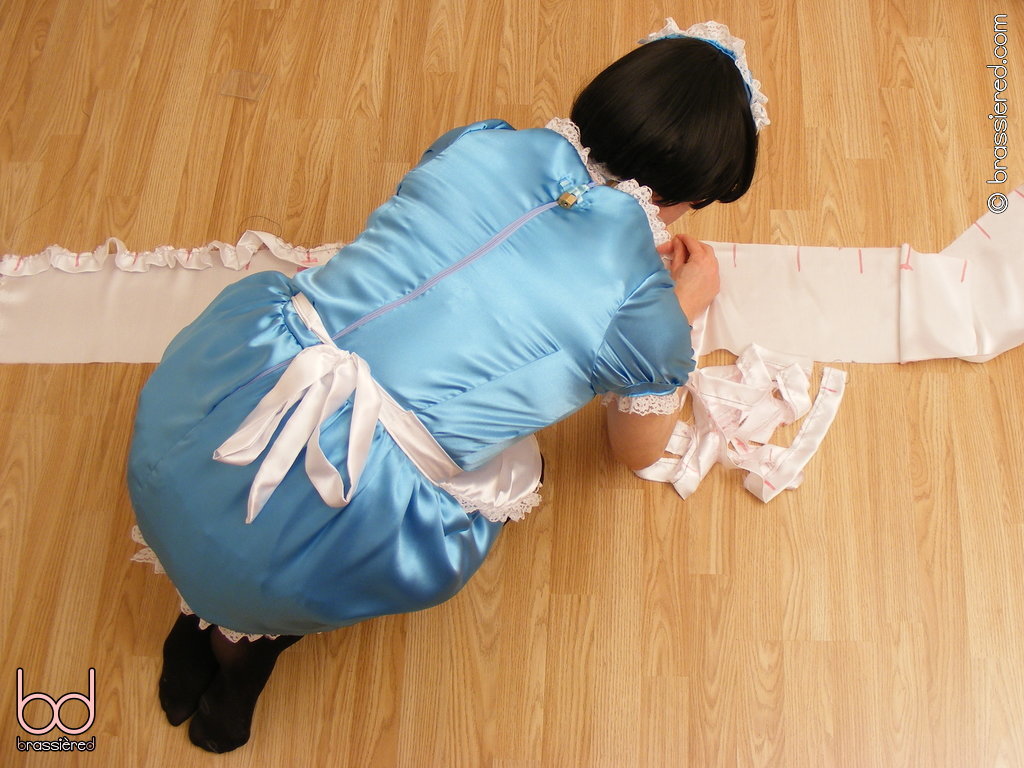
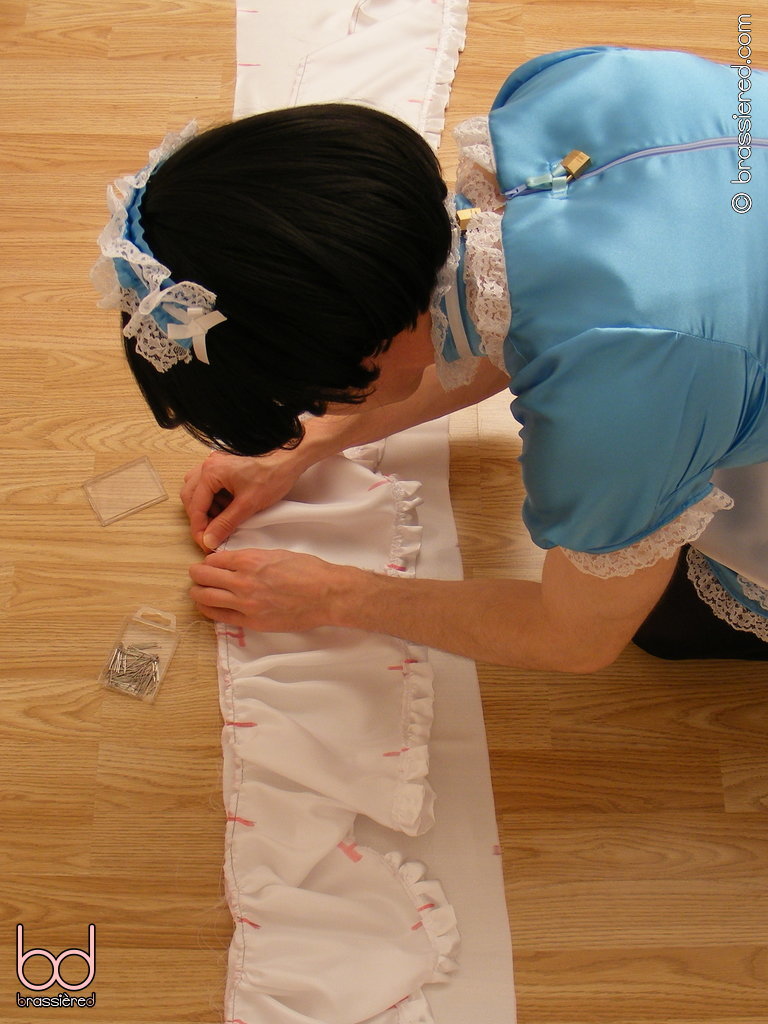
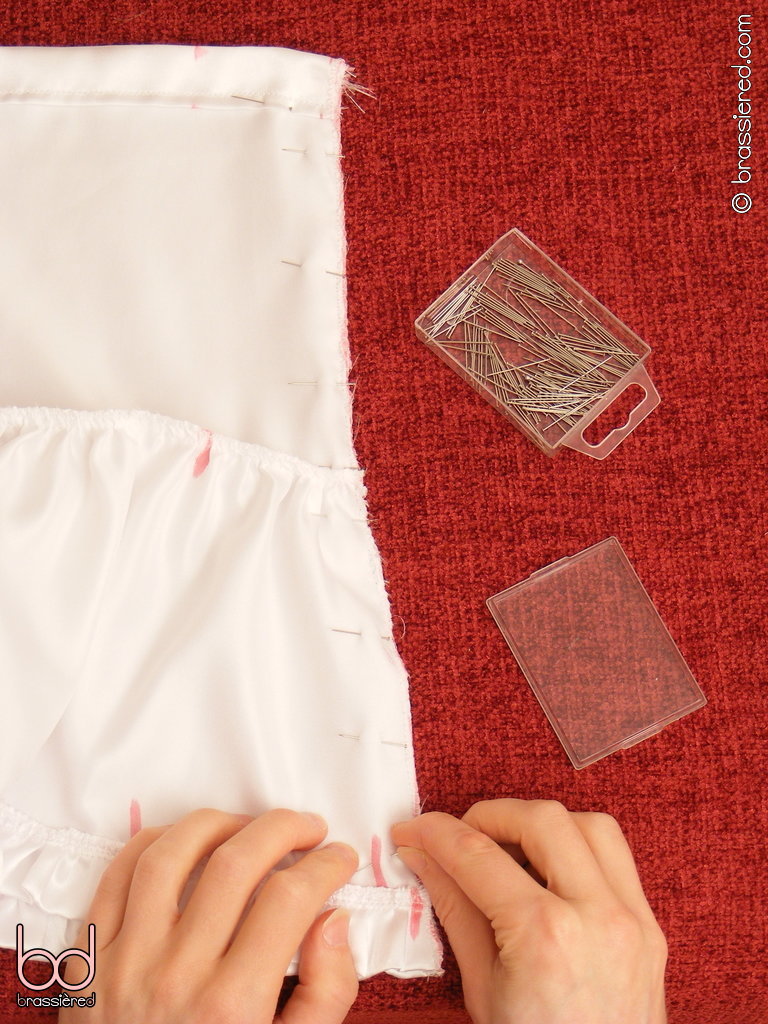
With the marks on both the bottom strip and ruffle facing towards you, pin them together, taking care not to lose any lines among so much material. In Figure 11.12, my husband finds himself grovelling on the floor again, slowly working his way along the length of a strip that he'll eventually find himself gathering again. How strange to think a similar amount of fabric is folded up under his skirt!
If you didn't split the gathering thread into sections, you can nevertheless avoid having to pull it from the very ends each time by turning some of the excess into a loop. In Figure 11.13, my husband does this on every fifth mark, reducing a singular piece of gathering into a series of more manageable lengths.
It's now simply a case of basting the two lengths of fabric together - exactly as you've done before, only on a much bigger scale! Between each pair of marks, take a moment to even out the ridges of the ruffles, sliding them up and down the gathering thread as necessary. Don't forget that you can still adjust the latter at this stage, not only stretching it taut, but pulling it out in loops or even cutting it if that makes things easier. It may seem a never-ending task, but patience is a virtue that every maid should cultivate, with the fifth marks and the seams between the strips offering some indication of your progress as you work your way along - in Figure 11.14, my husband is only halfway there!
It's unlikely that the end of the ruffle will align with that of the bottom half, but this isn't a problem. Simply baste up to the last set of marks as shown in Figure 11.15, then return to the start to begin the painstaking process again - this time, with a regular stitch, along your seam allowance.
Check your gathering as my husband does in Figure 11.16, unpicking and resewing as necessary. It's useful to have a different coloured pen on hand here to mark any mistakes as you go along, as finding them again in so much material is far from easy!
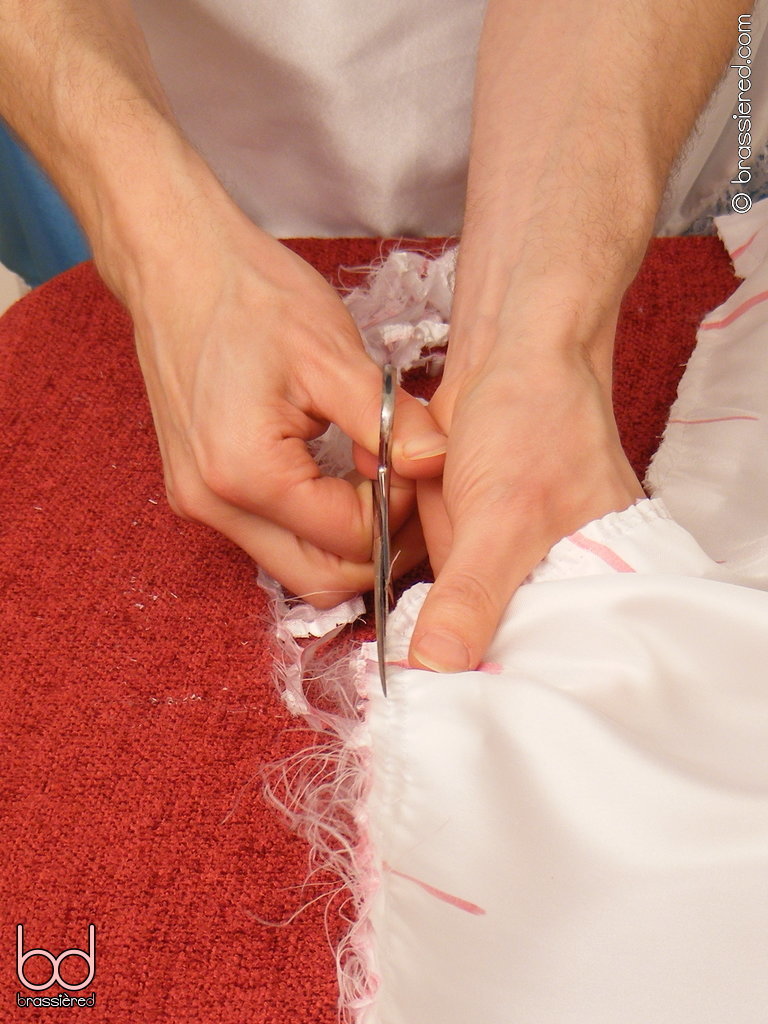
Trim the edge of the seam, taking great care not to cut through anything you shouldn't. In Figure 11.17, my husband put the thinner bottom strip on top and the bulkier ruffle beneath, working his way slowly and carefully along the entire length. It's a stressful process, but not one that can be rushed.
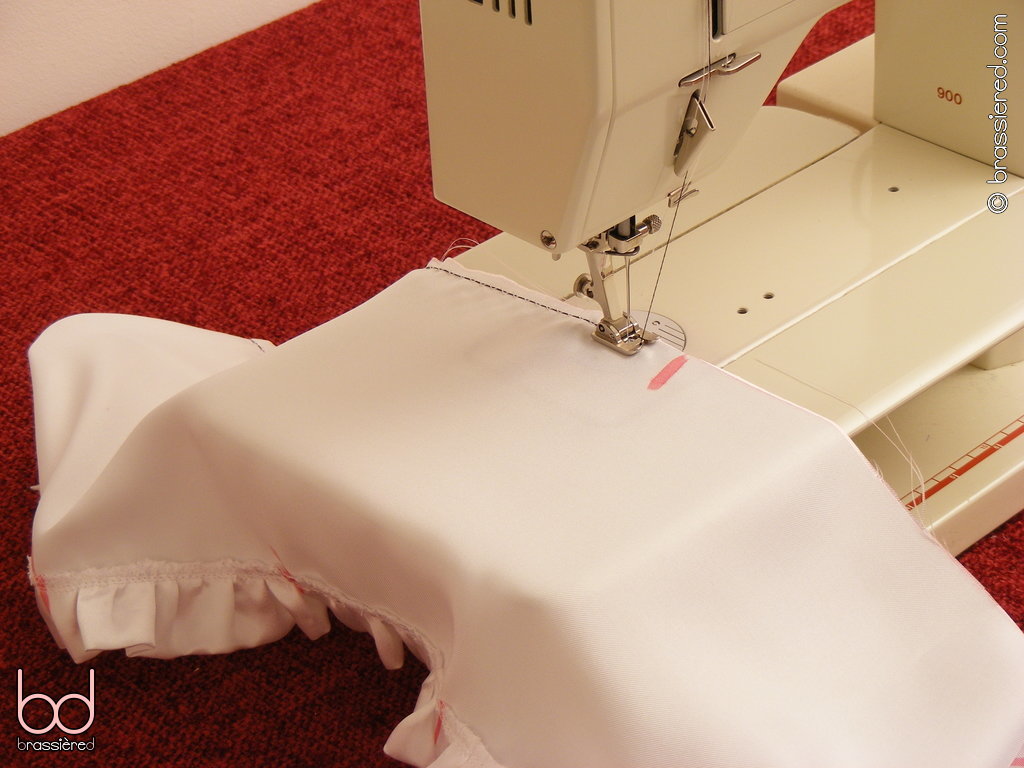
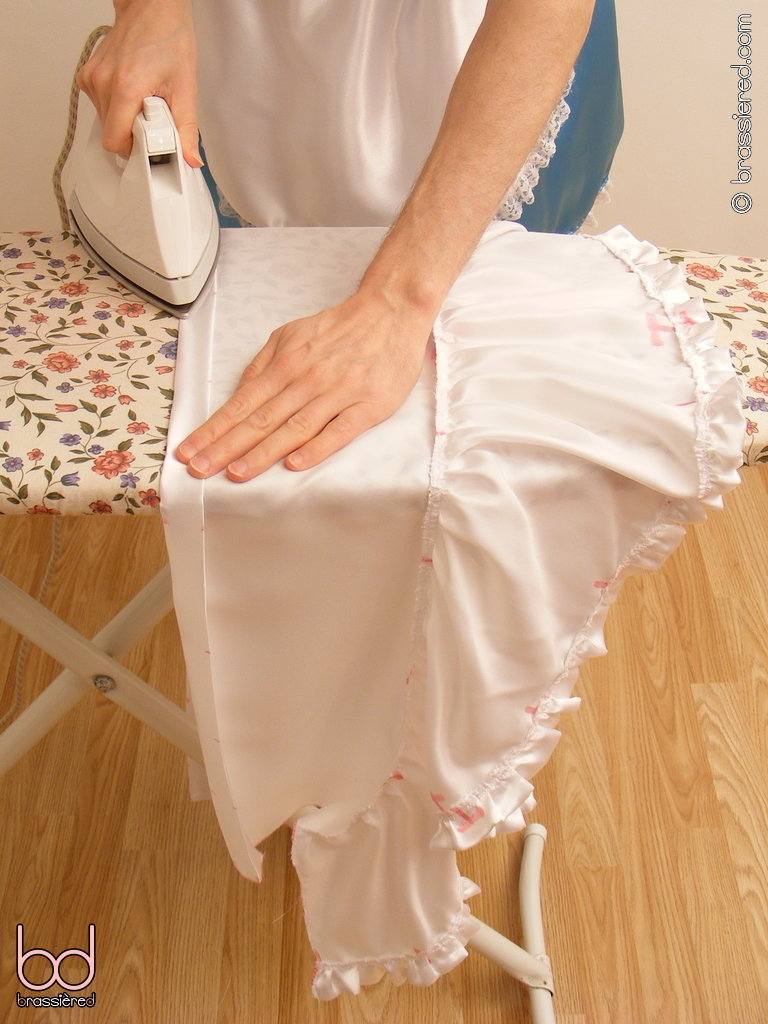
Overlock the edge, then press. We didn't need to do the latter with the skirt of the maid's dress, but as lengthy as it may be, the ruffle doesn't have quite enough weight to hang down of its own accord. In Figure 11.18, my husband does his best to avoid pressing the pleats of the ruffle as he irons along the seam.
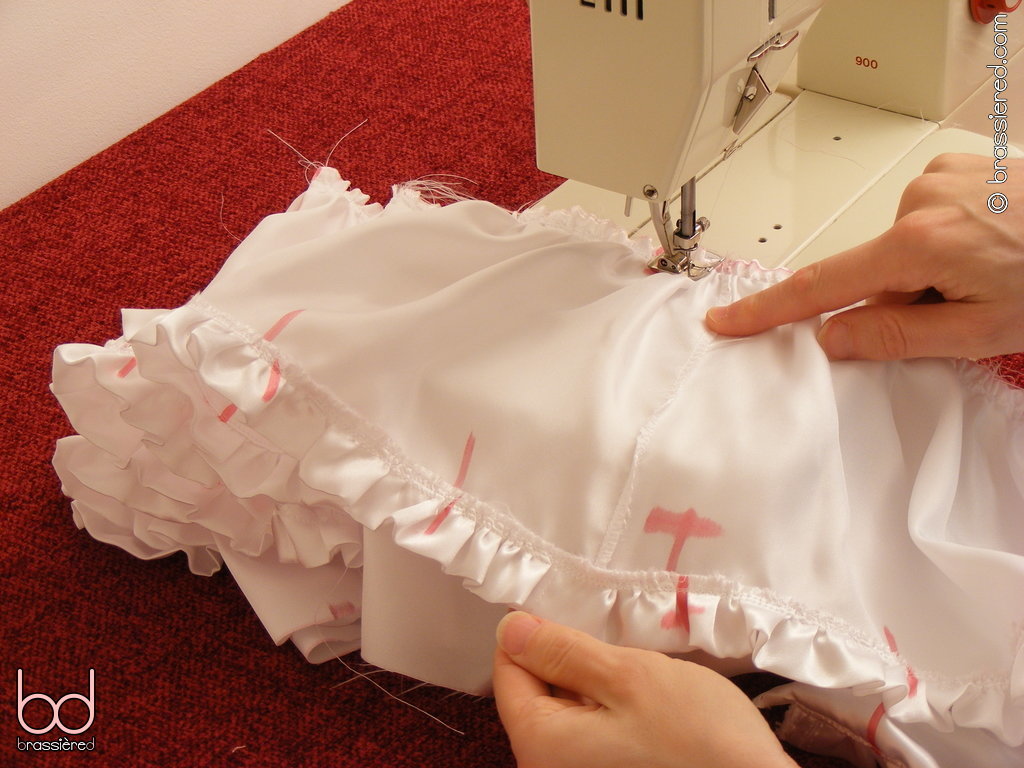
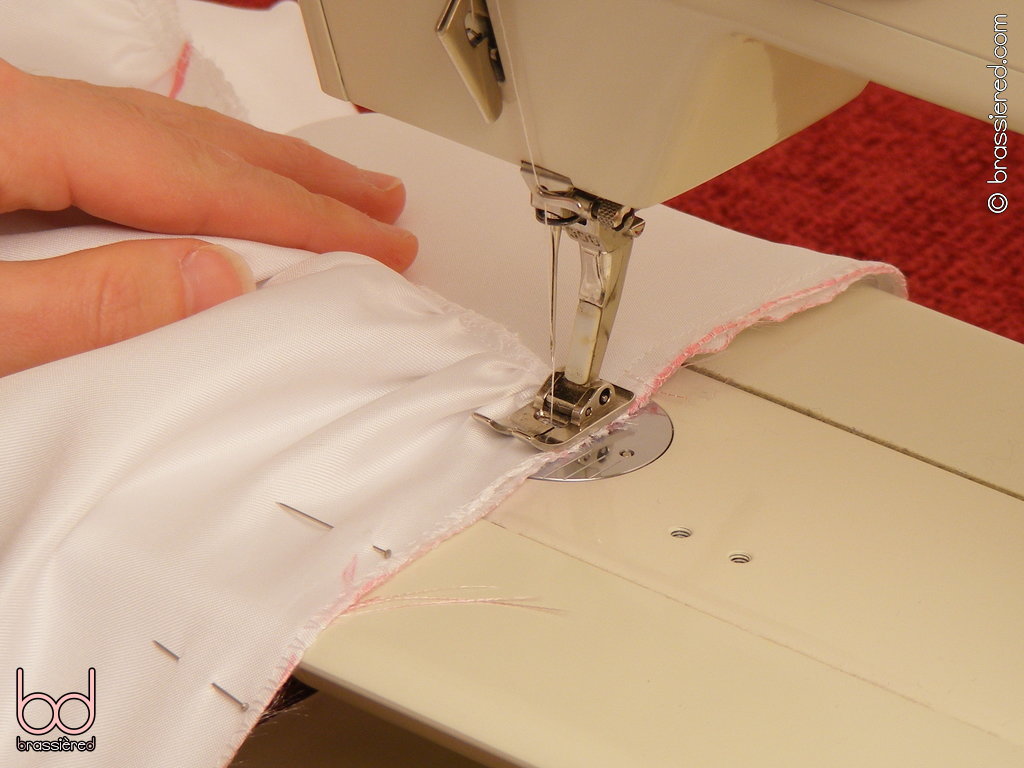
To hold the ruffle in position, run a line of regular stitches just above the seam. In Figure 11.19, my husband uses the inside of the presser foot as a guide, the consistent distance he achieves adding a subtle, but pleasing feature to the bottom of his petticoat.
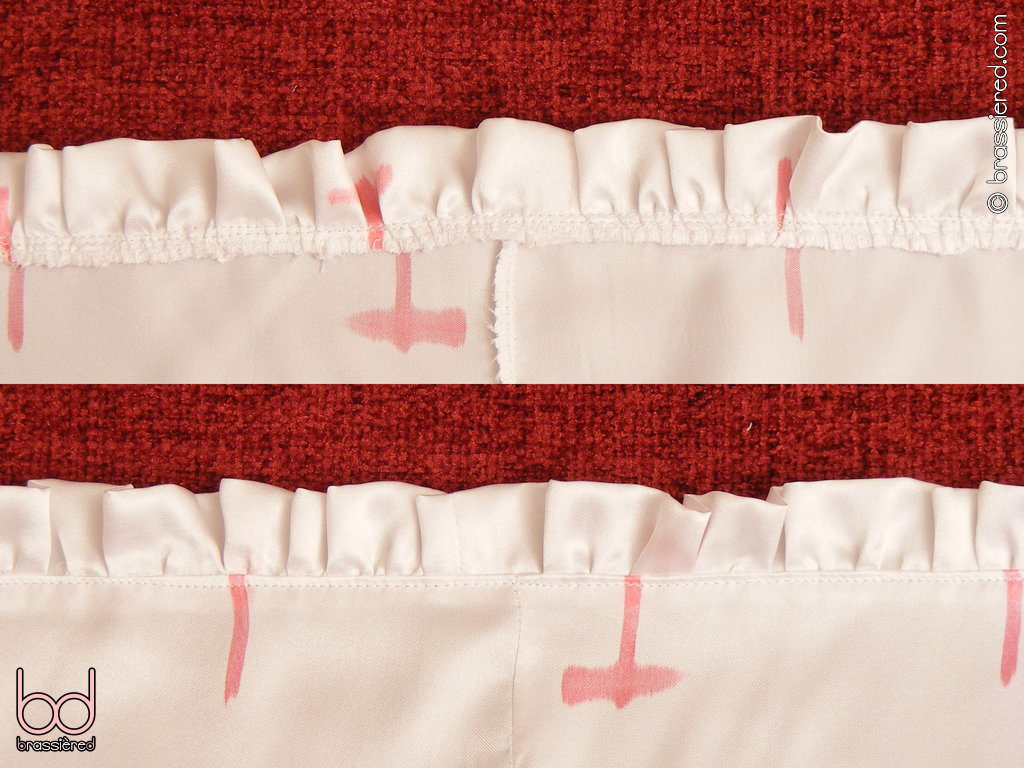
Figure 11.20 shows the finished seam from both sides.
Gathering top and bottom
We're now going to do exactly the same again, only with the top and bottom halves of the petticoat. We'll be joining the two in the same 2:1 ratio as before, meaning the ratio between ruffle and top will be 4:1, even before we take the elasticated waistband into account.
With the right side of the top half facing you, mark lines every 10cm / 4” along its top edge, starting from the left-hand selvedge as you did previously. With the wrong side of the bottom half facing you, and the ruffle at the bottom, mark lines every 20cm / 8” along its top edge similarly, as shown in Figure 11.21. As before, my husband has made every fifth line different.
Sew a gathering stitch along the rough edge of the bottom half (Figure 11.22), putting the thread that you'll pull on the wrong side of the fabric.
Pin the top and bottom halves together so their right sides are touching, aligning the marks along the entire length (Figure 11.23). Again, don't worry too much about what happens at the end - we'll be trimming off the excess fabric shortly.
Baste your gathering, making sure to keep the seam between the two sections of the bottom half flat as you sew over it (Figure 11.24). Check, then sew with a regular stitch before checking again. Unpick and resew any sections as necessary.
Trim the seam (Figure 11.25). It doesn't matter which half is topmost this time, so long as you take care.
Overlock the seam (Figure 11.26). There's no need to sew it down this time.
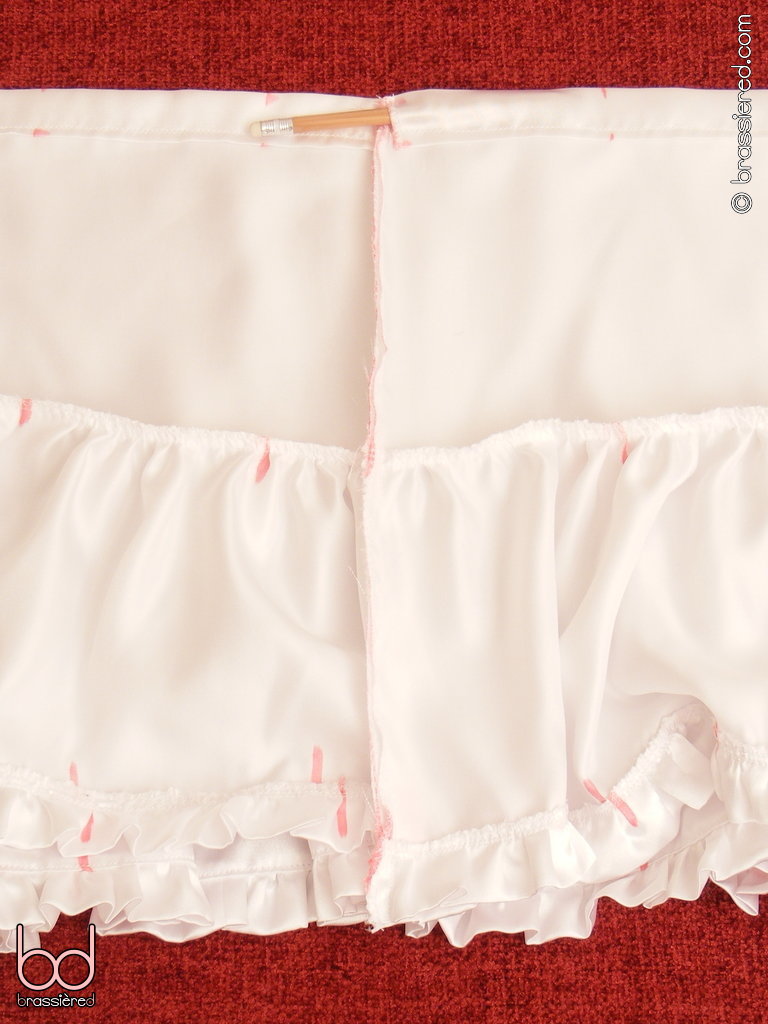
Figure 11.27 shows the finished petticoat bottom from both sides - a long strip of ruffled fabric.
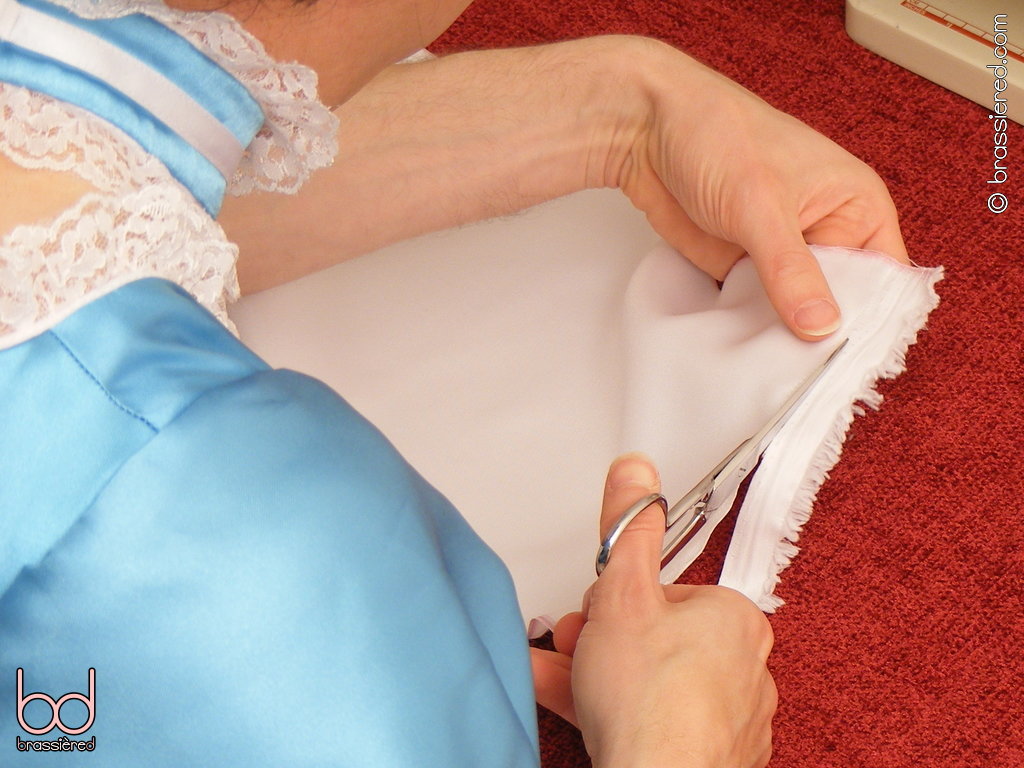
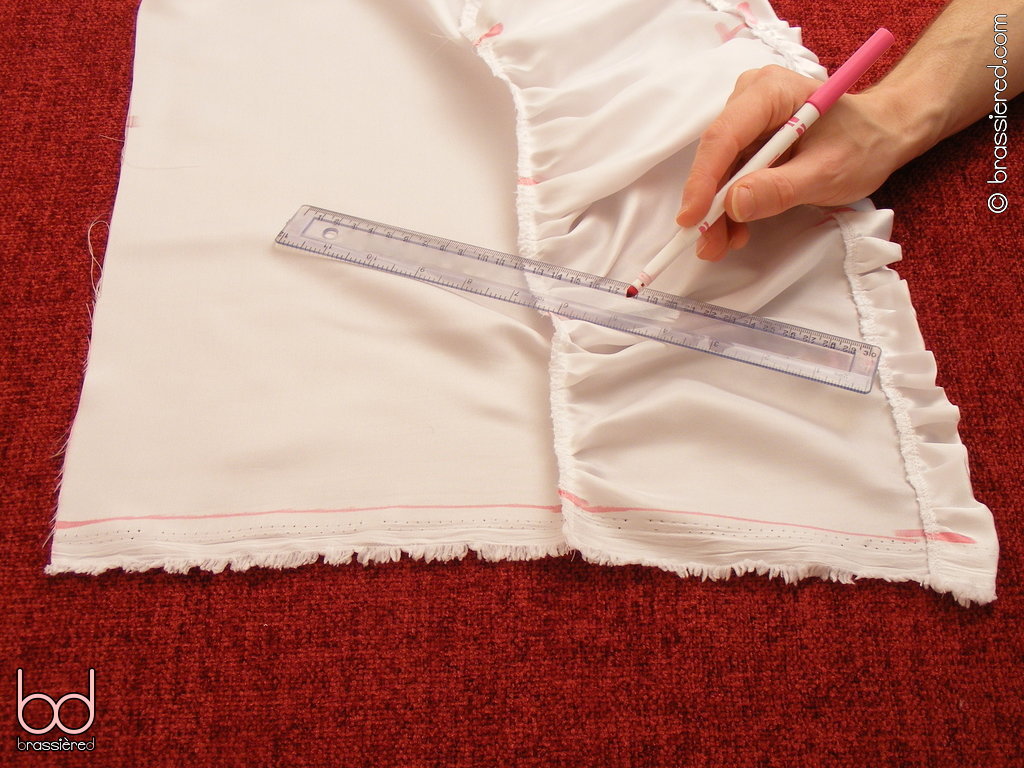
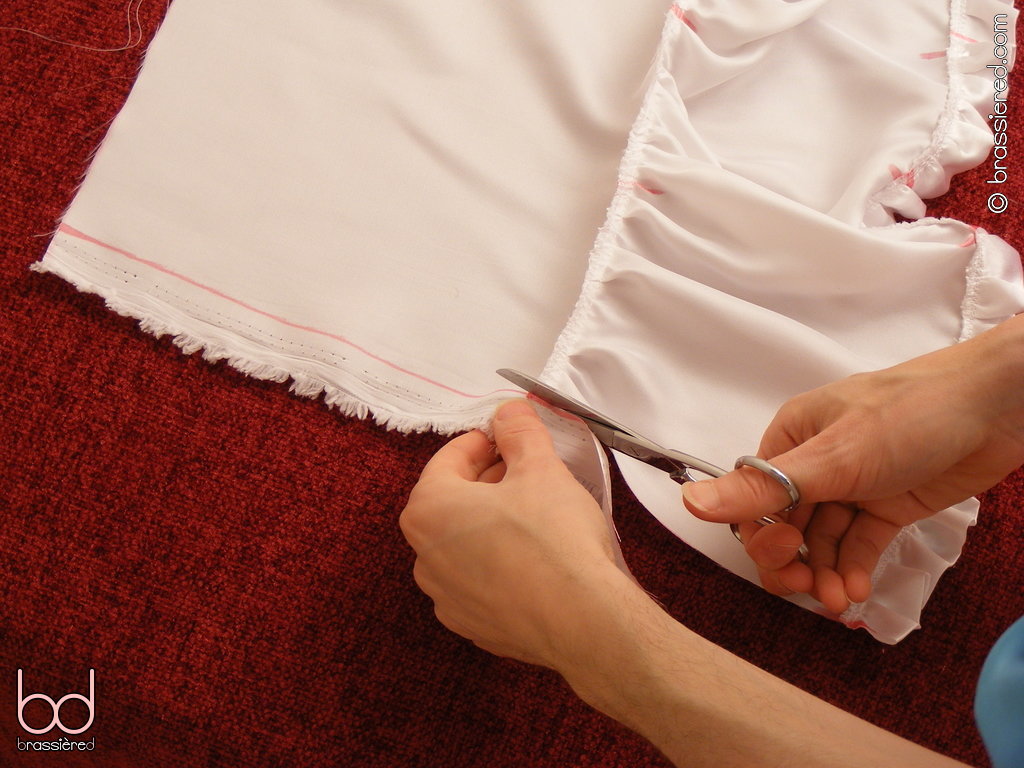
Trim the selvedges and any ungathered material from the short edges of this strip. Rather than just attacking with scissors, it's best to do this by marking a line first, as my husband does in Figure 11.28, using the marks that are already on the material to help you get it straight.
Overlock the short edges (Figure 11.29). We do so now, rather than after we've sewn them together as you might expect, because we won't be sewing their entire lengths together - a small gap is needed for the elastic, and we don't want this to fray any more than the rest of the material.
Making the elastic casing
We're now going to make a casing for the elastic that will hold your maid's petticoat around your waist, doing so in a similar manner as we made the hem for your skirt, but making it a little wider to make inserting the elastic easier.
With the right side of the petticoat facing you, use your ruler to mark points that are 2.5cm / 1” and 5cm / 2” away from the rough edge of the top half. Do so at regular intervals all the way along the top of the petticoat (Figure 11.30).
Fold the rough edge of the fabric in to the first of the marks and press, then fold the resulting edge in to the second of the marks and press again. Do so first on one side, then on the other side of the petticoat to get a crisp edge. (Figure 11.31). Pin the resulting hem in place.
With the right side of the petticoat uppermost, sew a regular stitch along the entire length of the hem. In Figure 11.32, my husband puts this stitching ⅞” from the edge of the fabric, leaving himself ⅛” leeway. Although the hem is hidden, its thickness forms a prominent ridge which can also be used as a guide. When you've sewn from one end of the petticoat to the other, turn it over and check that your stitching does what it should - if not, redo it!
Fold the two short edges of the petticoat together, so that the right sides are touching. Pin together, aligning the edges of the elastic casing, the middle seam and the top of the ruffle (Figure 11.33).
Starting at the bottom of the elastic casing (not the top!), sew the two short edges of the petticoat together. In Figure 11.34, my husband uses the edge of the presser foot to put this a suitable distance from the edge.
Returning to the top of the elastic casing, sew just enough stitches to hold the two short edges together while still leaving a hole in each beneath (Figure 11.35).
Figure 11.36 shows the finished seam. Note how a pencil can be inserted into the elastic casing.
Fitting the elastic
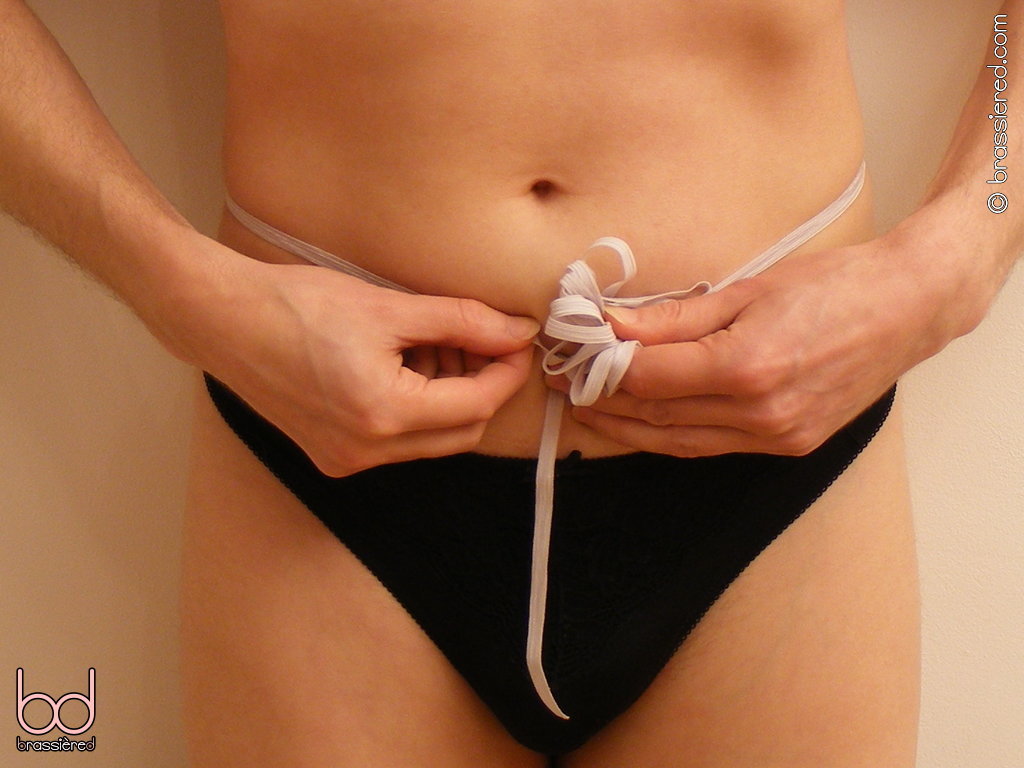
A pencil won't keep your petticoat up, however! To do that, we'll need elastic, something which comes in a variety of sizes and strengths. Get a feel for how well yours works by stretching it around your waist, determining the kind of length you need for it to stay in place without being too tight. In Figure 11.37, I've allowed my husband to strip down to his panties for this.
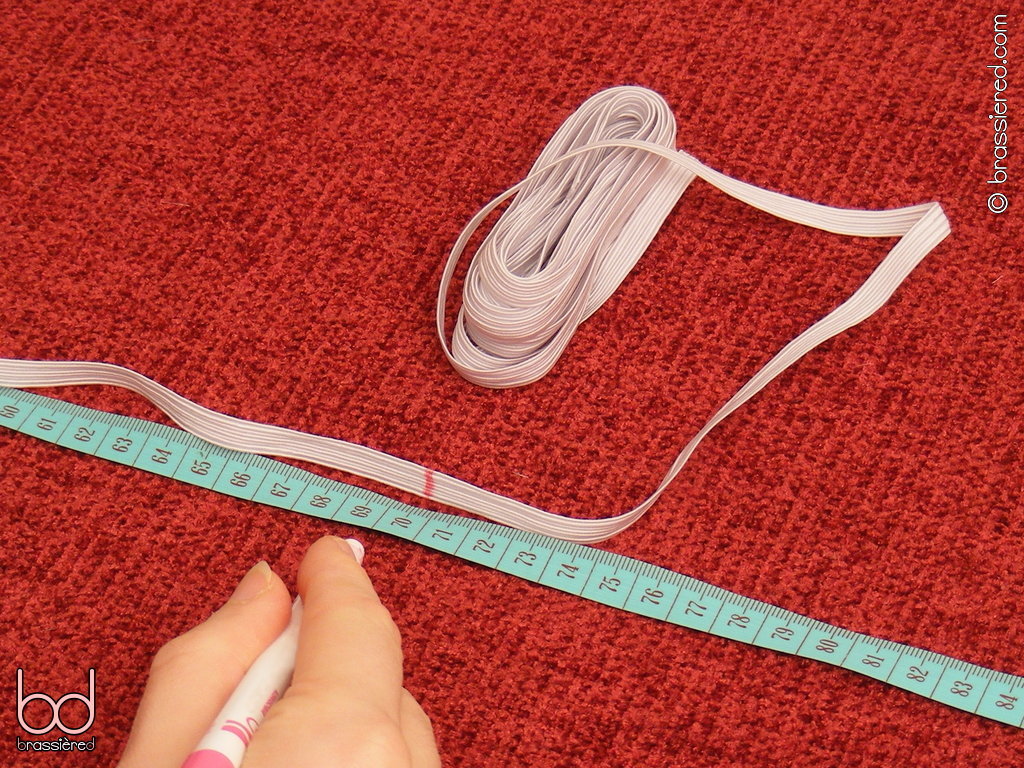
Make two marks on the elastic - once at your desired length from its end, the other at twice this distance (Figure 11.38).
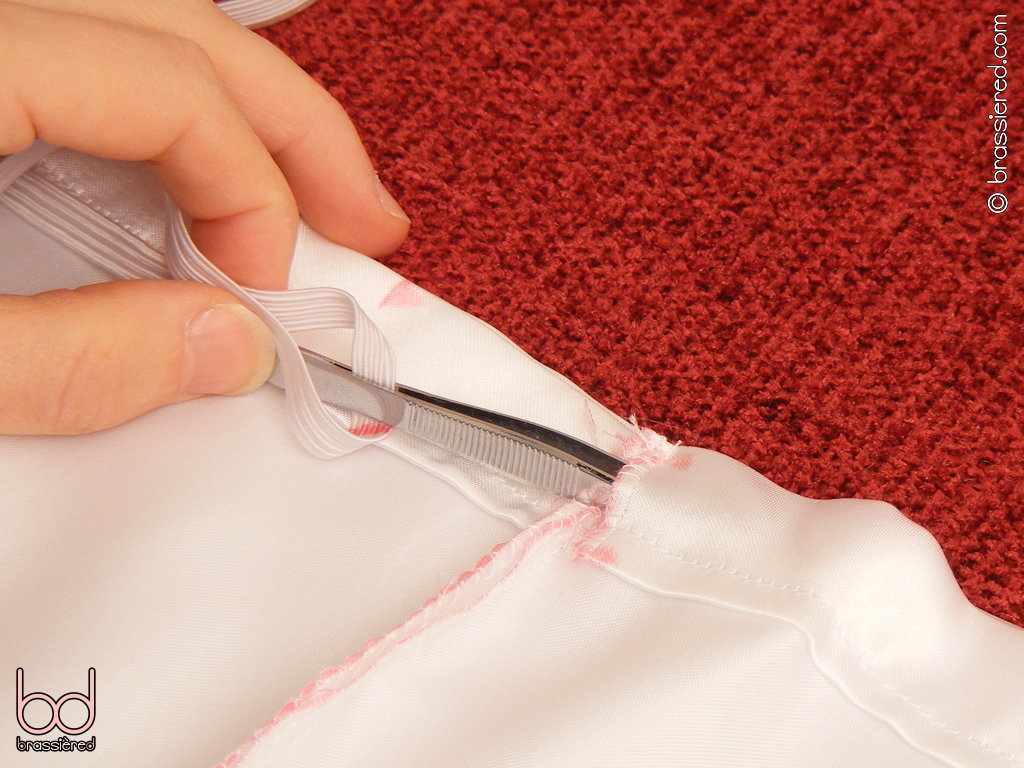
Slide the elastic over a pair of small tweezers, positioning the first of the marks in the fork. Squeezing the tips together, insert the tweezers into the elastic casing (Figure 11.39).
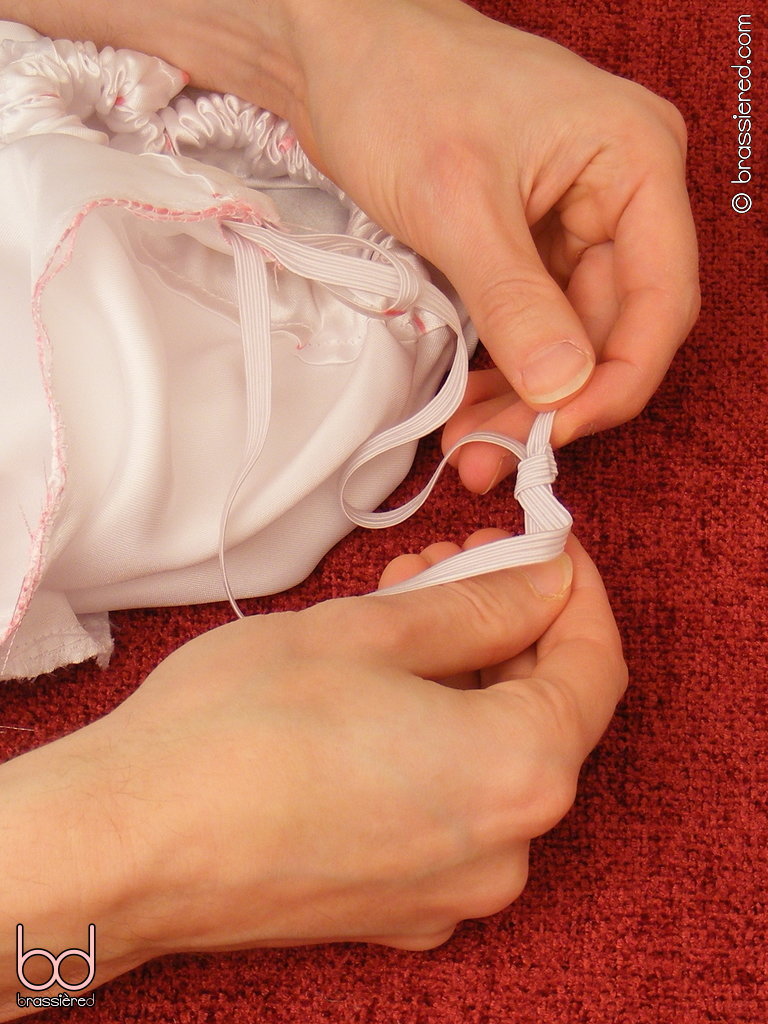
Taking care to keep hold of the ends of the elastic, work the tweezers around the entire circumference of the petticoat, keeping them squeezed to stop them snagging. When they finally emerge from the by now bunched up fabric, slip the end of the elastic through the resulting loop and tie off in a knot, using the second of the marks to get the right length (Figure 11.40). Before cutting the elastic, take a moment to step into your petticoat, adjusting as necessary. Once you're satisfied with the result, you can hide the knot inside - the tweezers are helpful here.
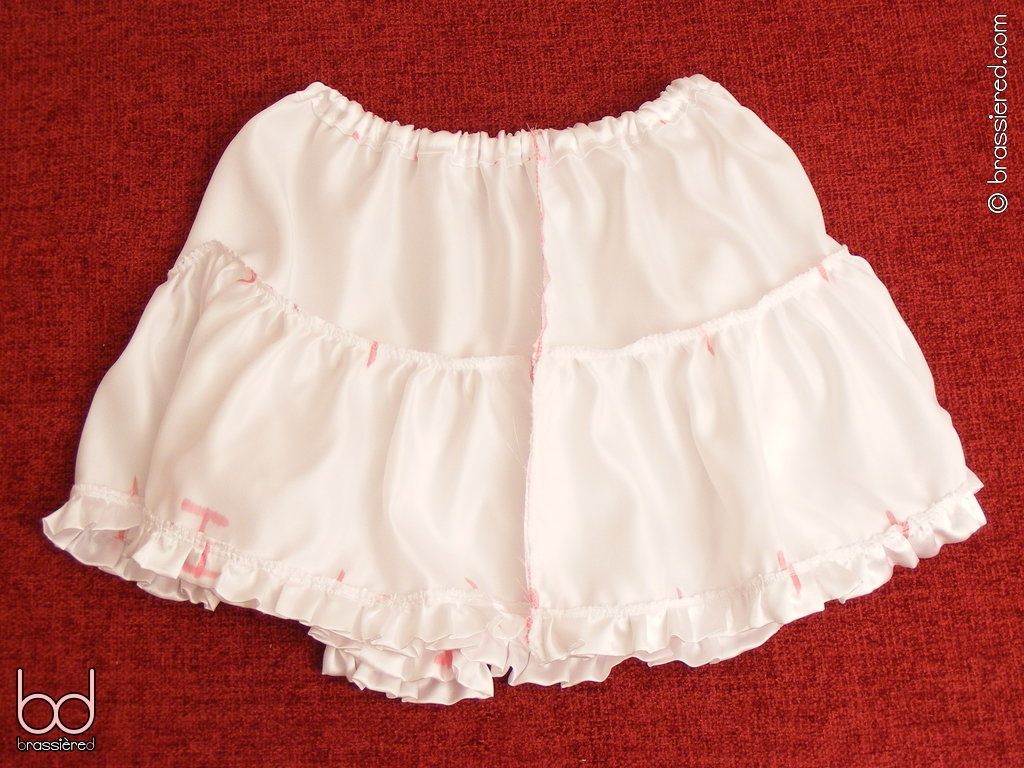
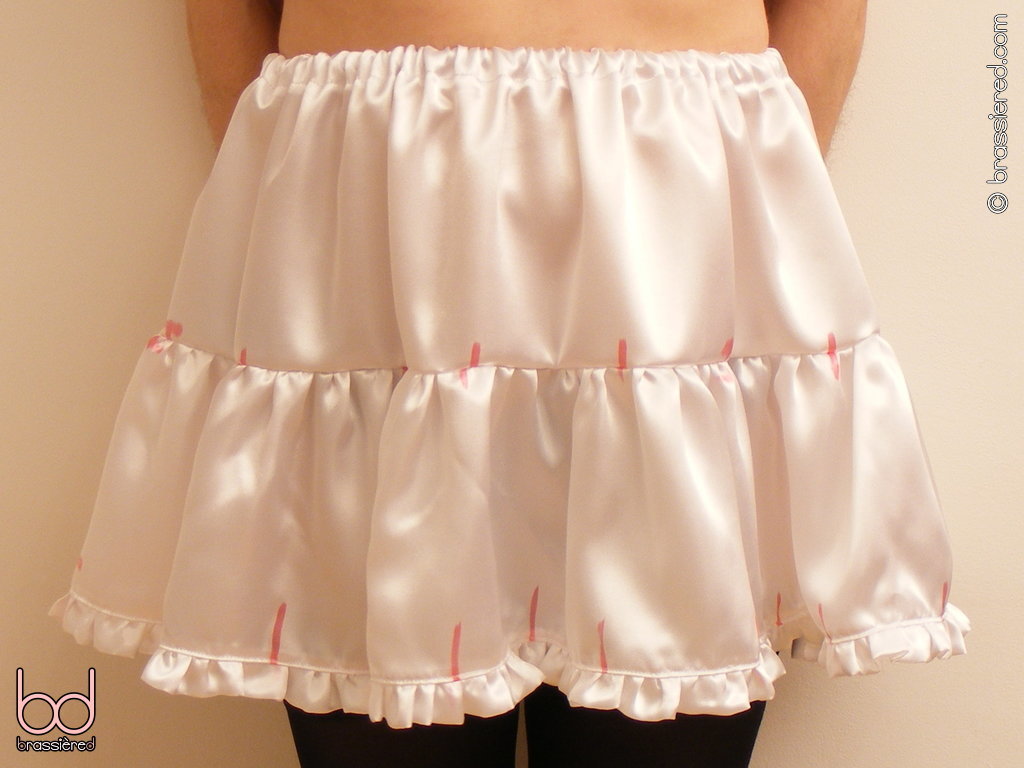
The finished petticoat is shown inside and out in Figure 11.41, but there's no substitute for seeing it modelled , as my husband does in Figure 11.42. After a wash to remove the marks, it's ready to be worn beneath his skirt!