sewing for sissy maids
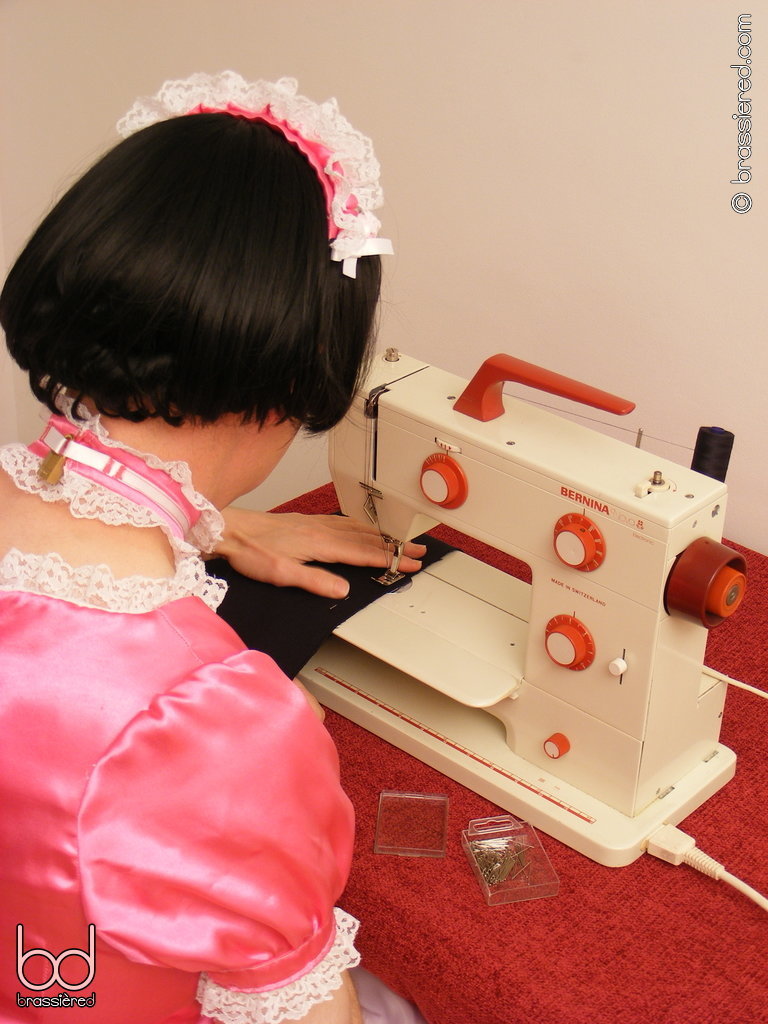
Chapter 12: How to make something different
So far, all the maid's uniforms we've seen my husband wearing have been identical save for colour, sharing the same design in satin and lace. Practice makes perfect, and putting together a series of similar outfits like this really helped hone my sissy maid's sewing skills. If you've made it this far, the chances are that you'll want to go back and make another yourself too, using the experience you gained with your first uniform to make the second even better!
Once you're familiar with the fundamentals, however, there's no reason why you can't mix things up a little. In this chapter, we'll be exploring what you can do by changing both the materials and the design of your maid's uniform, making outfits that range from the practical to the provocative. Whether your mistress wants you serving her in a skirt long enough to brush your ankles, or showing off your panties in one puffed out by prodigious petticoats, it's surprisingly straightforward to put together a whole wardrobe of different styles.
Pretty pink gingham
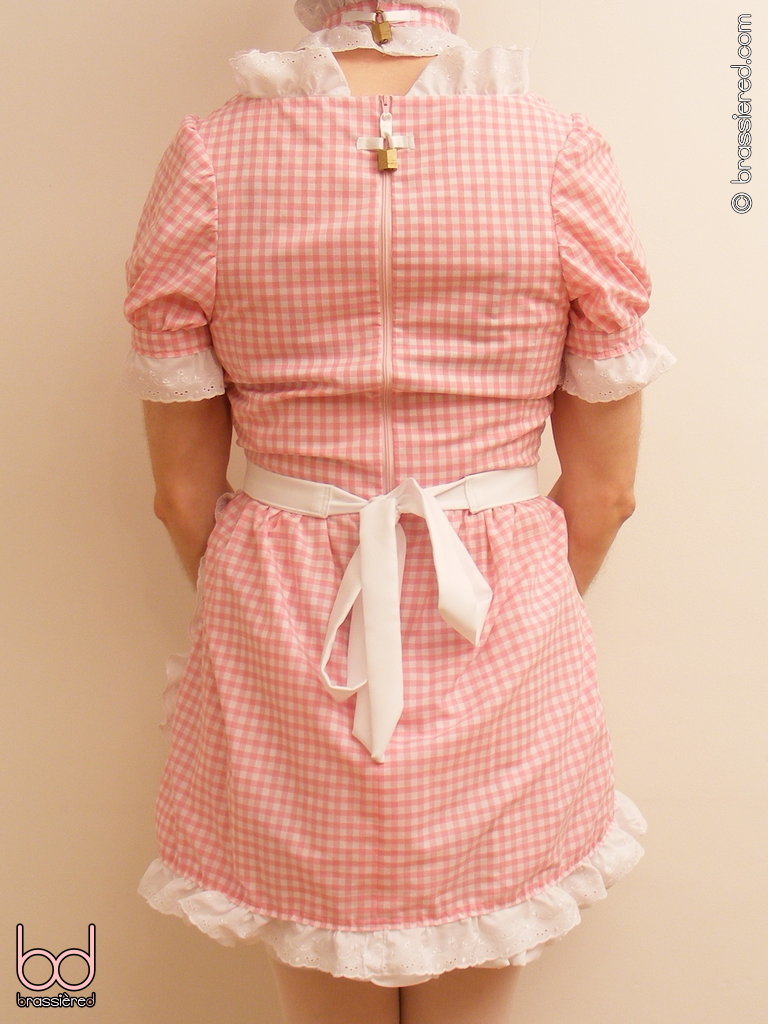
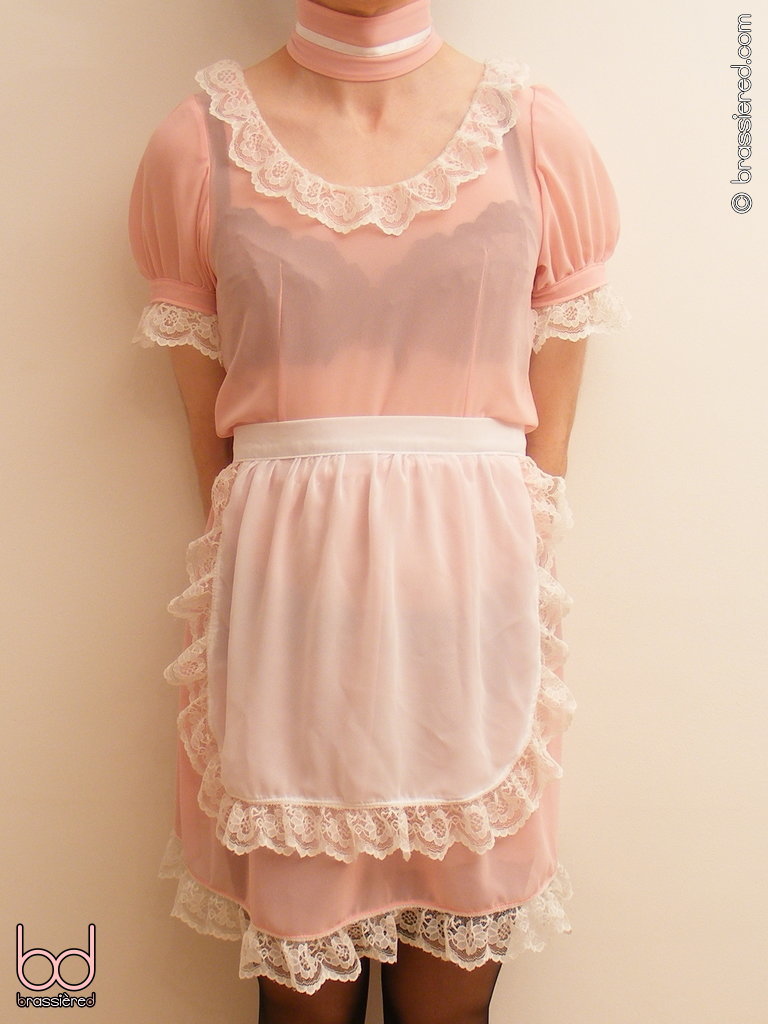
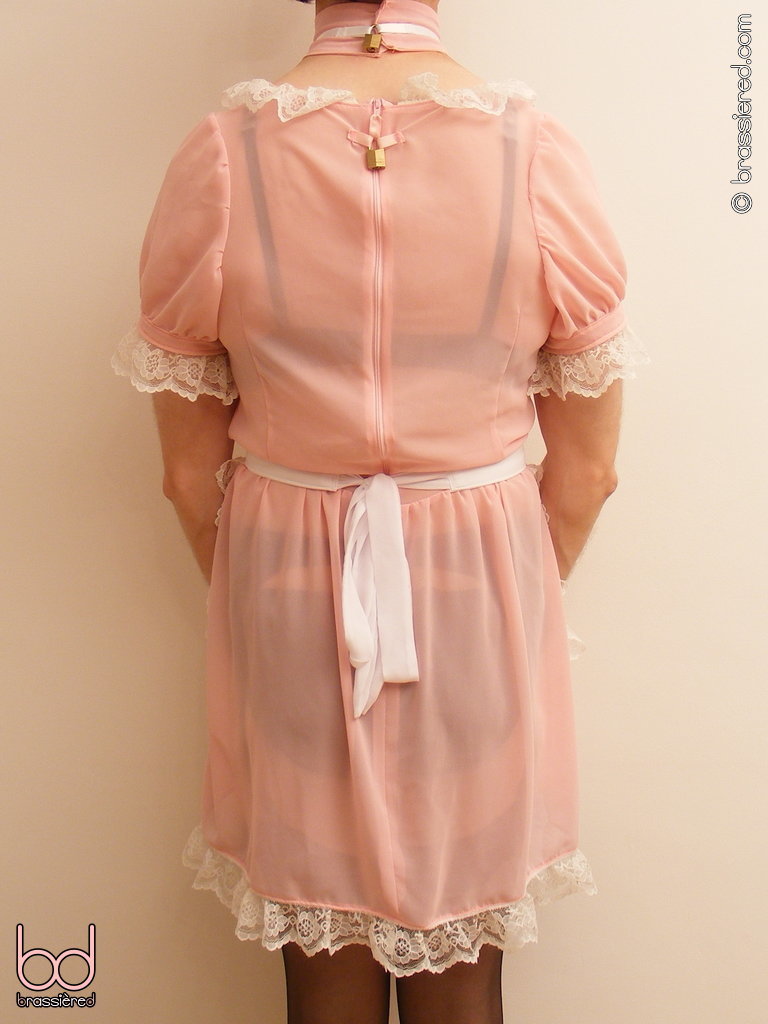
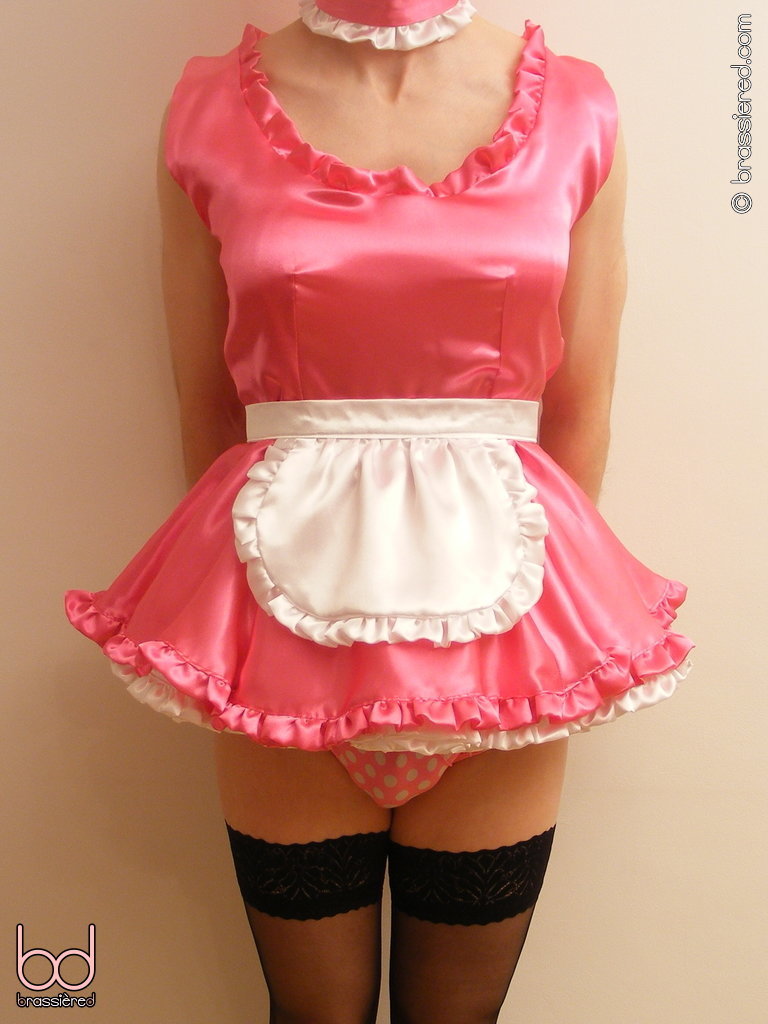
The maid's uniform my husband wears in Figure 12.1 follows exactly the same design as those from previous chapters, but the change in materials gives it a rather different air. In place of satin and lace, gingham and broderie anglaise offer a dainty domesticity that's perfectly suited to a maid who'll be busying himself around the kitchen, with the bi-stretch polyester used for apron and petticoat providing practical protection no matter what my husband might be baking. How easy it is to imagine him putting out a still warm cake on a matching tablecloth, the wide, frilly trim of his choker and headpiece completing such a picture perfectly.
Using a trim that frays
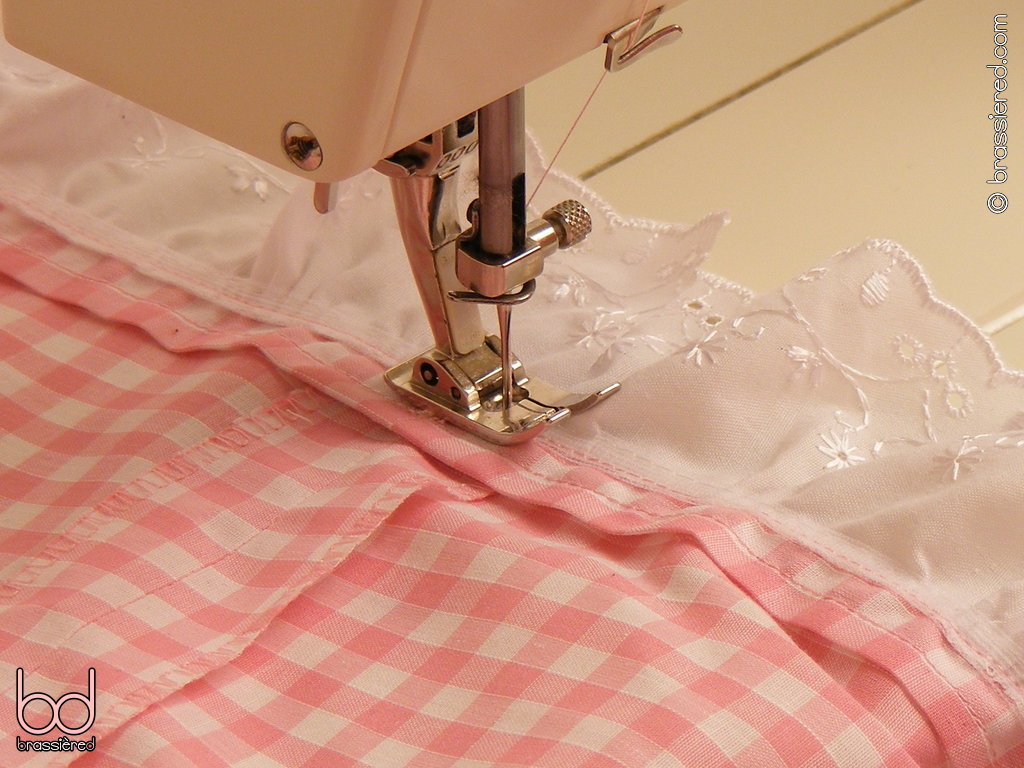
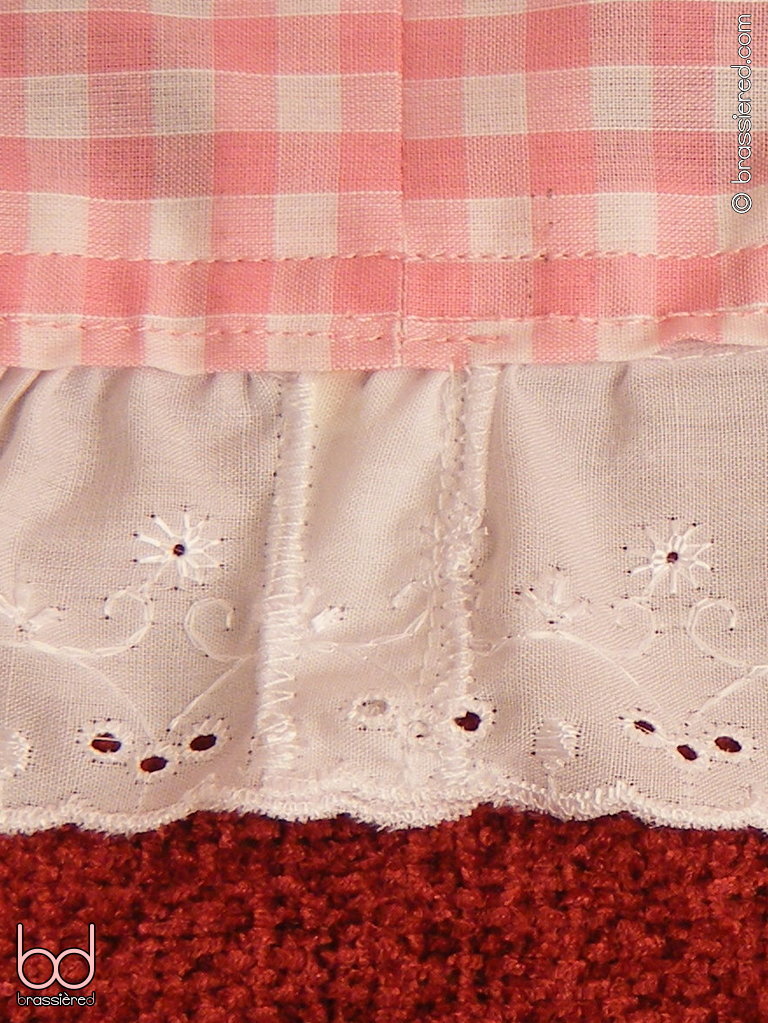
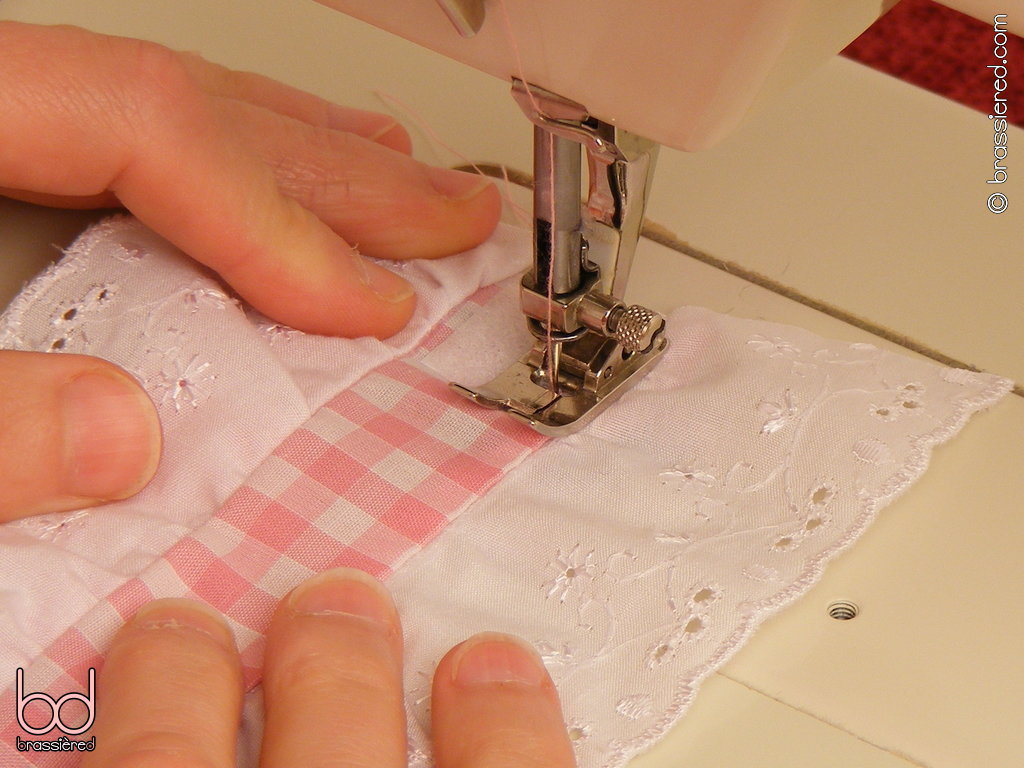
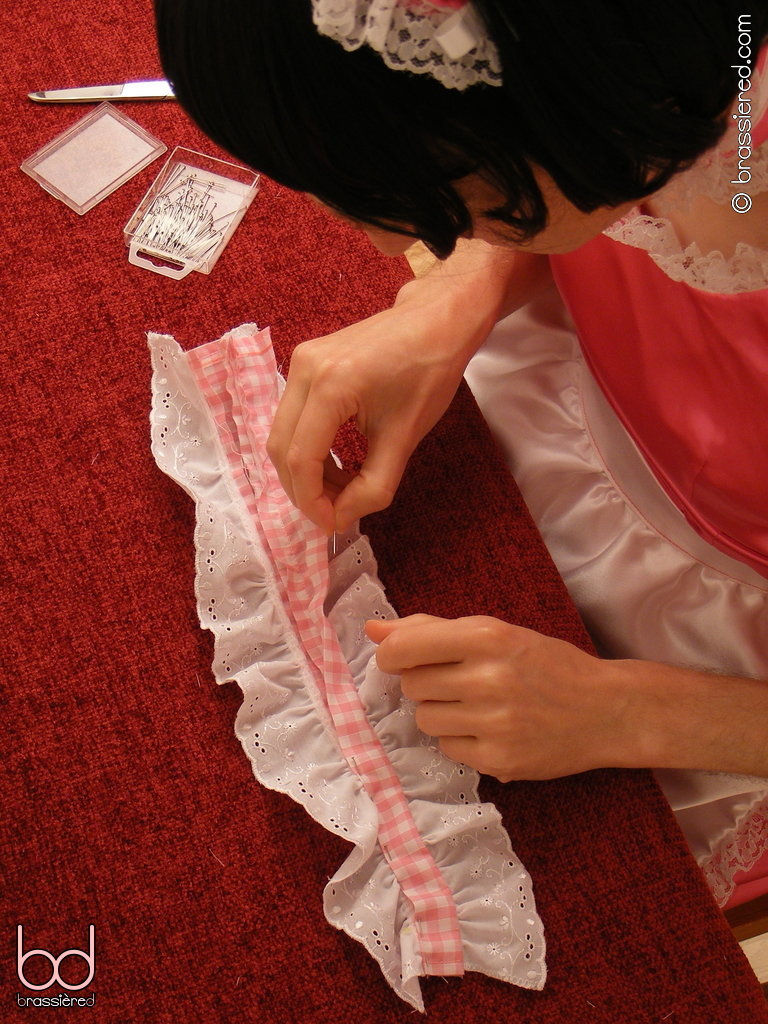
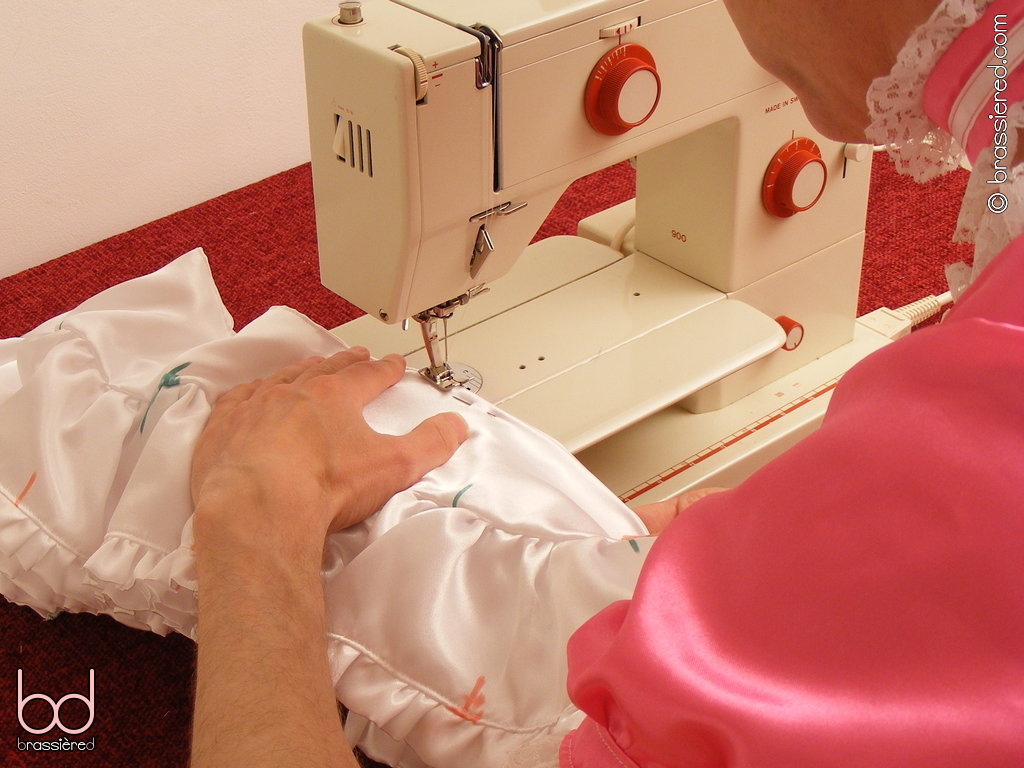
Unlike lace, broderie anglaise requires additional attention if its ends aren't to fray, being essentially a long strip of fabric with embroidered eyelets. If my husband were to leave the trim of his skirt as we see it in Figure 12.2, it would not survive too many trips through the washing machine before it would be in quite a sorry state - the same being true for the sleeves of his uniform as well. There's a reason we've been overlocking exposed seams, but doing so here isn't ideal - it would be better to make the trim continuous.
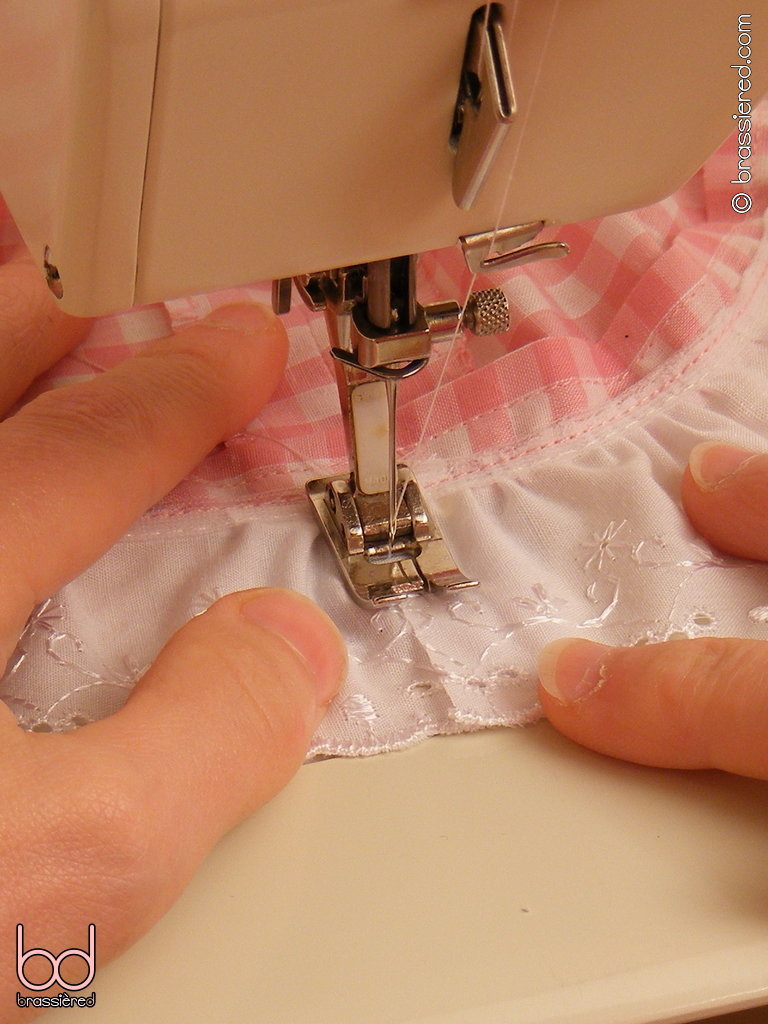
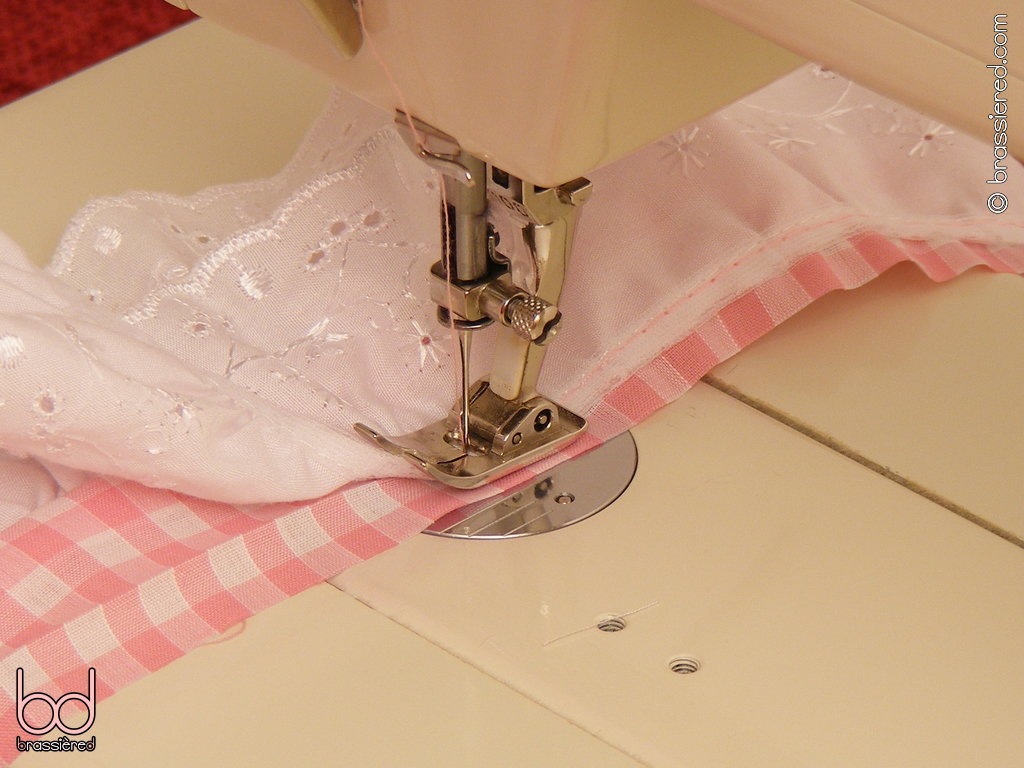
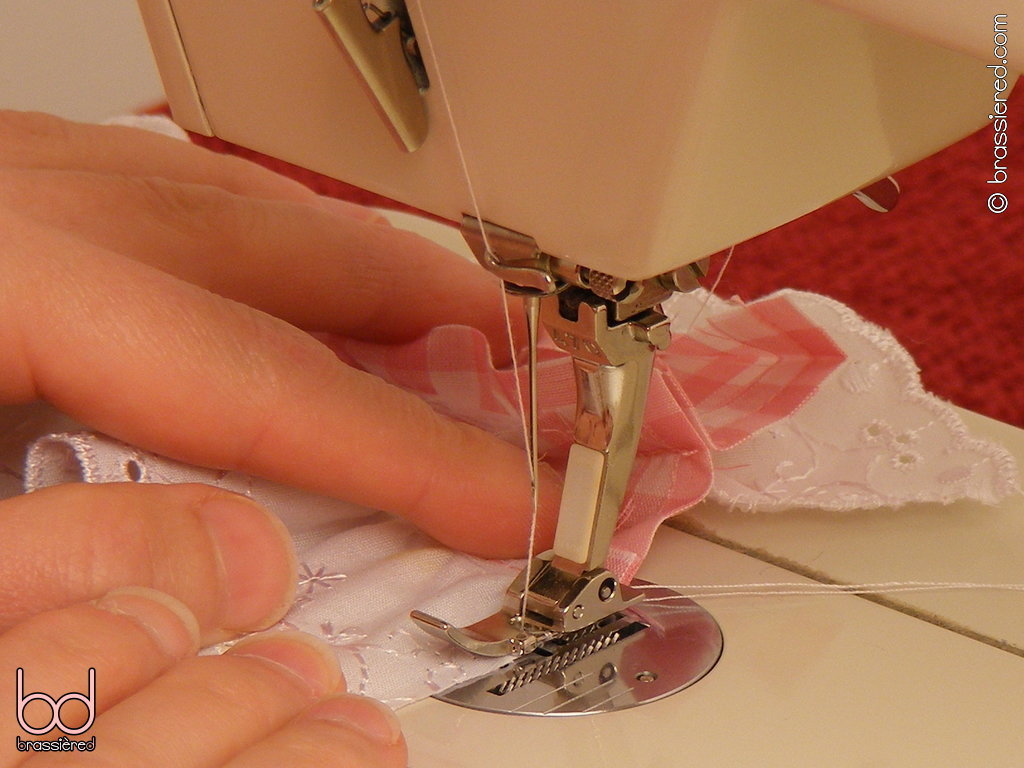
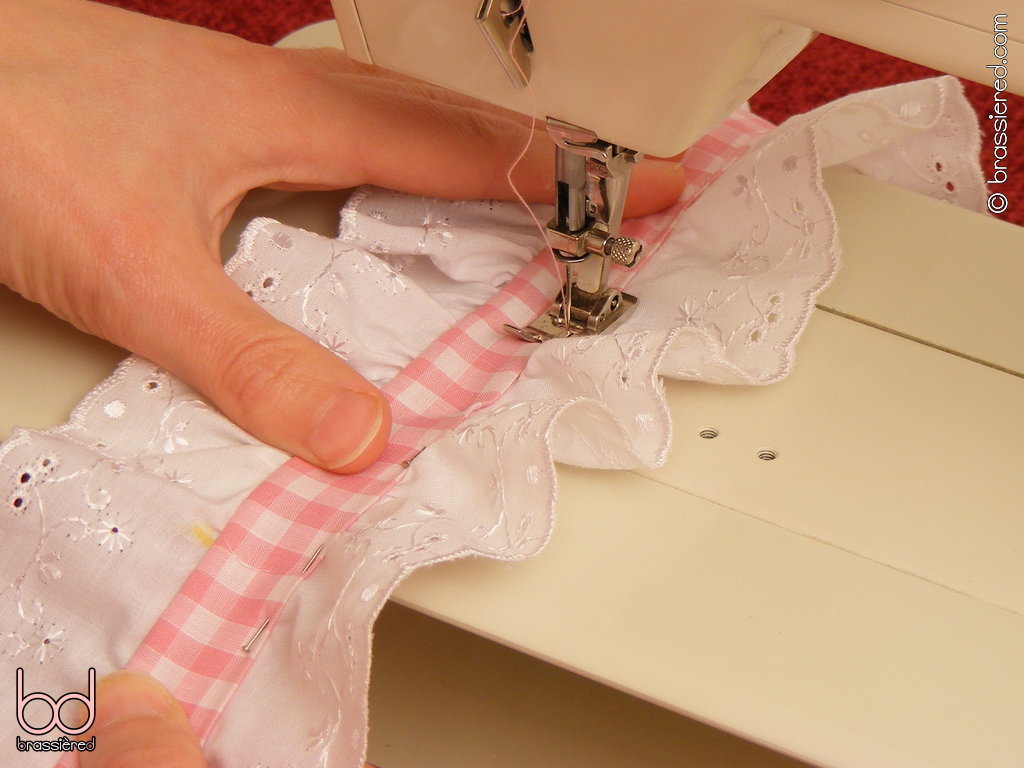
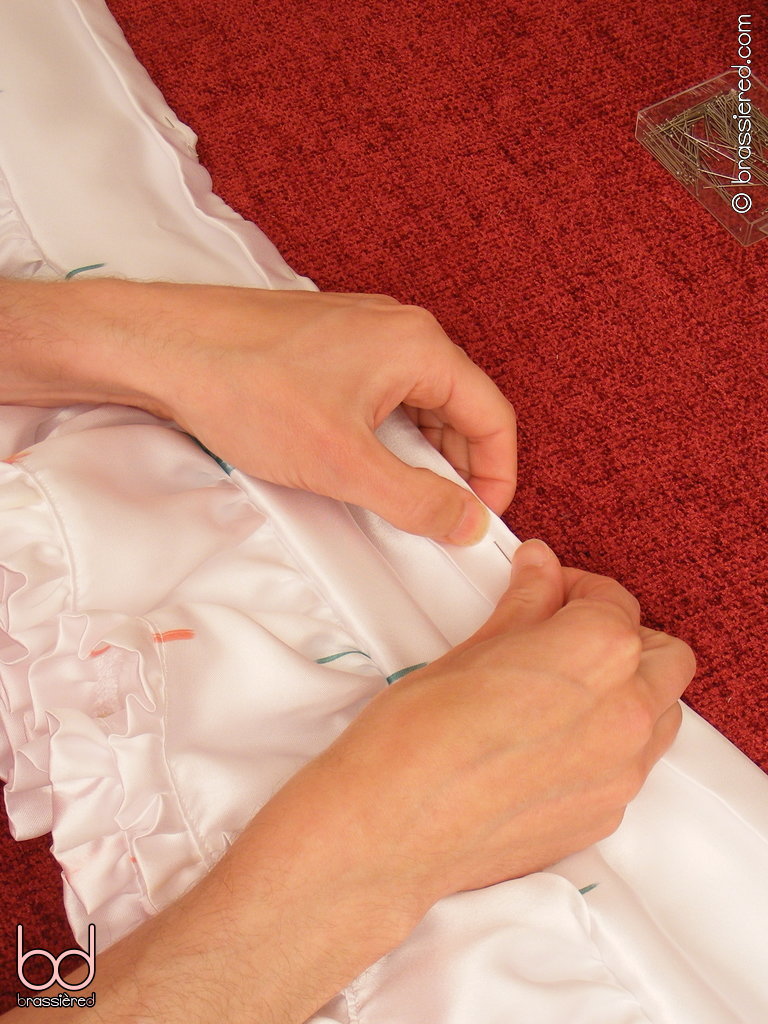
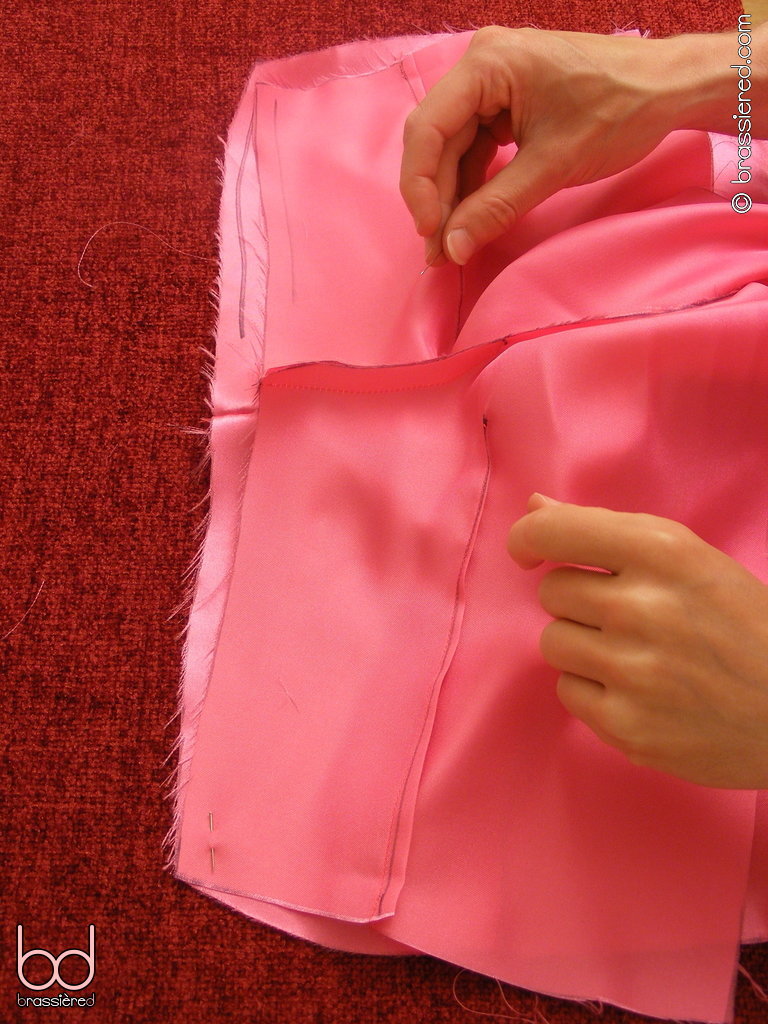
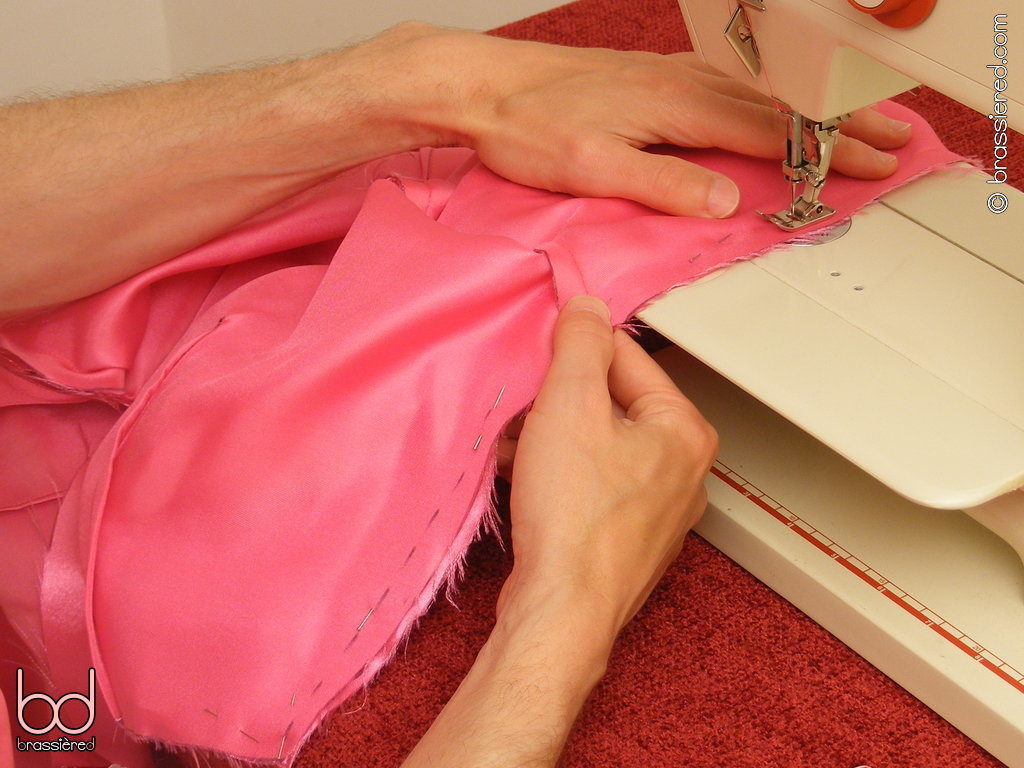
To do this, allow sufficient extra trim for the ends to overlap by 2.5cm / 1” or so at the back of the skirt, then sew the ends together by means of two lines of zigzag stitches, as shown in Figure 12.3. By centring these on each of the raw edges, and making the stitch width wide but the stitch length narrow, my husband simultaneously achieves the same effect as overlocking them, stopping any frays.
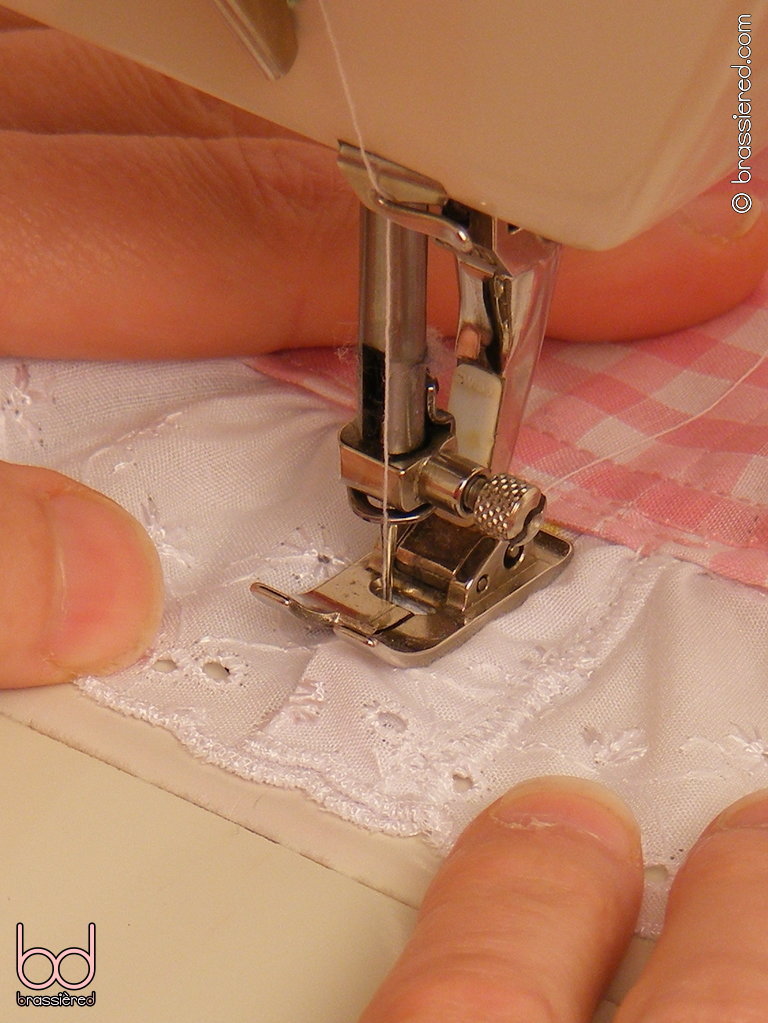
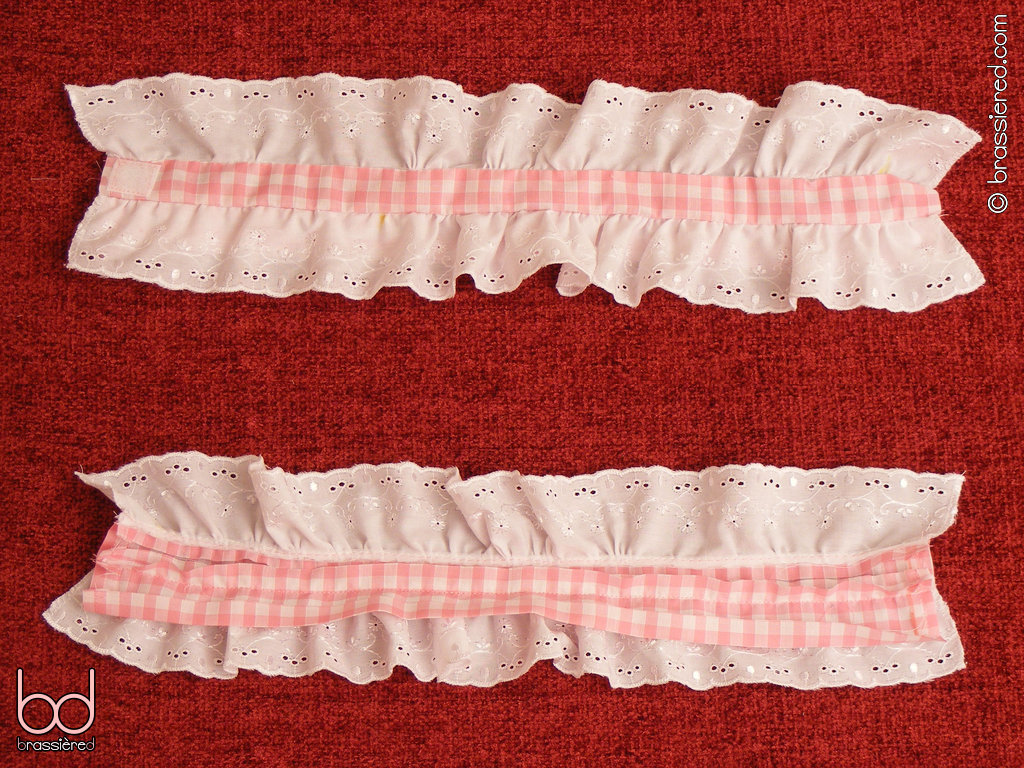
The final result is shown in Figure 12.4, the join being barely perceptible.
Using a wide trim
My husband's choice of broderie anglaise poses an additional problem, however - at 50mm / 2”, it is too wide for our previous method of making a choker and headpiece. While we could make the latter's fabric wider to accommodate this, there are limits as to how much material a male maid can have around his neck before his collar becomes comical, such that we'll need to adopt a different approach.
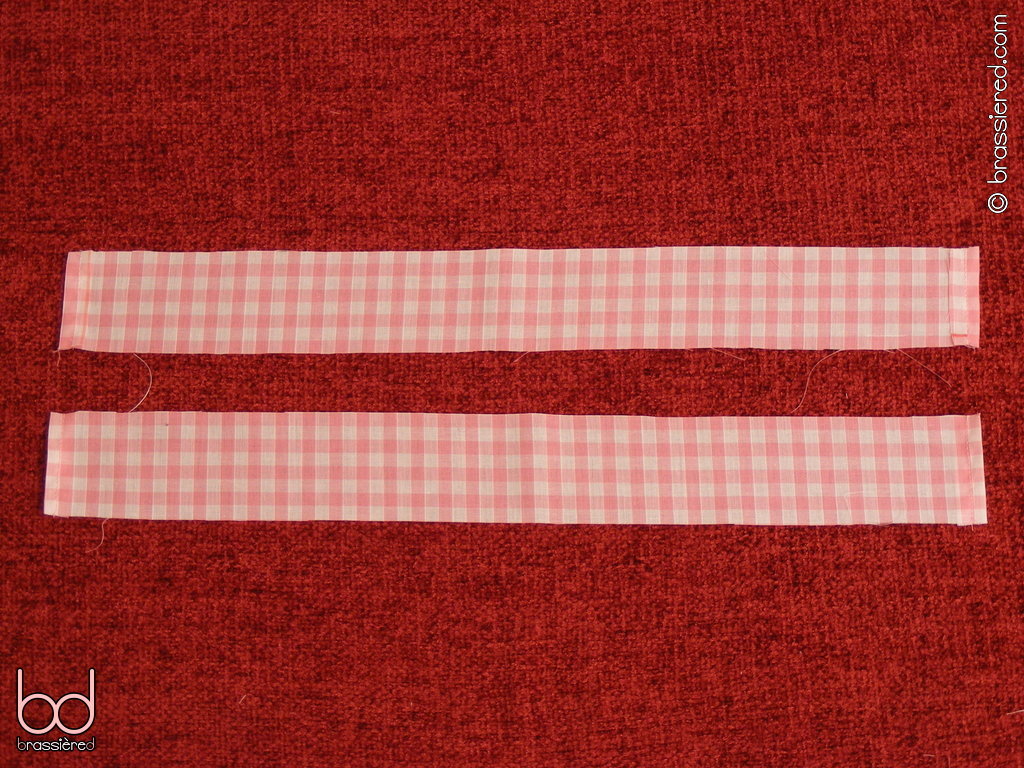
Start by preparing the two choker halves as you did before, with pressed and sewn short ends. This time, however, fold one of the long edges of each in by your seam allowance as well, pressing it flat as my husband does in Figure 12.5. The gingham's weave makes it easy to do so by a consistent distance, with two squares being sufficient here.
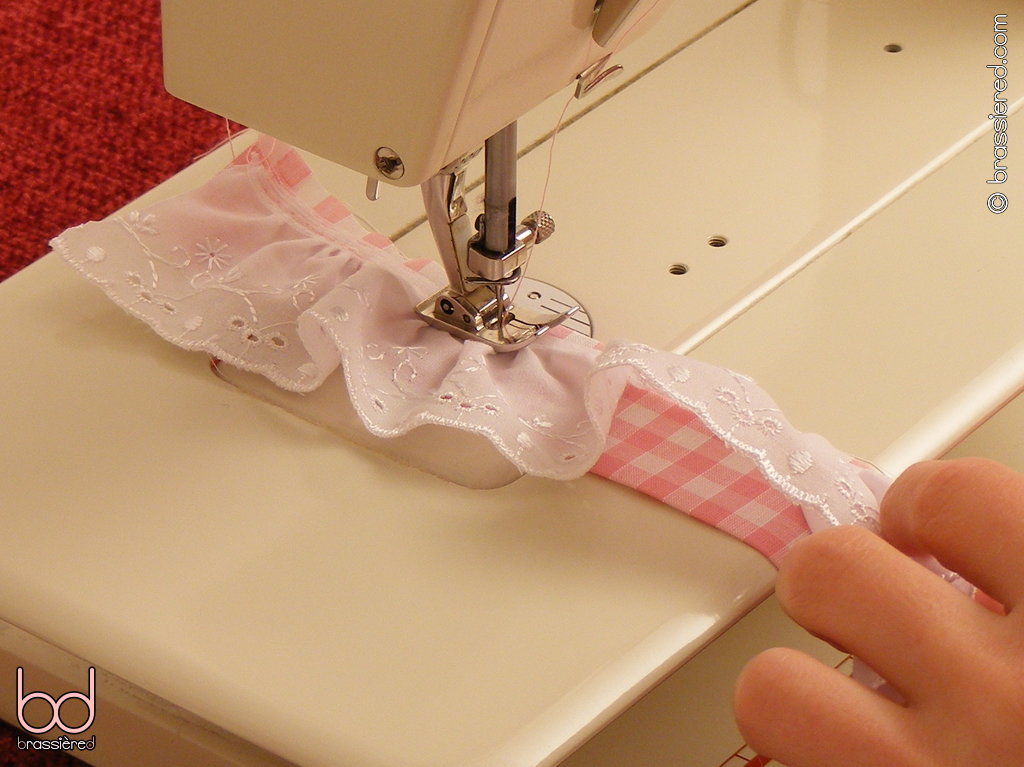
With the raw edge of the fold facing down, baste a length of broderie anglaise along the other long edge of one of the choker halves, pointing its frill inwards as shown in Figure 12.6 - exactly as you did with the lace before, but this time, only doing so on one of the edges.
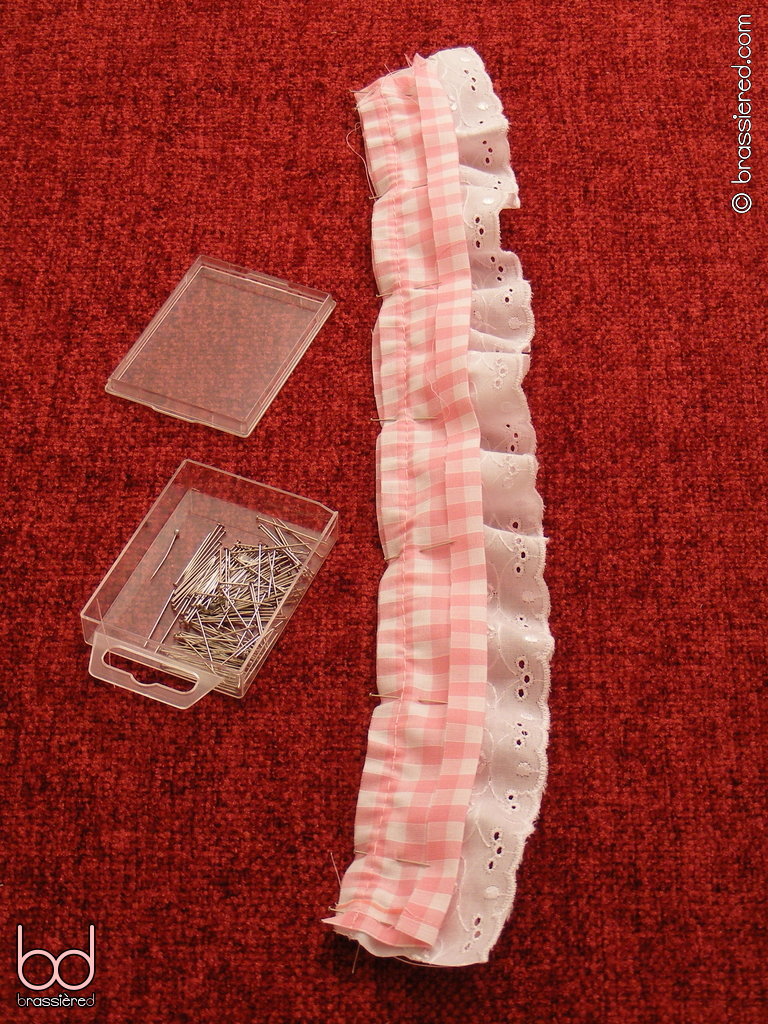
Sandwich the broderie anglaise between the two choker halves, making sure that the folded raw edges face outwards. Pin together, aligning the long edges (Figure 12.7).
Sew the two unfolded long edges together with a regular stitch, following the basting stitches that attach the broderie anglaise. Although in Figure 12.8 it appears that my husband is sewing the opposite edge to the trim, the latter is actually so wide as to extend the full width of the gingham.
By opening the resulting strip out, it is possible to expose the raw edges from where they have been folded under, allowing a second length of broderie anglaise to be sewn along one of them. In Figure 12.9, my husband does this with a basting stitch, placing it so as to put the gathered hem of the broderie anglaise just inside the fold when everything is folded back in again.
Attach the loop side of the hook and loop tape as you did before (Figure 12.10).
Overlock the raw edges of the broderie anglaise, starting from the gingham and working out (Figure 12.11). If you're wondering why we do so now, rather than before sewing it in place, it's because judging the required length of a slightly elastic trim can be very difficult - it's much easier to cut afterwards.
As Figure 12.12 shows, the choker looks complete from one side, but the other still has the two folded edges exposed.
Fortunately, these simply need to be pinned, then sewn together. Use a regular stitch here, placing it consistently close to the folded edge (Figure 12.13). For consistency, my husband will go on to sew a second line of stitching along the other long edge of the gingham - one that has no practical purpose, but serves to make the lines of stitching look symmetrical.
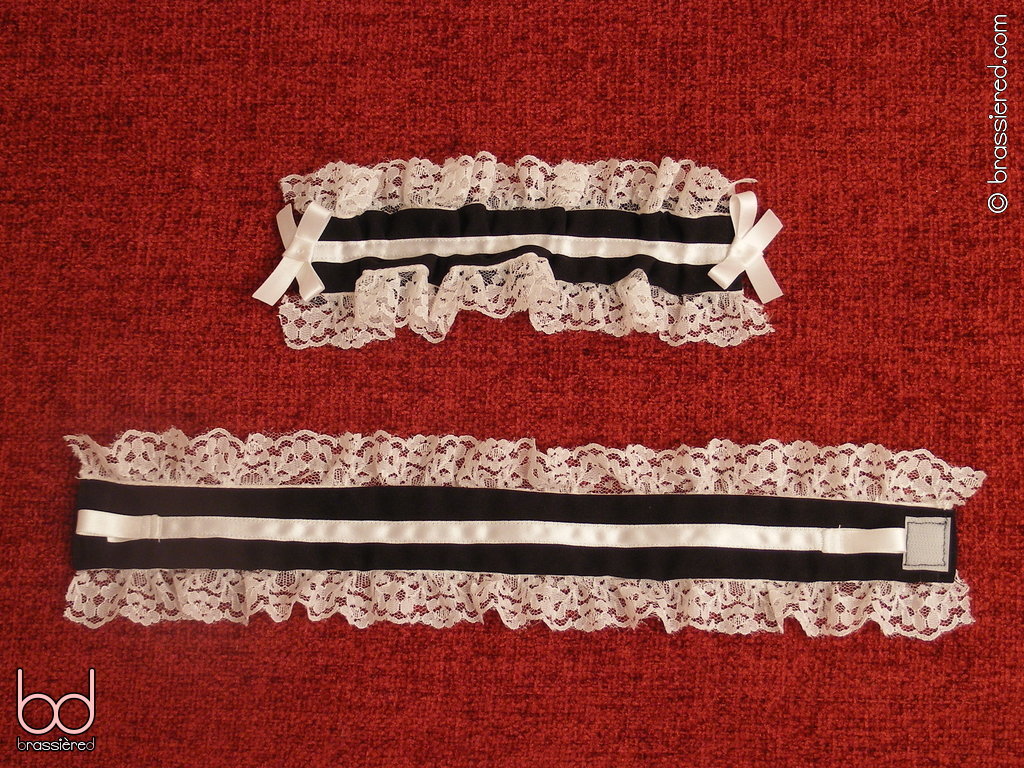
You can now continue as you would for a regular choker, sewing the short ends of the tube together, then attaching the hook side of the hook and loop tape, ribbon and loops. The finished choker is shown from both sides in Figure 12.14. My husband managed to slightly misjudge its length, assuming that the gingham he was working with had a quarter inch weave rather than a half centimetre one when he initially folded in the short ends. Fortunately, this was easily corrected by moving the hooks further in, it hardly offending me that this particular choker overlaps a little more when locked around his neck.
Summery sheer chiffon
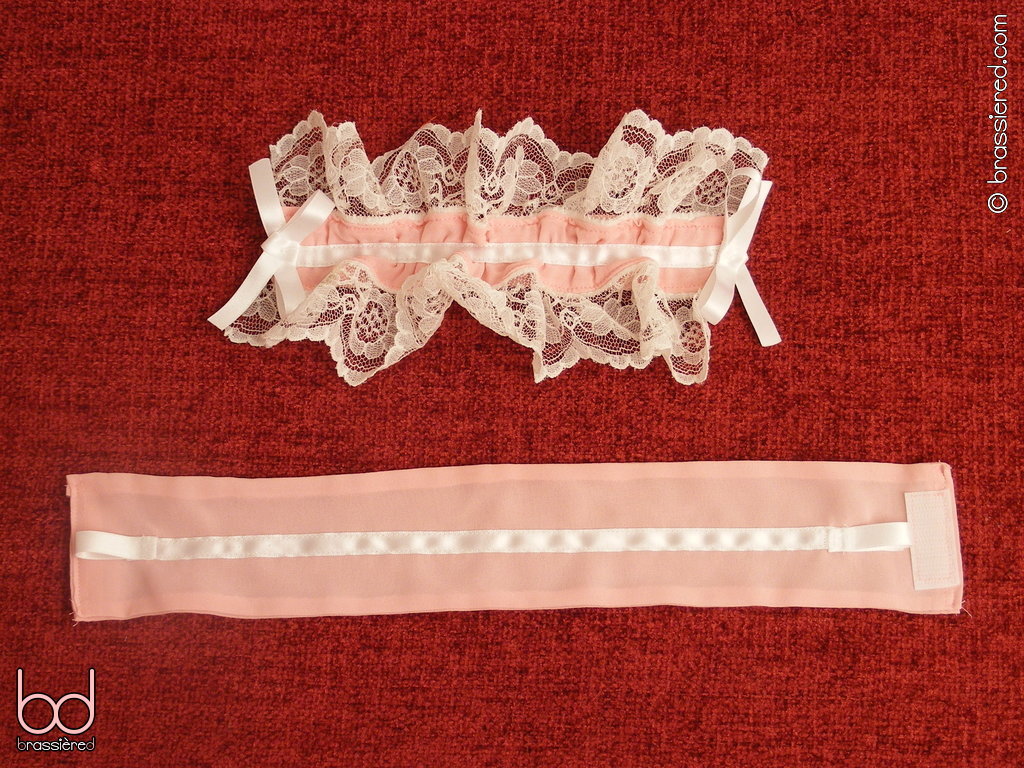
In Figure 12.15, my husband models a maid's uniform made of lightweight chiffon, the flimsy fabric leaving little doubt about the lingerie he wears beneath. Such an outfit won't see him sweat as much should he be bringing me a cold drink while I sit out in the summer, but the degree to which it puts his black bra and panties on display might well make him feel a little hot under the collar - especially if I'm joined by guests under the garden umbrella!
Despite the different style, the outfit still broadly follows the same design as before, albeit with a couple of accommodations for the change of materials. Once again, my husband has used a broader trim - a 70mm / 3” ivory lace, which is too wide and too flimsy to stand up, quite apart from its colour. Making the best of his mistake, he's followed the same procedure as he did with the gingham for the headpiece, complementing the wider lace with slightly larger bows - 30cm / 12” of ribbon being used for each. On the choker, he's omitted the lace entirely, instead using a wider strip of fabric and overlocking the internal edges to good effect. Thanks to the chiffon's sheerness, these appear as more opaque bands.
The main difference, however, is the absence of lining on both dress and apron - a second layer of chiffon would reduce the sheerness substantially, spoiling the delicious view of his underwear. Instead, a single thickness has been used, posing the problem of how to attach the lace that would have previously been sandwiched between two pieces of fabric. We solved this on the skirt of the satin uniforms by making a hem, but such an approach isn't ideal for the apron - it's not only difficult to fold around a curve, but the additional layers of fabric make the result rather conspicuous.
Attaching trim to a raw edge
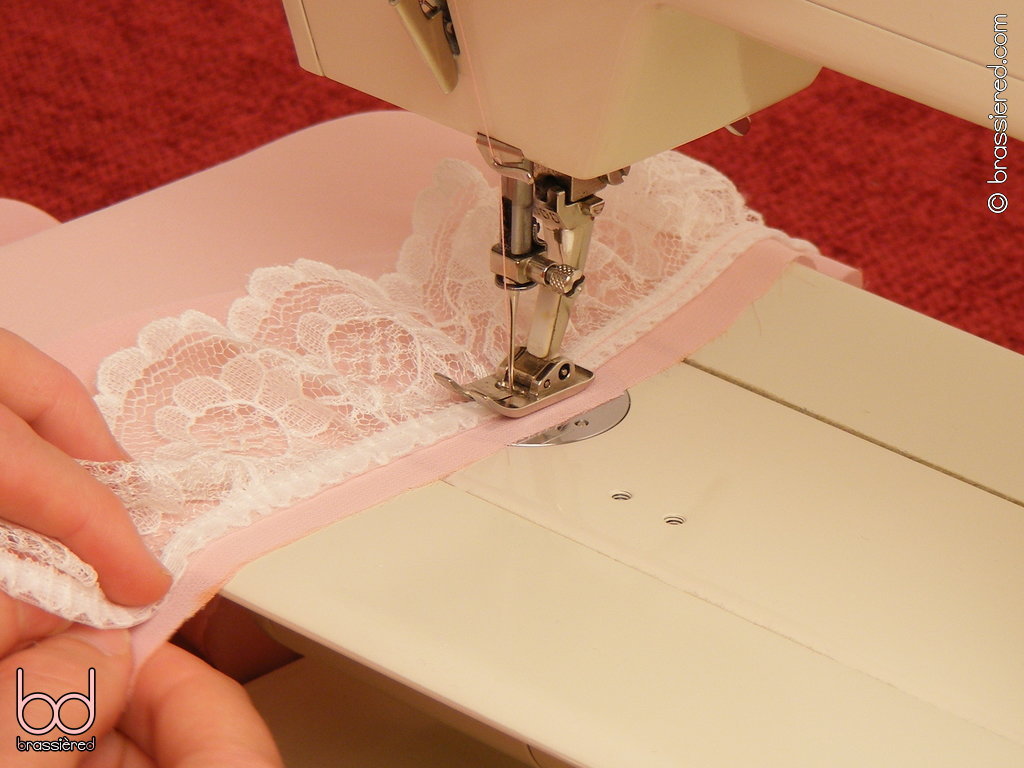
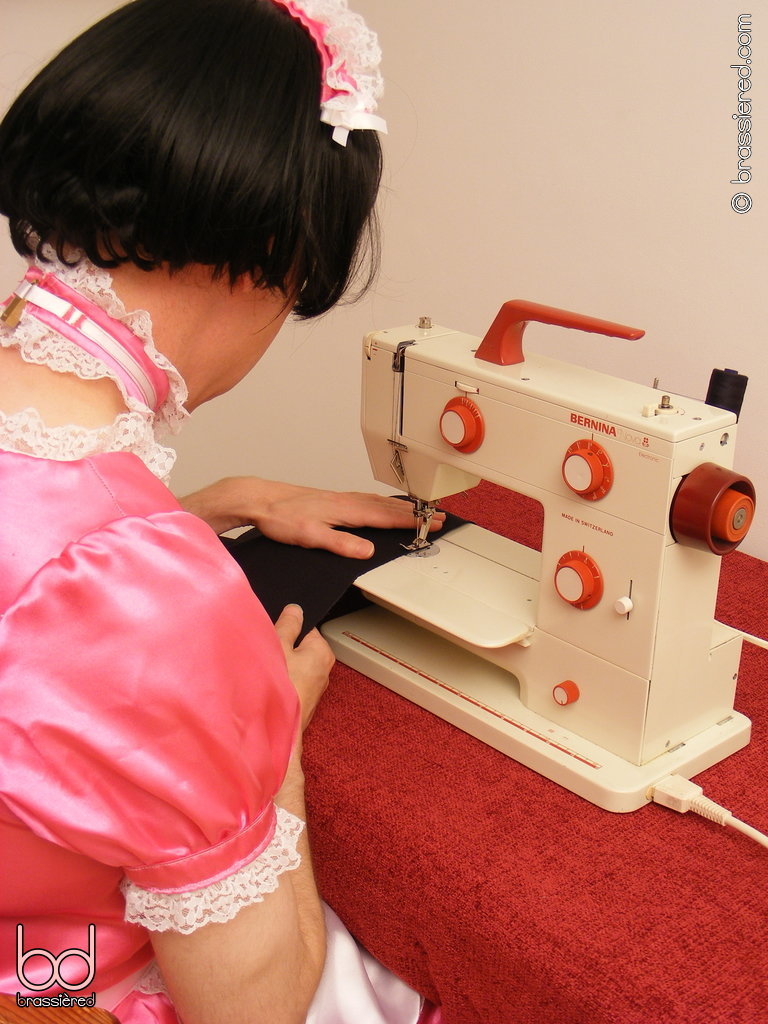
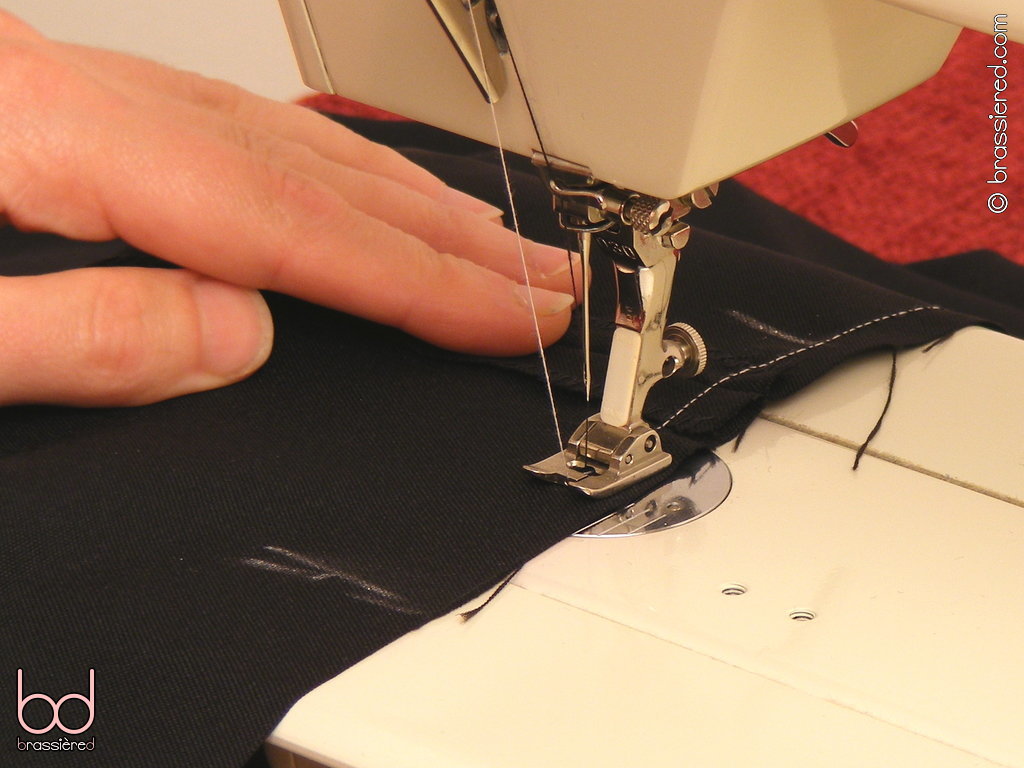
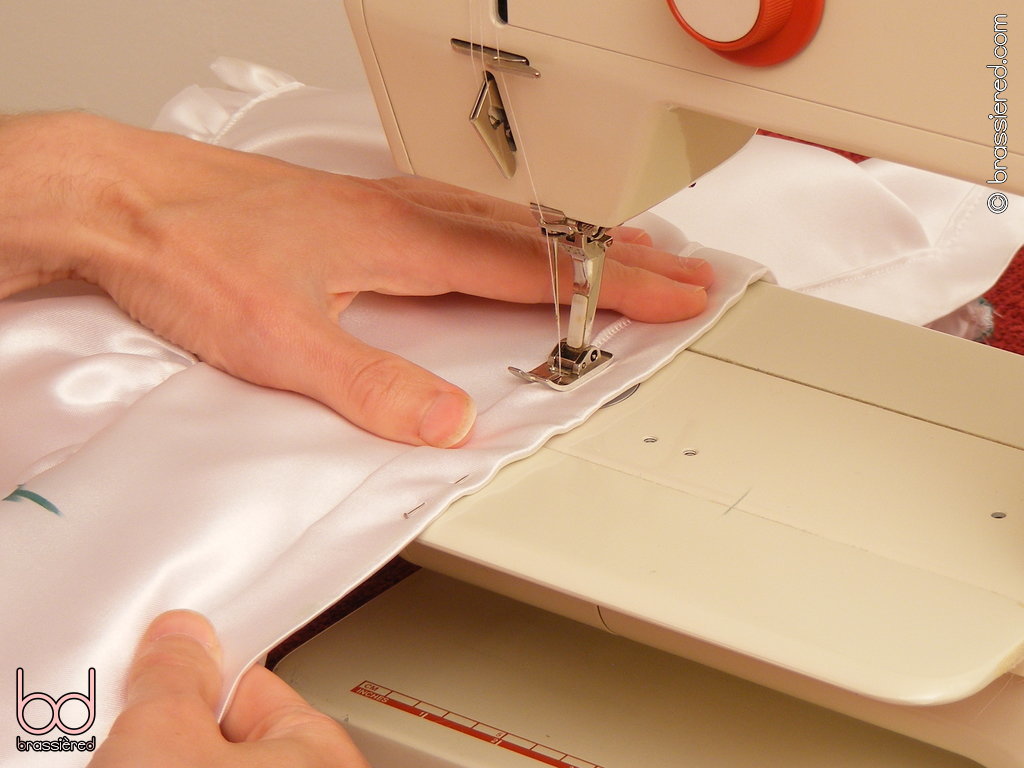
In Figure 12.16, my husband is attaching the lace to the bottom of the sheer uniform's skirt, but the same approach is applicable to the apron. Start in a similar way that we did with the choker and headpiece, sewing the lace in place on the right side of the fabric with its frill pointing in. Rather than trying to sew the lace along the very edge of the fabric, stick to the seam allowance, but use a regular stitch rather than basting.
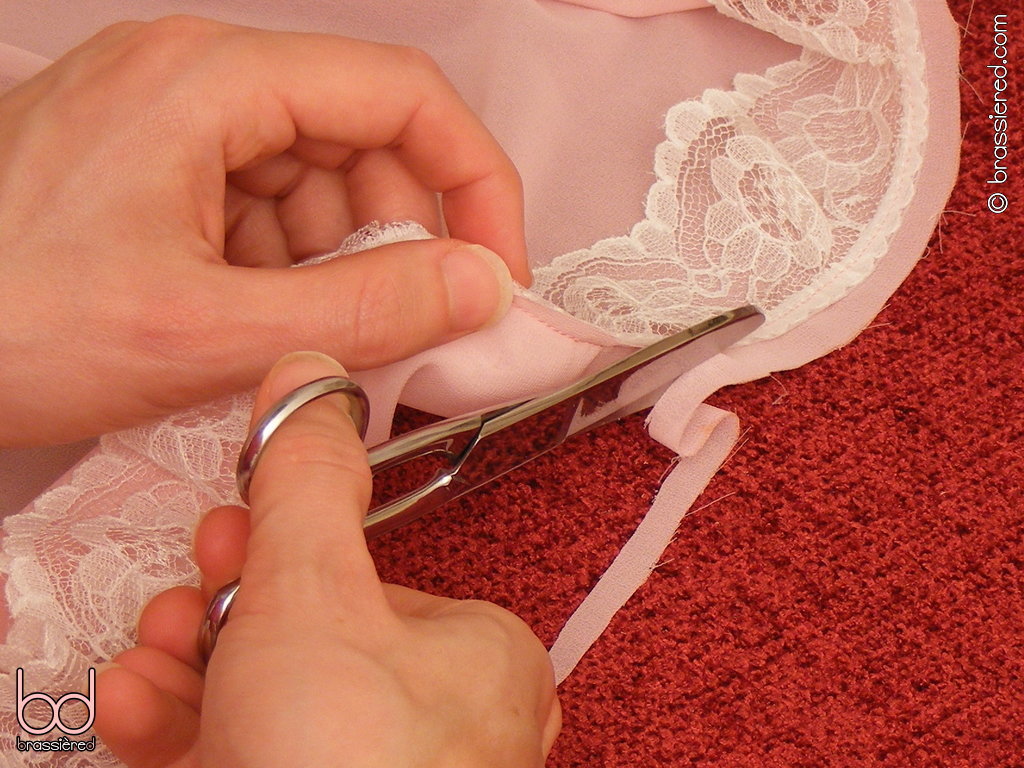
Trim the excess material from the edge, leaving only a little beyond the lace (Figure 12.17).
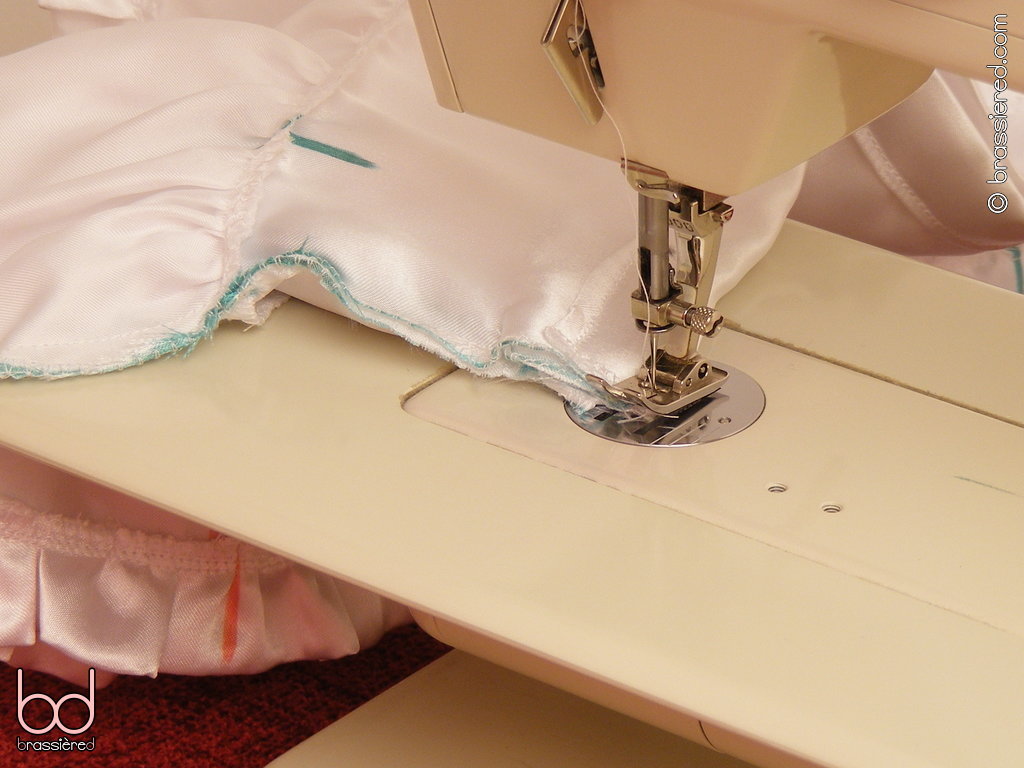
Overlock the resulting edge (Figure 12.18). If you've cut things correctly, the overlocking should overlap the gathered edge of the lace, the latter being more substantial than the chiffon.
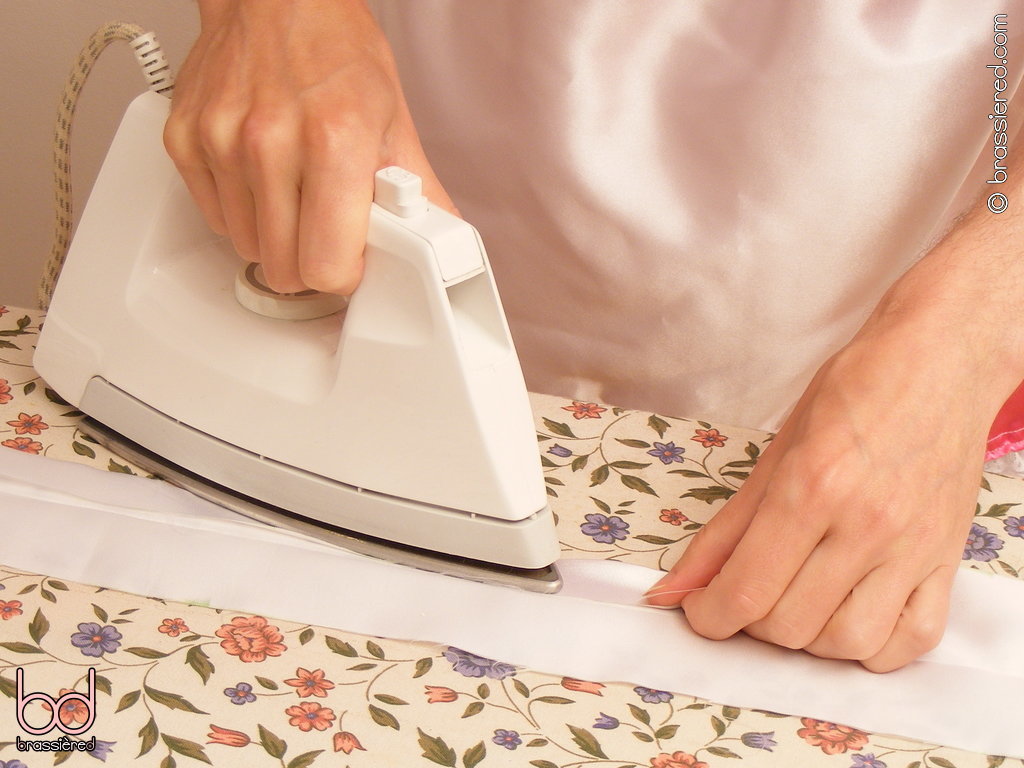
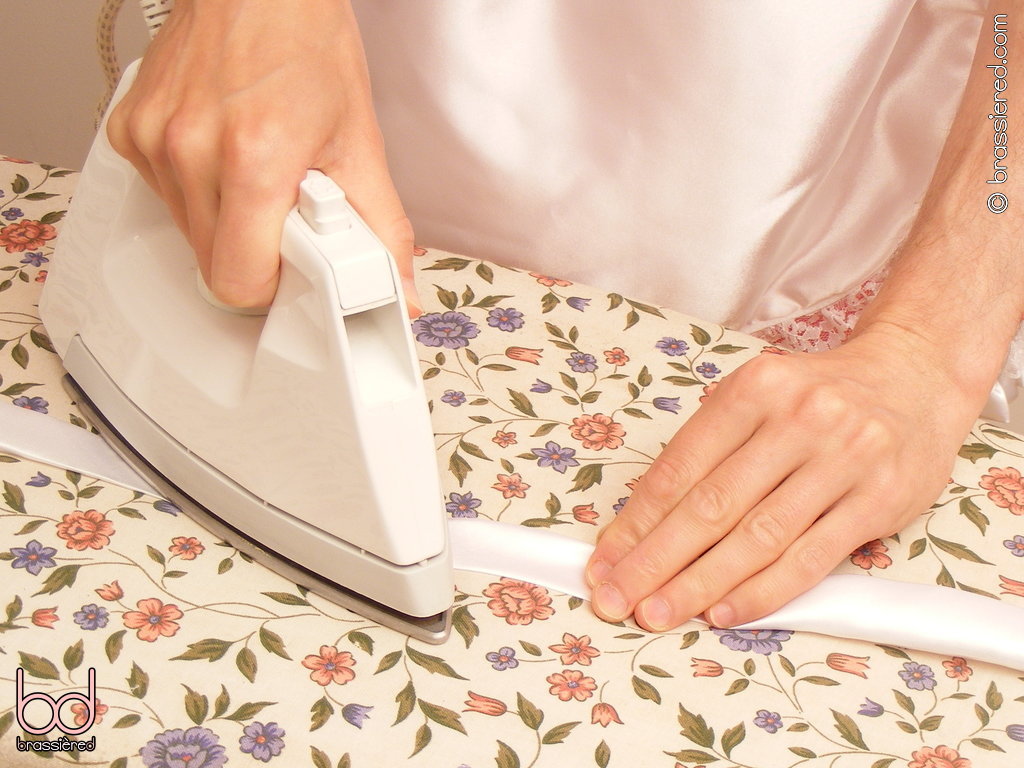
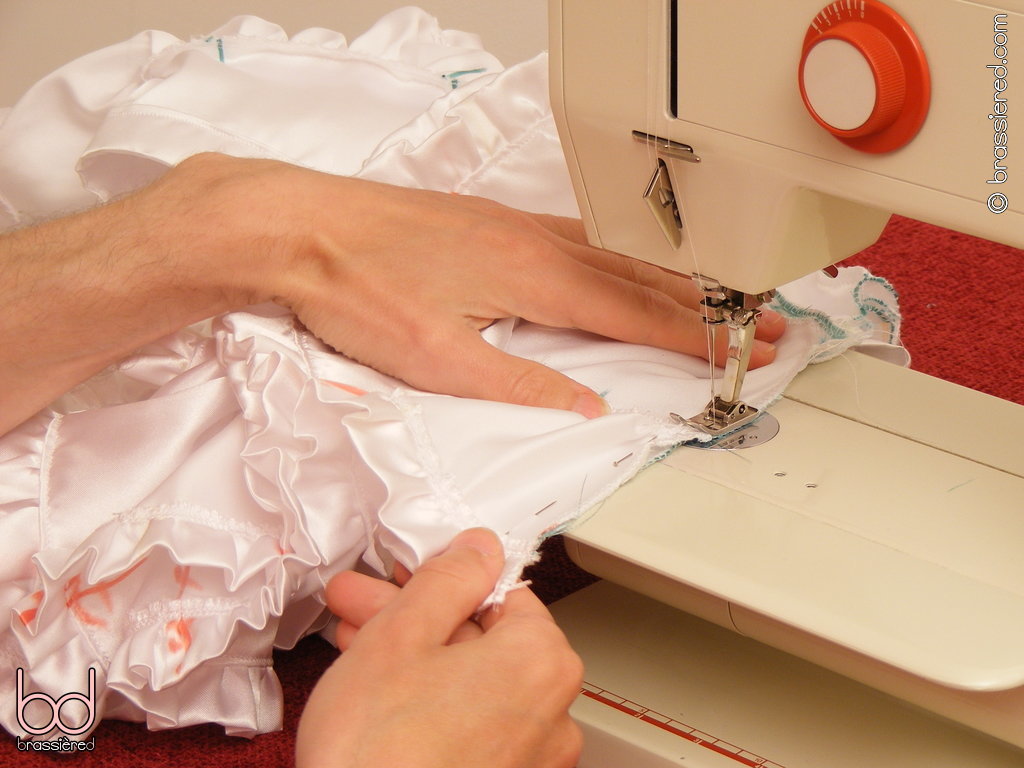
Fold the overlocked edge underneath the fabric, so the frill of the lace points outwards. With the right side of the material facing up, fix the trim in this position with a line of regular stitches. In Figure 12.19, my husband again makes use of the inside of the presser foot to achieve a consistent distance. If this seems familiar, it's because we did the same with the gathered ruffle of the petticoat in the previous chapter.
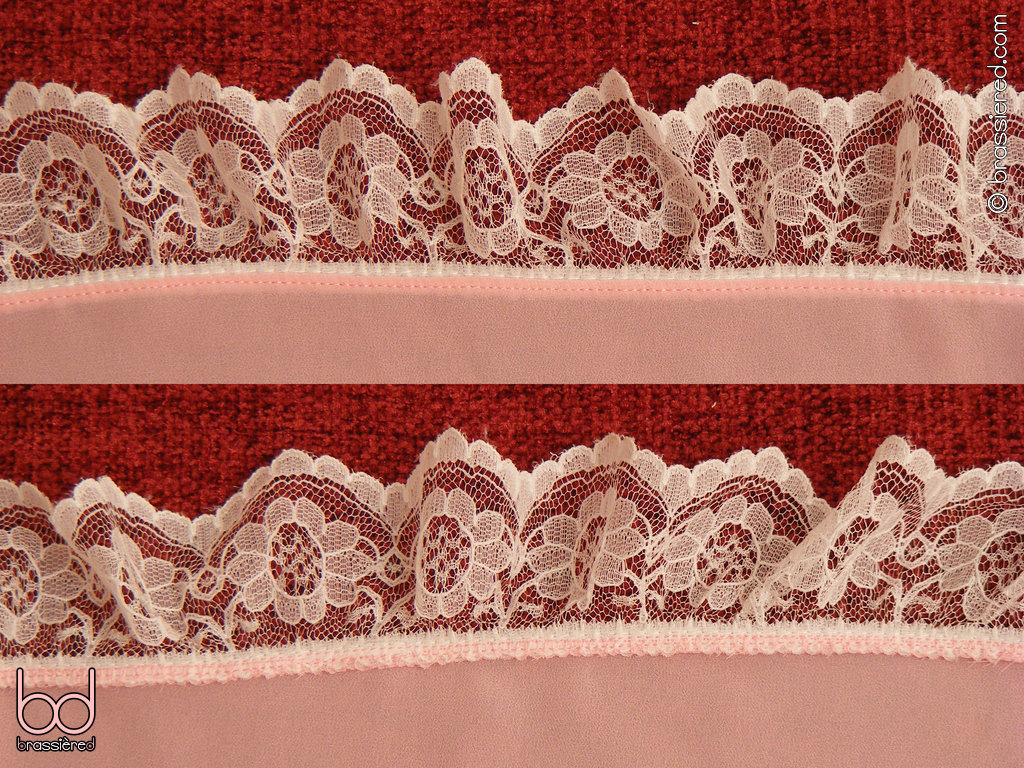
The finished edge is shown in Figure 12.20. The band of deeper pink is actually the gathered edge of the lace showing through the chiffon, but the effect is far from displeasing, especially when compared to the uniform's bulkier sleeve bands.
Strengthening sheer fabric
The flimsiness of the chiffon is a large part of its appeal when making a sheer maid's uniform, but there are some places where we need more strength. We're familiar with using fusible interfacing on the waistband of the apron, but here the headband of the headpiece benefits from similar stiffening too.
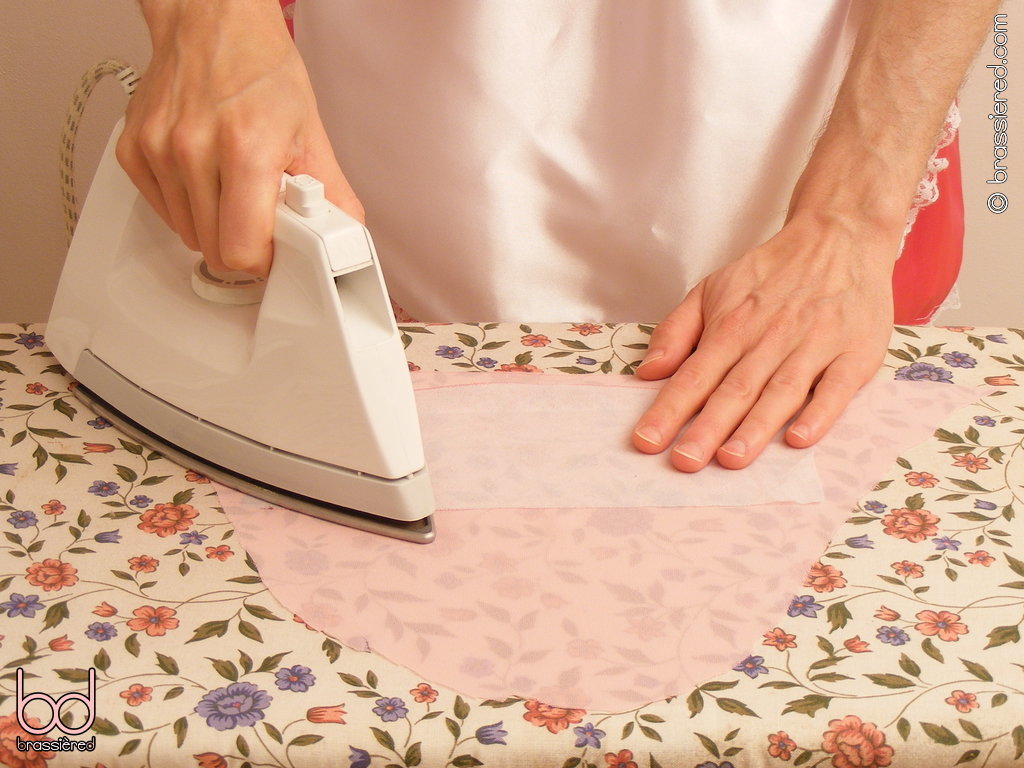
Previously, we simply cut out similarly sized rectangles of fabric and interfacing, but doing so with lightweight material is more difficult - it's far from easy to keep it straight while marking and cutting. To resolve this, cut only the interfacing to the right shape, ironing it onto a larger piece of fabric as my husband does in Figure 12.21 before cutting again - the slightly odd shape is because he's making use of a scrap.
Overlocking internal edges
Without a lining, the inside of the bodice has many more raw edges that must be overlocked. Figure 12.22 shows the seams around the armpit of one of the sleeves, all suitably protected from fraying.
Even where the seams aren't exposed, the sheerness of the chiffon means that they can be seen. Rather than leaving a wobbly edge, overlock these as well, aligning the edge of the overlocking foot with the stitching of the seam to maintain a consistent distance. In Figure 12.23, my husband does this with what will become his choker, producing the pleasing effect we saw earlier.
Practical black polyester
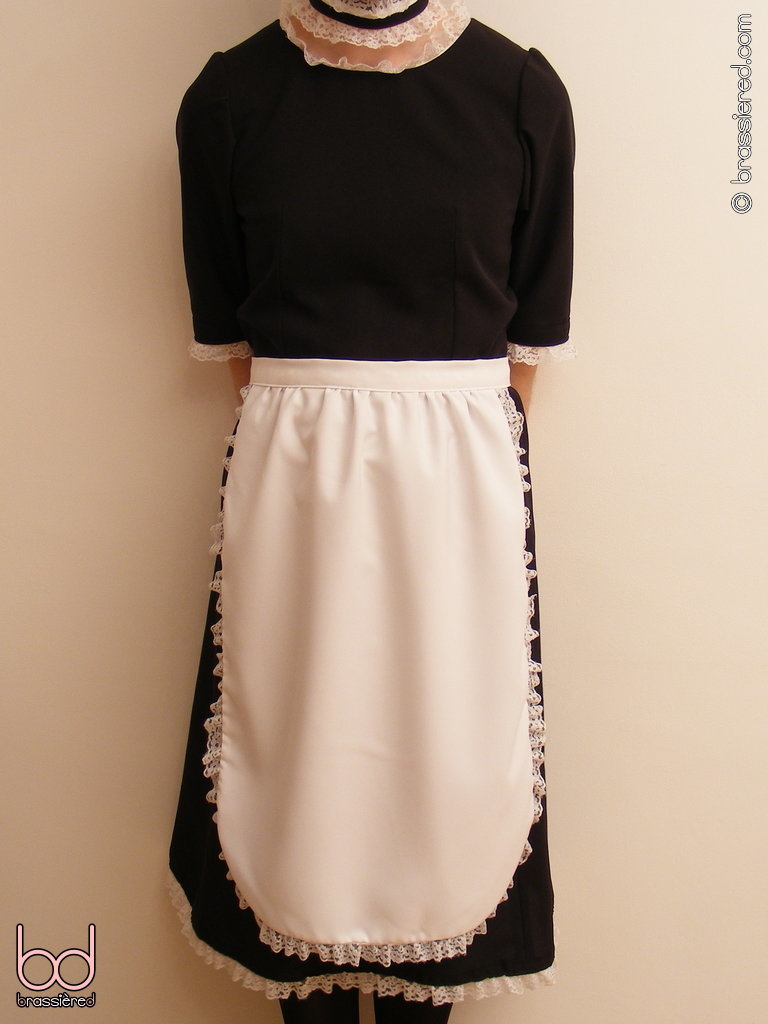
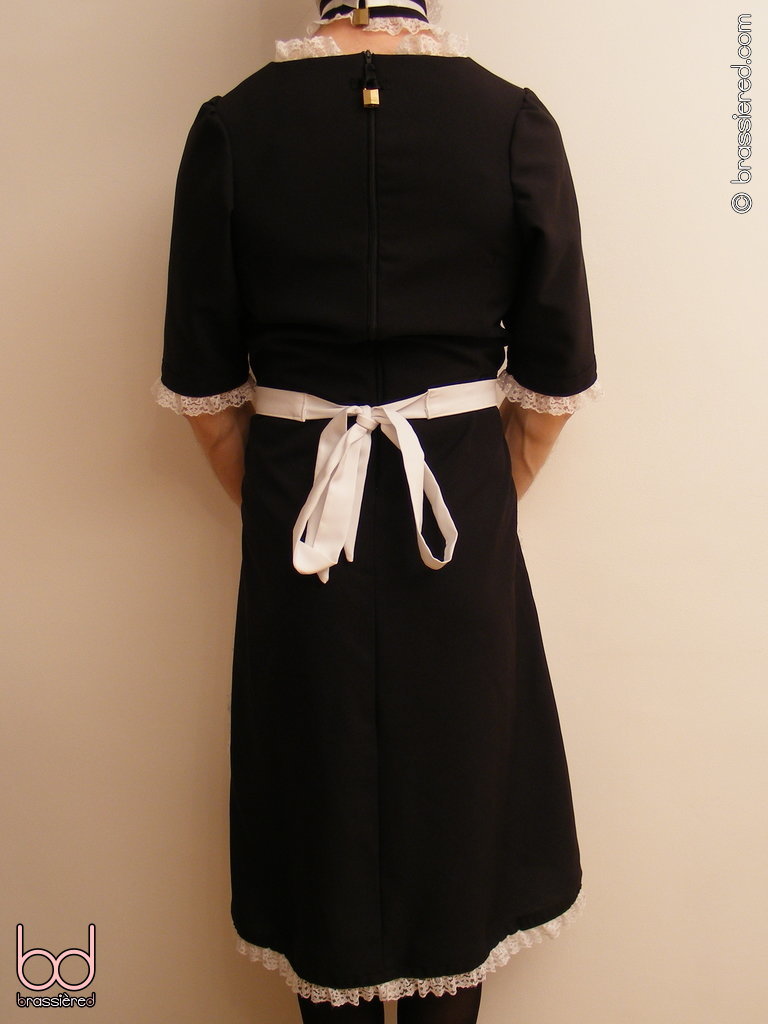
It only takes a few changes to the design of the maid's dress to make it more modest, as the uniform my husband wears in Figure 12.24 illustrates. With a higher neckline, elbow-length sleeves and a longer skirt that's less gathered at the waist, it's a sensible choice for more strenuous chores, cut from a practical polyester that won't have any problems with my maid getting down on his hands and knees to scrub the floor. Beneath the heavy black fabric, my husband could be wearing a similarly substantial longline brassière and panty girdle for all we can see of his underwear, having to work around the house in the full attire of an old-fashioned servant - complete with very long apron!
A higher neckline
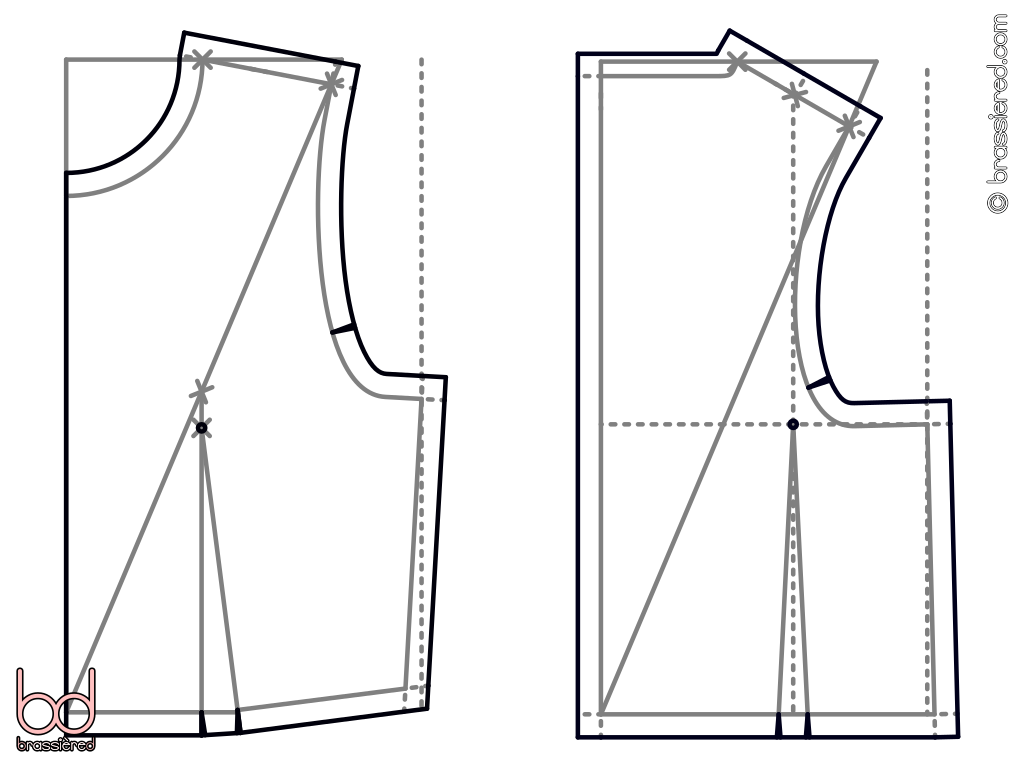
When we drafted the pattern for the front of the bodice in Chapter 3, we drew a circular guideline, from which we dropped down for a more daring décolletage. For a modest neckline, we simply use this circular guideline as the neckline, keeping the full length of the shoulder rather than dividing the latter in two. As Figure 12.25 shows, that has a knock-on effect on the back of the bodice, but otherwise the pattern pieces remain the same - indeed, assuming the other measurements haven't changed, we can adapt the ones we've used previous by adding an extra piece to them rather than starting from scratch.
Elbow-length sleeves
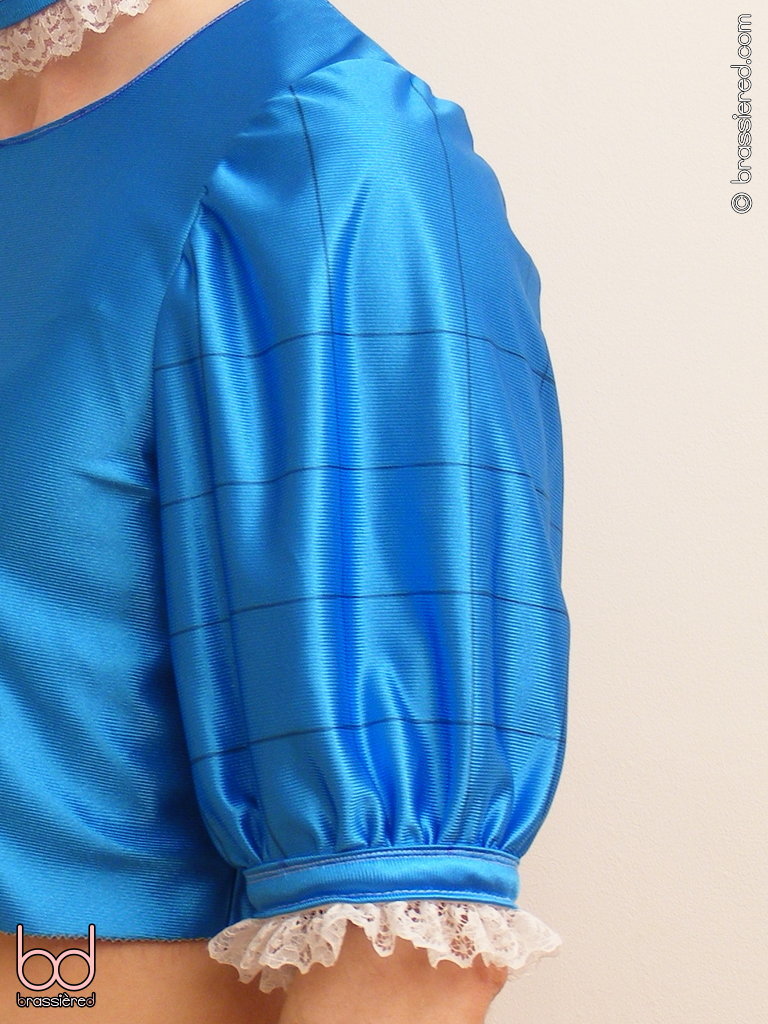
It's possible to draft a longer sleeve simply by using different measurements for overarm and underarm lengths, wrapping the ribbon we took these from just above the elbow rather than above the bicep. Doing so works, after a fashion, but as can be seen in the trial my husband put together for Figure 12.26, the result has rather more fabric gathered around the sleeve band than is perhaps ideal.
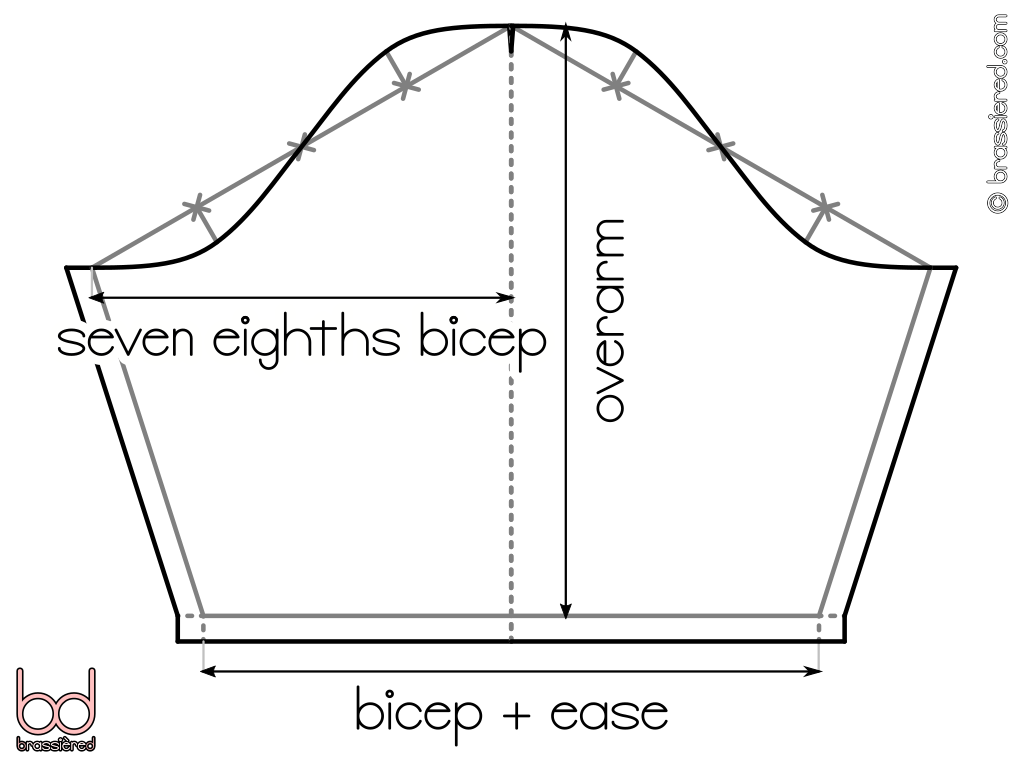
One way around this is to taper the sleeve piece as shown in Figure 12.27, so that its bottom edge is the same length as the sleeve band. Although the latter will generally sit lower down the arm than before, it will still rise from time to time with movement, such that you should continue to use the bicep measurement here to avoid the sleeve band snagging when you reach or stretch. Note that the overarm measurement used here is that from the shoulder to the elbow.
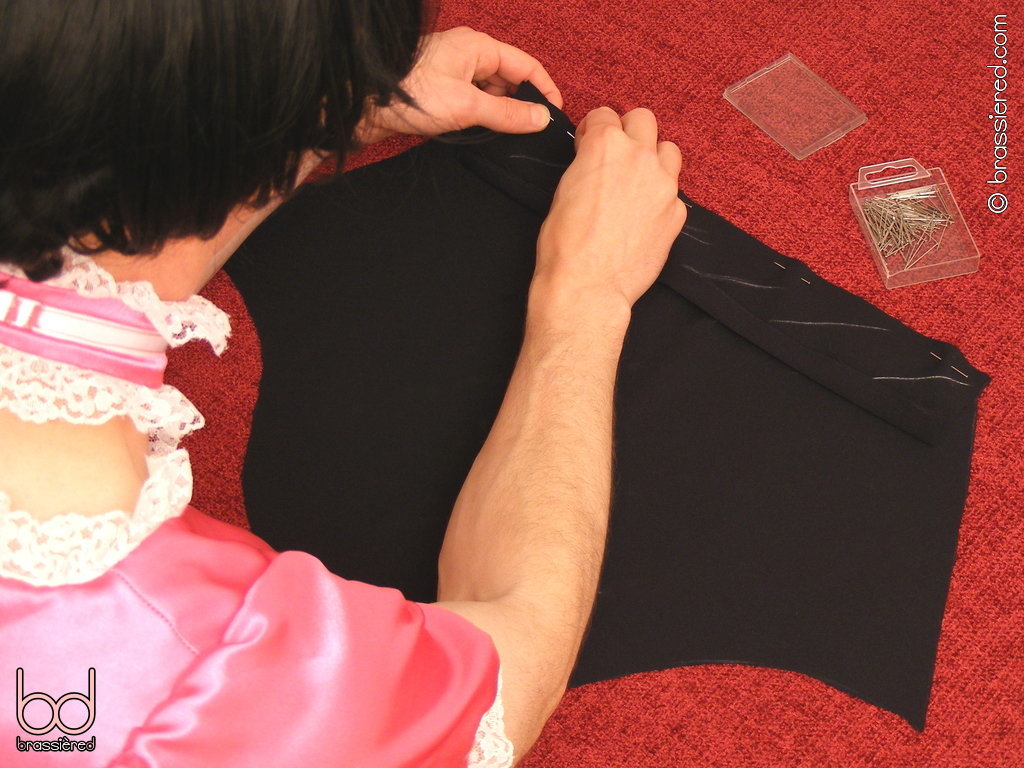
It's then simply a case of pinning, then sewing the sleeve and sleeve band together, as my husband does in Figure 12.28. He's marked one side of each piece with tailor's chalk to help him identity which side of the fabric is the “right” one when, unlike satin, both are the same. Because there's no gathering involved here, joining the two pieces is a straightforward affair, after which we continue as before.
The finished sleeve is shown in Figure 12.29, ready to be attached to the bodice.
A longer skirt
The skirts we've seen so far have been very simple - merely rectangles of fabric, gathered at the waist. For a short skirt, this approach works surprisingly well, but it's nevertheless something of a compromise, there being limits as to how much material can be bunched up before the resulting seam becomes ungainly. For a longer maid's uniform, we can do better.
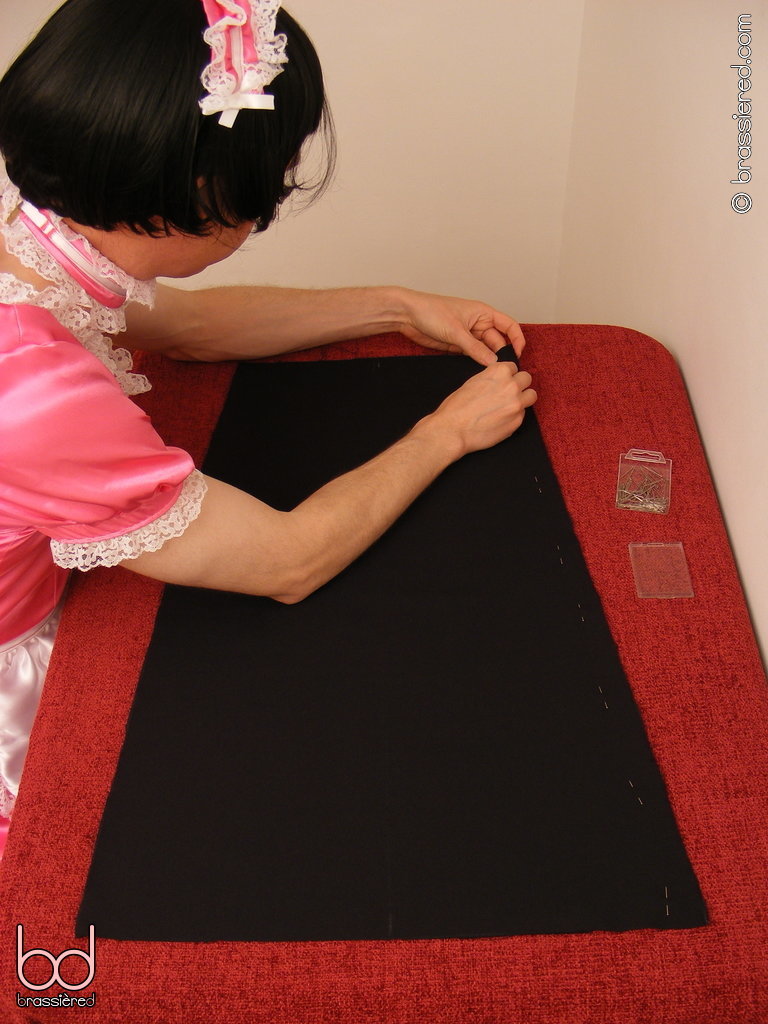
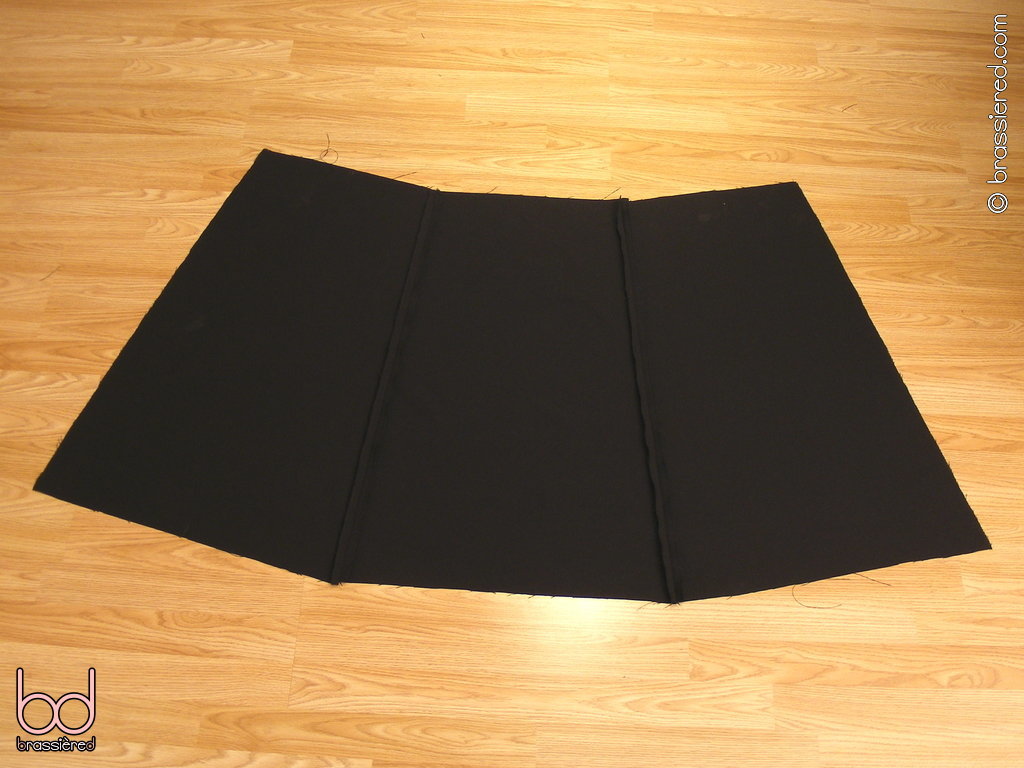
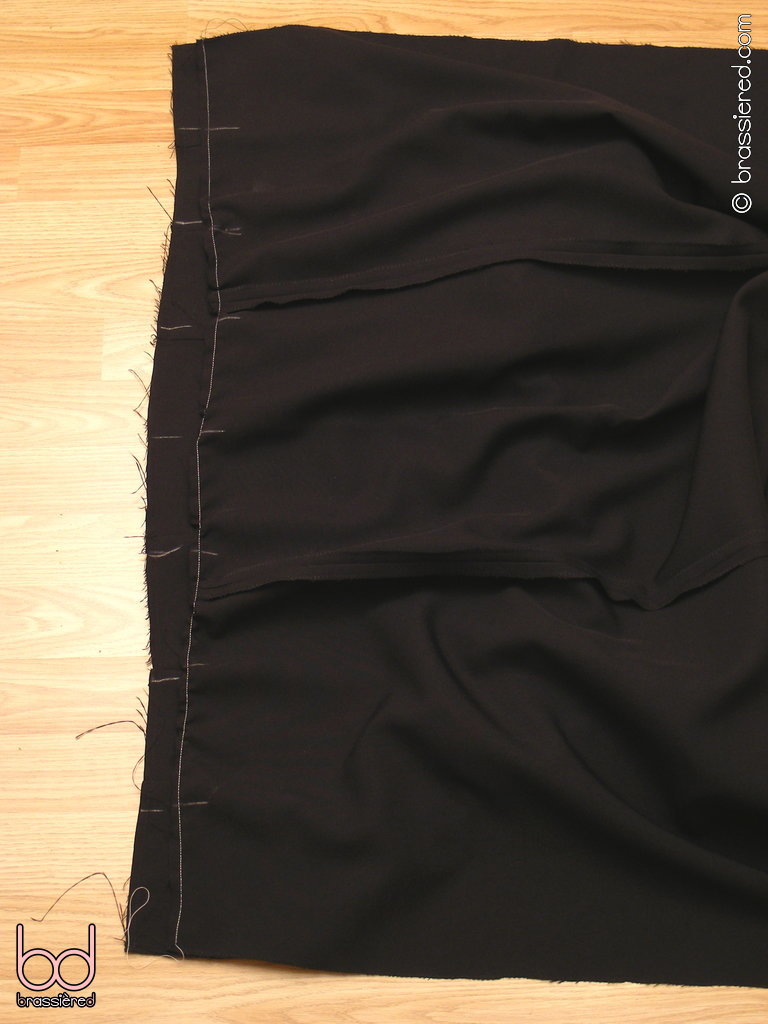
If you consider what we're trying to achieve with a skirt, you can see that, ideally, the length of material around the hem would be longer than that around the waist. Figure 12.30 shows one way of achieving this, producing three tapered sections from one strip of fabric. When arranged so the shorter edges form one line and the longer edges another, the resulting skirt has a waist that's around 100cm / 40” and a hem that's around 150cm / 60” in length, a ratio of approximately 1.5 / 1. In an ideal world, the top and bottom edges would be curved rather than straight to achieve a consistent length, but the angles involved mean the difference is only a few millimetres / fractions of an inch between the longest and shortest parts - easily absorbed in gathering and hem.
Having cut the three tapers from the strip, overlock all of their long edges. Pin together to form a single piece, with the shorter short edges forming one edge and the longer short edges forming another (Figure 12.31).
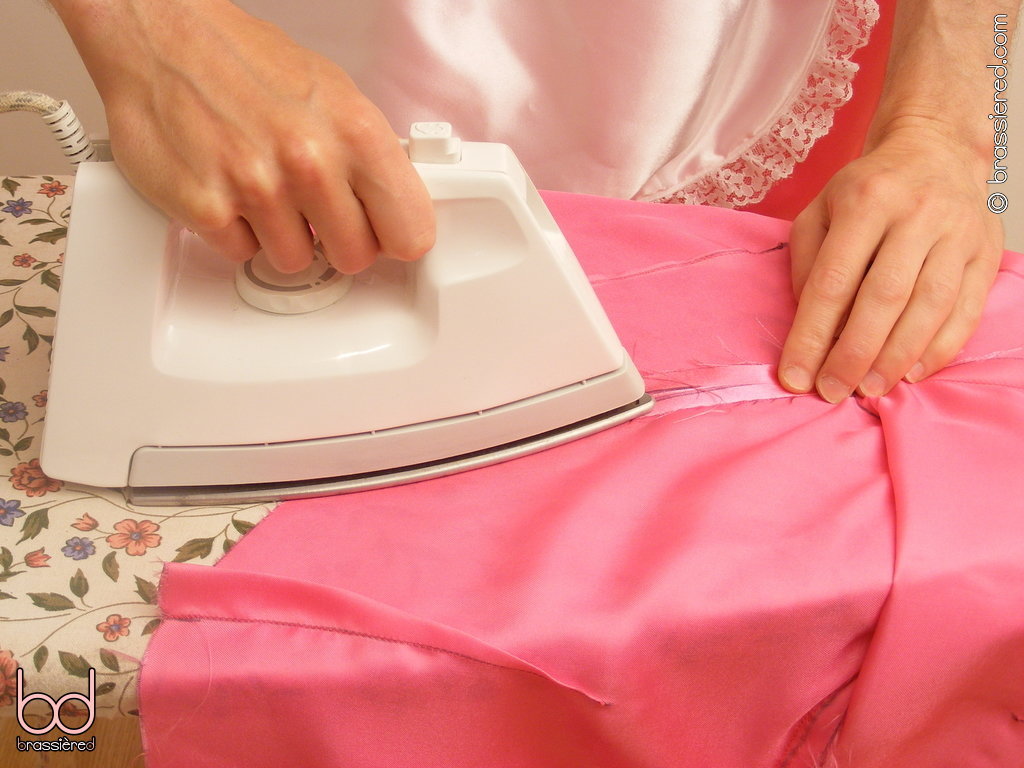
Sew the long edges together with a regular stitch along the seam allowance, then press the resulting seams flat (Figure 12.32).
The finished skirt piece is shown in Figure 12.33, ready to be attached to the bodice. Although the waist is narrower than our rectangular skirts, it still needs to be gathered - trying to match the two lengths exactly is asking for trouble!
When sewing the gathering stitches, be sure to keep the seams flat, as my husband does in Figure 12.34
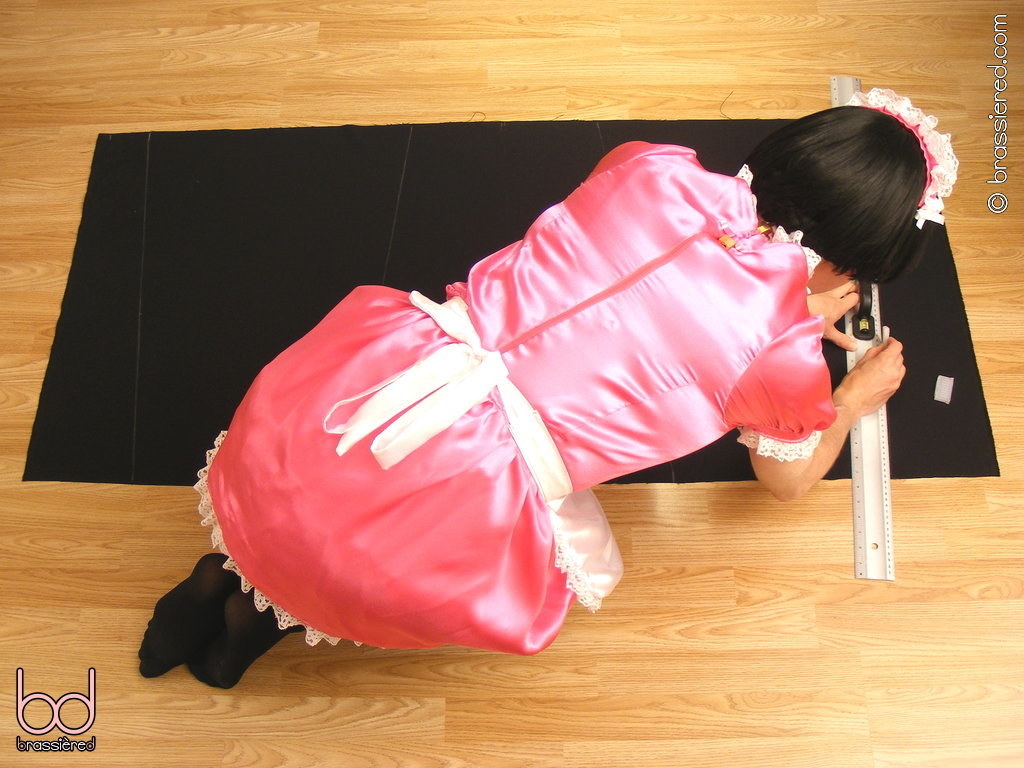
Take care to consistently position the seams of the skirt as well as the lines that mark the eighths of bodice and skirt. In Figure 12.35, my husband measures the distance from one of the seams of the skirt (below) to one of the seams of the bodice (above) after basting, going on to compare with the other side. If the two distances aren't similar, now is the time to redo things - although the apron will hide a slight difference, the maid's dress should still be as symmetrical as you can make it.
On the subject of aprons, there's nothing difficult about making a longer one - simply use bib pieces that are the length of the skirt minus 5cm / 2”, exactly as you did before. The greater weight and length of material will cause the apron to hang down slightly differently, but the effect is no less pleasing to see covering a submissive man's lap!
Sleeveless satin showpiece
My husband finds himself forced to show off his panties again in Figure 12.36, this time despite the masses of material that flare out the skirt of his sleeveless maid's uniform to a full forty five degrees. Closely following his corseted curves, the bodice has a low-cut neckline that leaves no doubt about the large breasts he's burdened with, its ruffled trim shared by his silly little apron, frilly choker and beribboned headpiece - the latter boasting huge bows to make him look all the more ludicrous. With his bright pink bra straps left as exposed as his buttocks, it'll be a wonder if he'll be able to walk past where I'm sitting without being molested, but even in my absence, he'll struggle to forget this most suggestive of outfits. Could a sissy maid dream of anything more delicious to wear while waiting for mistress to call?
A four-layered petticoat
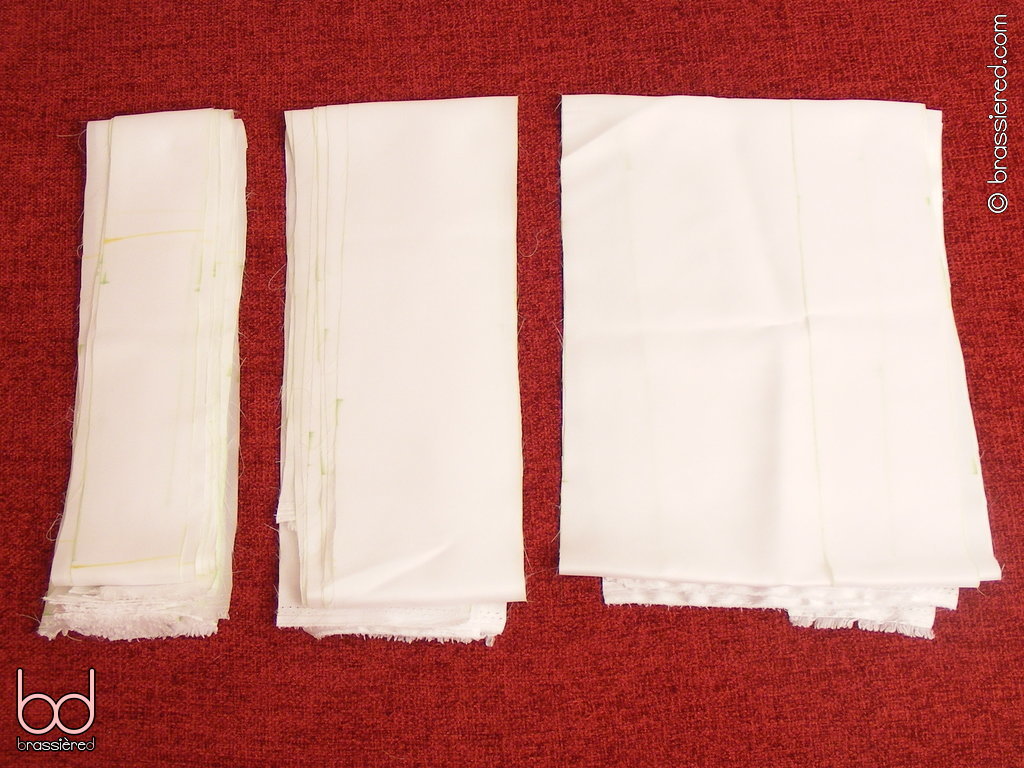
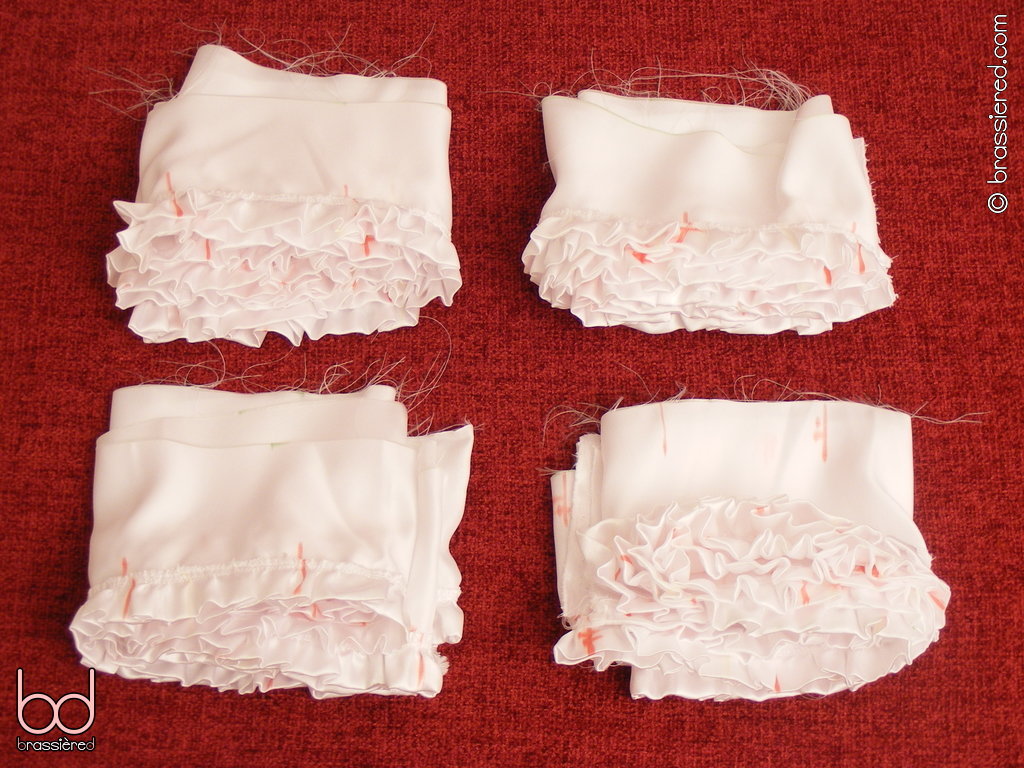
In putting together such a provocative outfit, my husband started from his panties and worked out. The petticoat is by far the most time-consuming part of the uniform to make, it being easier to alter the skirt to fit it afterwards rather than the reverse. Having been given strict instructions that the latter's hem should hang no lower than 25cm / 10” from his waist, a measurement chosen to make sure his panties would be flagrantly presented, my husband prepared the pieces shown in Figure 12.37.
As before, there are pieces for the top half, the bottom half and the ruffle. For a four-layered petticoat, we require four times as many of each, plus a separate strip for the elastic casing. To make combining the layers easier, my husband will be gathering two bottom halves onto each top half, then folding the latter in two. Consequently, the top halves are doubled in height but halved in number. Taking seam allowances into account, the finished petticoat will hang 22.5cm / 9” from his waist - 10cm / 5” from the top halves, 10cm / 5” from the bottom halves, and 2.5cm / 1” from the ruffle. The elastic casing will overlap the petticoat's top, adding no additional height to what will turn out to be a surprisingly voluminous garment for something so skimpy.
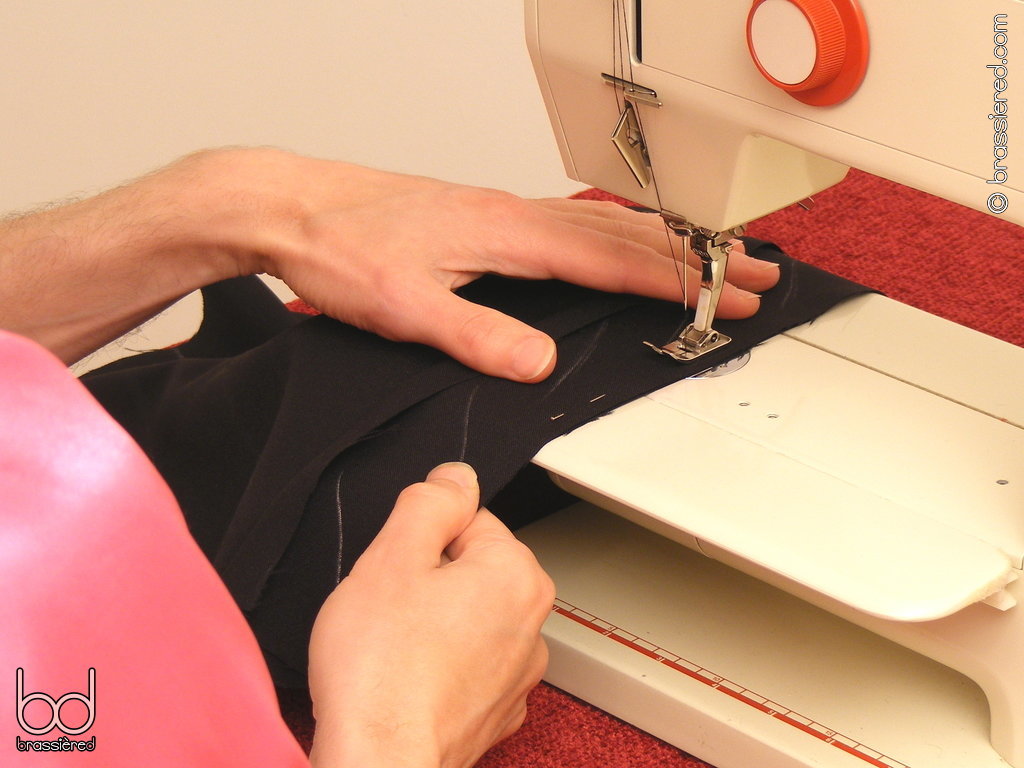
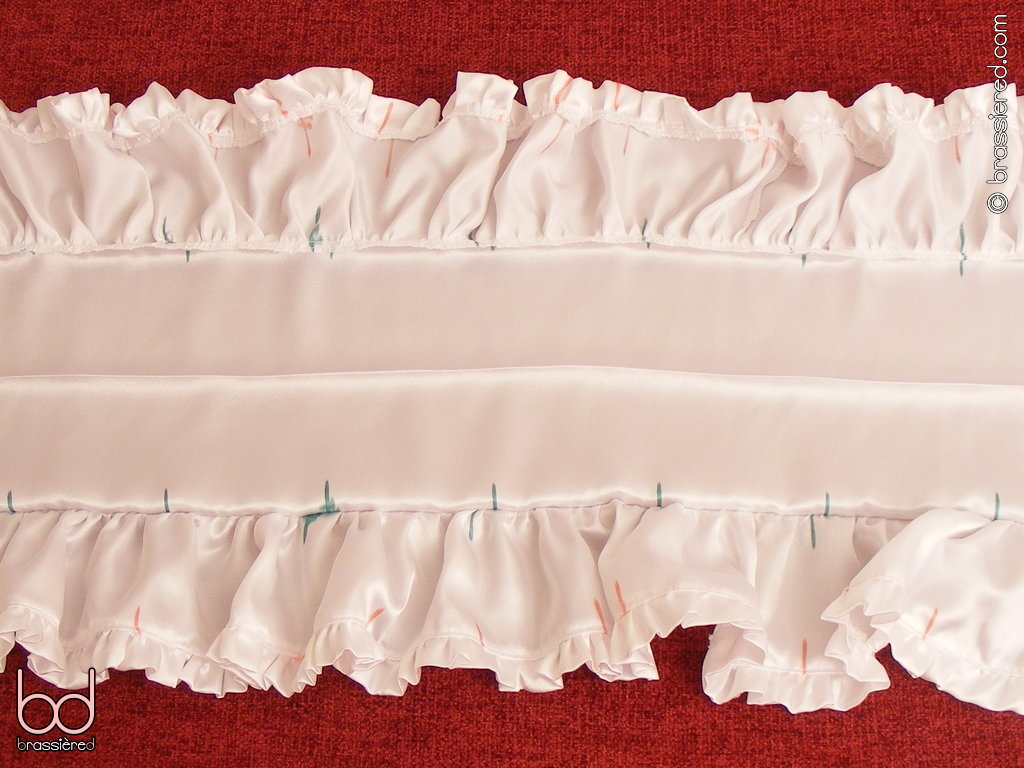
Simply cutting the necessary strips took my husband an evening, whereas adding the ruffles to the four bottom halves shown in Figure 12.38 took him four more. Slaving away at the sewing machine in the knowledge that he was slowly working his way towards an outfit that would leave him exquisitely exposed, his gathering skills had been honed to perfection by the time he had finished - yet his efforts warrant no more than a single photograph, merely the first step in putting together the petticoat. If you're looking to occupy your maid for a substantial length of time, whether as a punishment or simply to keep him out of mischief, have him put together such a garment - the seemingly never-ending gathering works a treat!
My sissy maid still has more gathering ahead of him, however, with each of the top halves needing two bottom halves to be attached to it. Before my husband does so, he folds each of the top halves in two along their length, pressing as shown in Figure 12.39 so as to permanently mark their centre line. He then gathers the bottom halves in such a way as to put the two right sides on the same side when the top half is folded, something which sees the wrong side of one of them showing when the strip is opened out.
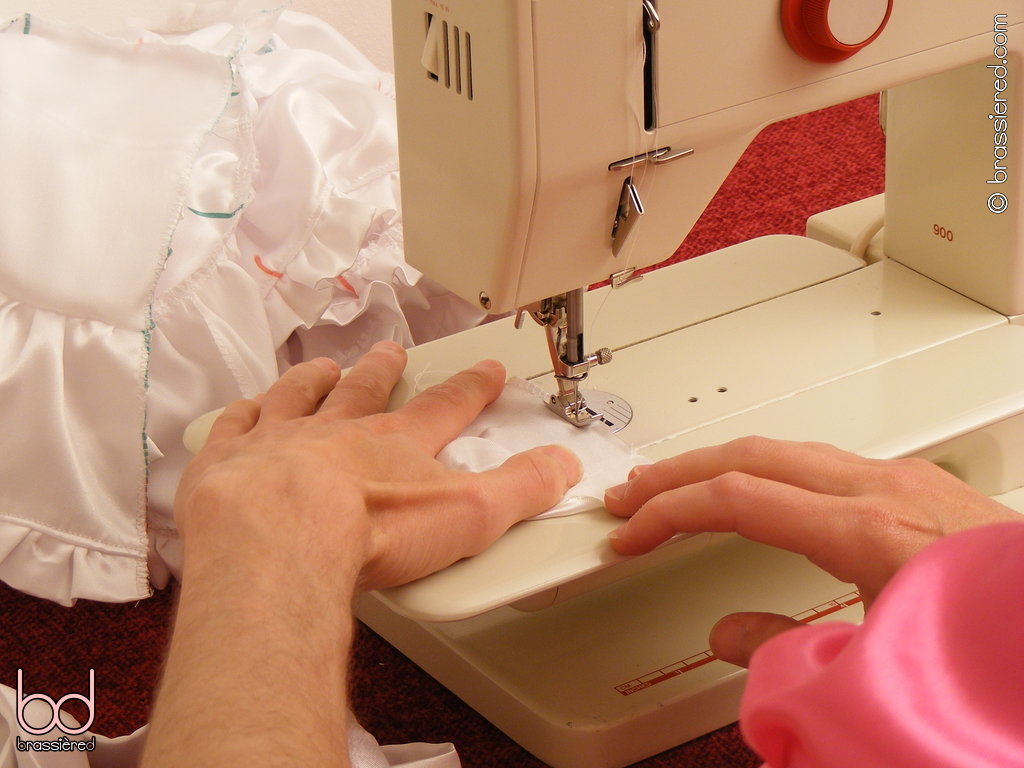
From there, trim the selvedges and any ungathered material from the short edges of the two resulting strips as you did before, taking care to make them the same length. With the material opened out, overlock the short edges from ruffle to ruffle, as my husband does in Figure 12.40.
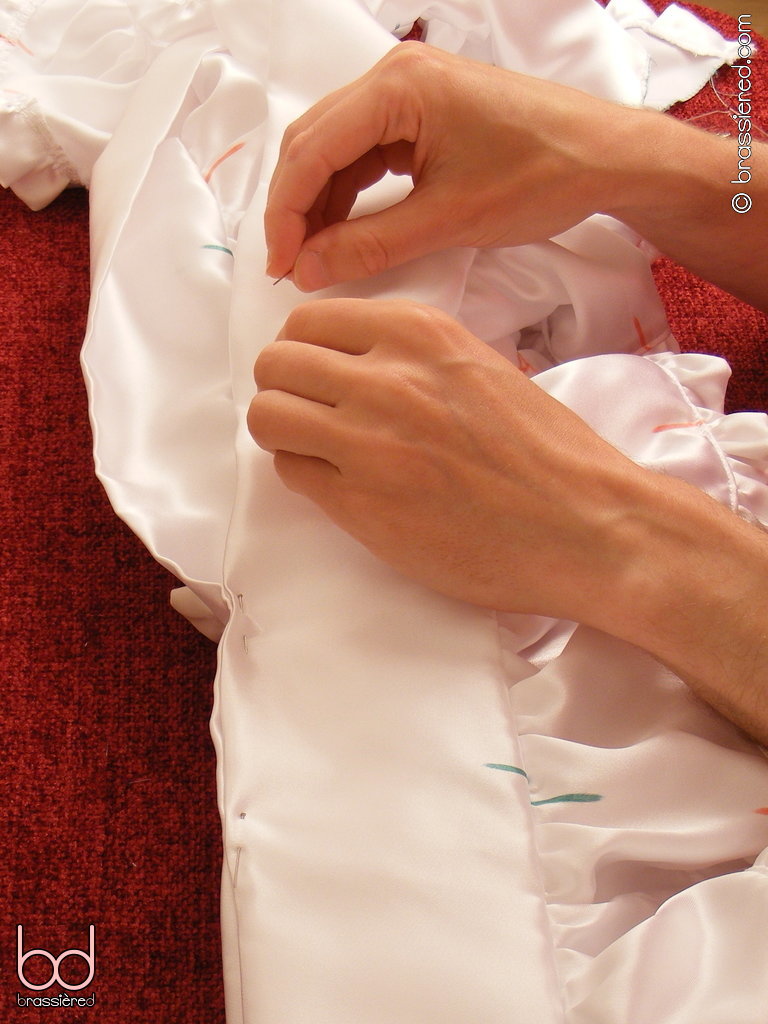
Pin the two strips together along their folded long edges, then sew with a regular stitch (Figure 12.41).
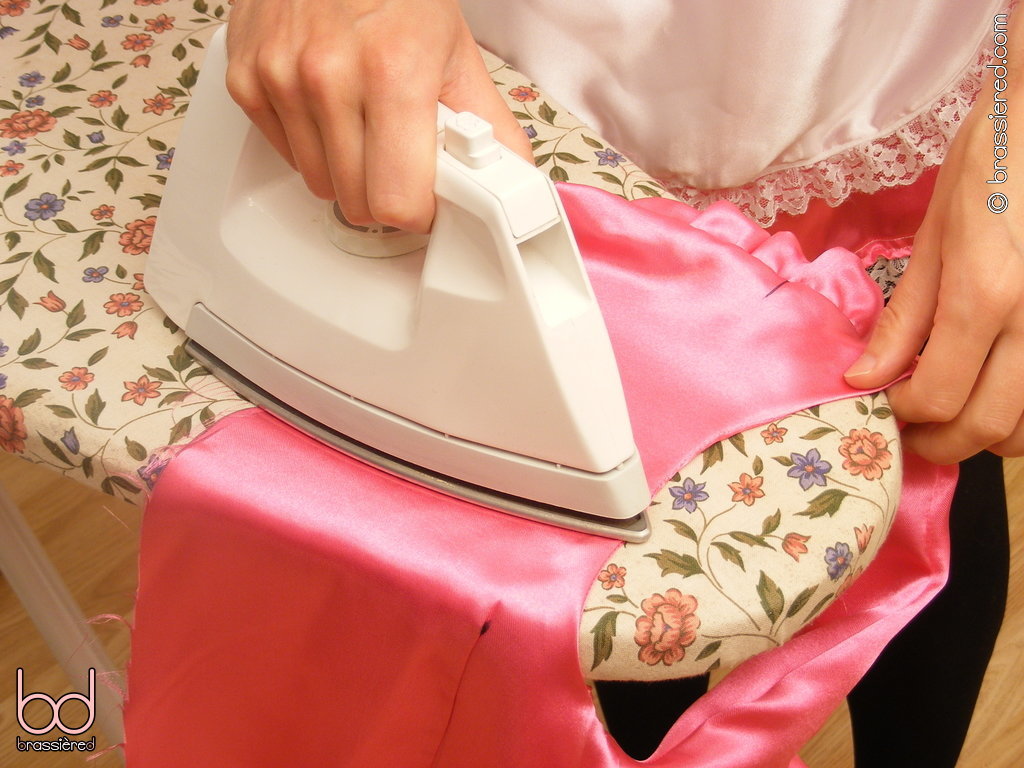
Fold the casing strip in half along its length and press. Having done so, open it out and fold each of the raw edges in to the middle and press again, as my husband does in Figure 12.42. Finally, press the centre fold again. The result is a strip of satin that's 2.5cm / 1” in height, whose raw edges are hidden in its central vee. Cut the casing to the same length as the top of the petticoat, then temporarily unfold to overlock its short edges.
Insert the top of the petticoat into the vee, aligning the short edges. Pin and then sew together with a regular stitch close to the bottom edge of the elastic casing. In Figure 12.43, we can see how the result will allow plenty of room for the elastic to be inserted, just as before. Check the other side of the petticoat to make sure the stitching passes through everything it should - by this stage, your sewing should be proficient enough to make this a mere formality.
The finished petticoat strip is shown in Figure 12.44. My husband has probably put eighteen hours of work into getting to this stage, spending the best part of a week of evenings at the sewing machine, but his labours have not been in vain. Already, we can see how the layers of ruffles will flare out a skirt in the most exaggerated of ways, but the satin frills will be packed even closer by the time my sissy maid feels them bouncing around the tops of his thighs - there's still elastic to come.
Starting with the innermost of the layers, pin and sew the side edges together in pairs (Figure 12.45). You won't be able to start your stitching right at the top each time, but that's not a problem - simply start as close to the bottom of the elastic casing as you can. Having done so for all four layers, come back to sew any gap, then sew the very top of the elastic casing as before, making sure to leave enough of an opening to thread the elastic through.
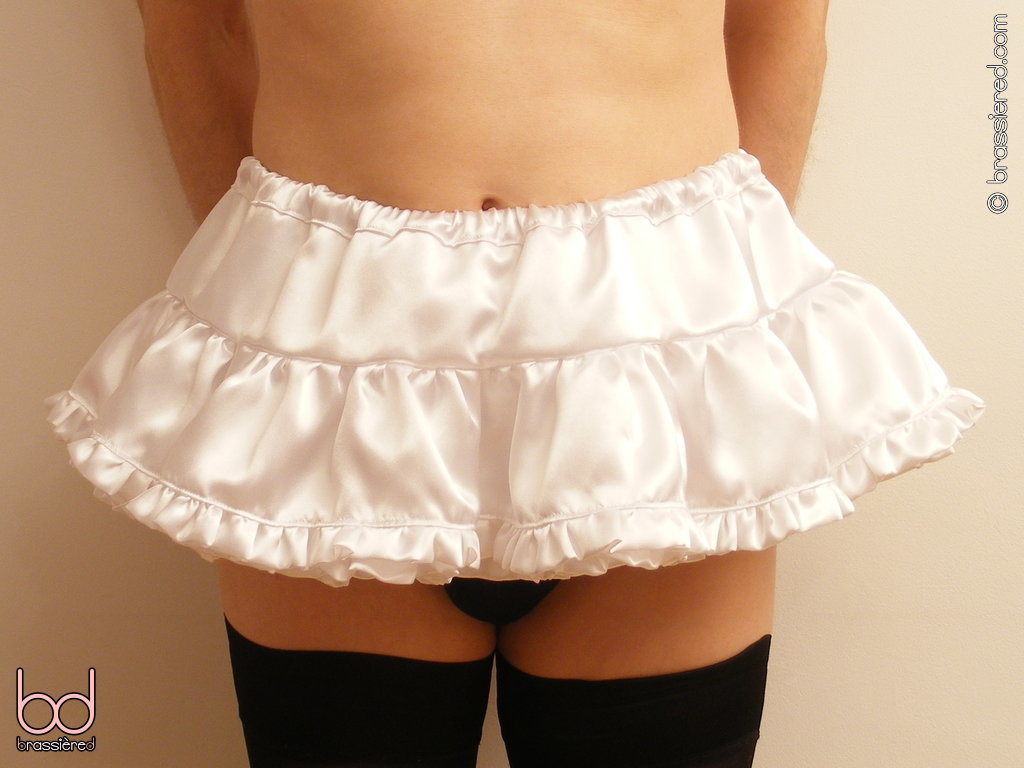
The finished petticoat is shown in Figure 12.46. If you compare it to the one from the previous chapter, you can see how the design is similar, albeit with this one being far short and bulkier. There's no reason why a similar approach couldn't be used to make a petticoat of a different length, or one with even more layers, it only requiring a maid's time - something of which there's lots when a man finds himself locked in a frilly uniform for the amusement of the woman he serves.
A busty bodice
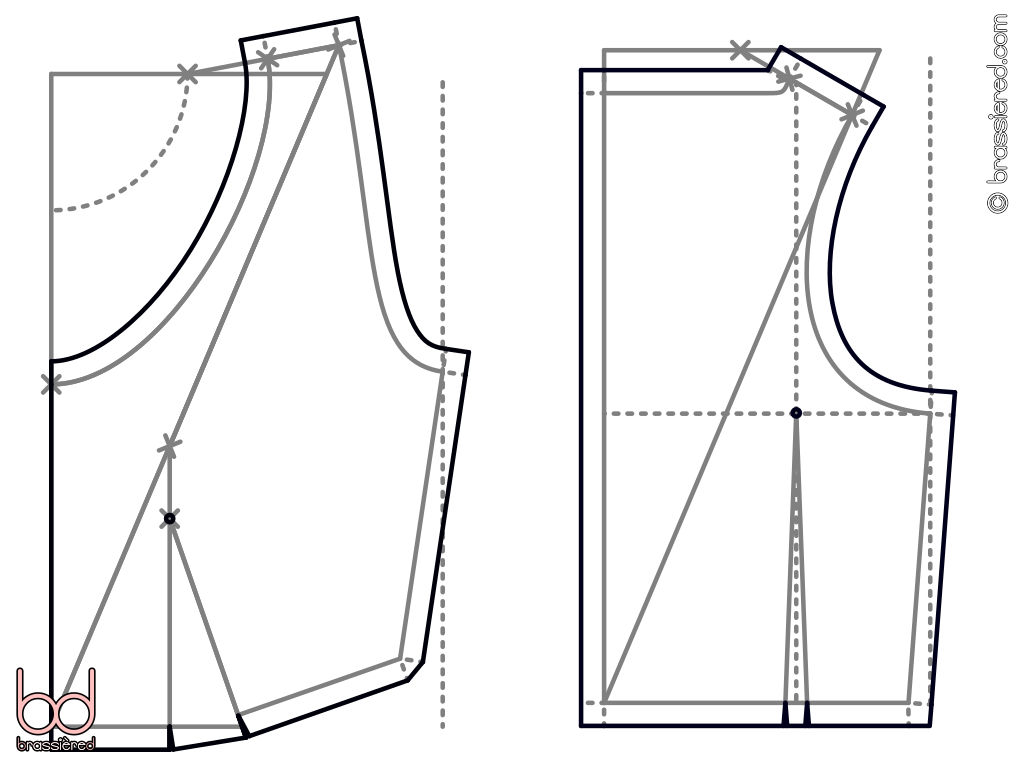
With his tightly laced corset taking a couple of inches off his waist and his heavily padded bra adding to his bust, the figure my husband flaunts in Figure 12.47 is very different to the one we saw him measuring in Chapter 2. That makes it necessary to draft a new pattern, taking into account how his foundation garments have affected his body and my desire for a more daring neckline.
My husband's larger breasts and narrower waist change the pattern for the front bodice significantly, not only affecting the slope of the shoulder and armhole, but requiring a bigger dart as well - the latter's apex dropped by twice as much as before. The bottom of the neckline is based on rather more of the neck to bust measurement, a decision which is due course will leave my husband with only the dress's gathered trim with which to hide the lace of his bra. For reasons we'll see shortly, the shoulder length remains generous, whereas the back bodice piece is relatively unchanged - note how its darts are comparatively narrower, since the bulk of the difference between waist and bust is at the front.
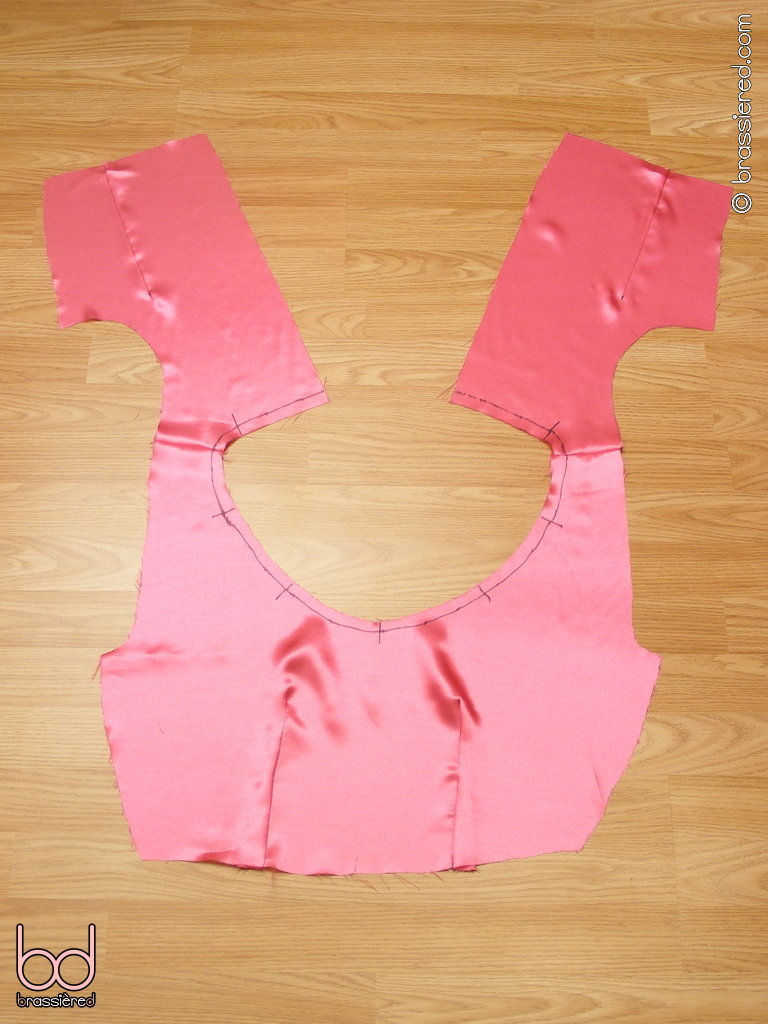
For a sleeveless bodice, prepare the pieces as before, but sew them together only by their shoulders, as shown in Figure 12.49. Because we'll be using a ruffle as a trim rather than lace, the neckline is marked into eighths, to be aligned with similar division on a strip of folded fabric. There's nothing new about gathering the ruffle here, save for doing so round a curve - otherwise, follow exactly the same procedure as you did for the petticoat, basting then stitching the trim in place along your seam allowance. Note how the ends of the ruffle are folded in towards the edge of the bodice, just like before.
Don't trim the raw edge as you might be tempted to do at this stage, but simply attach the second waistcoat as you would usually - right sides together, seams and marks aligned. Having done so, pin together the armholes, in so far as the open curves can be described as such, as shown in Figure 12.50. Sew together with a regular stitch along the seam allowance, but don't continue down to what will become the side seams of the bodice - leave these unstitched for now.
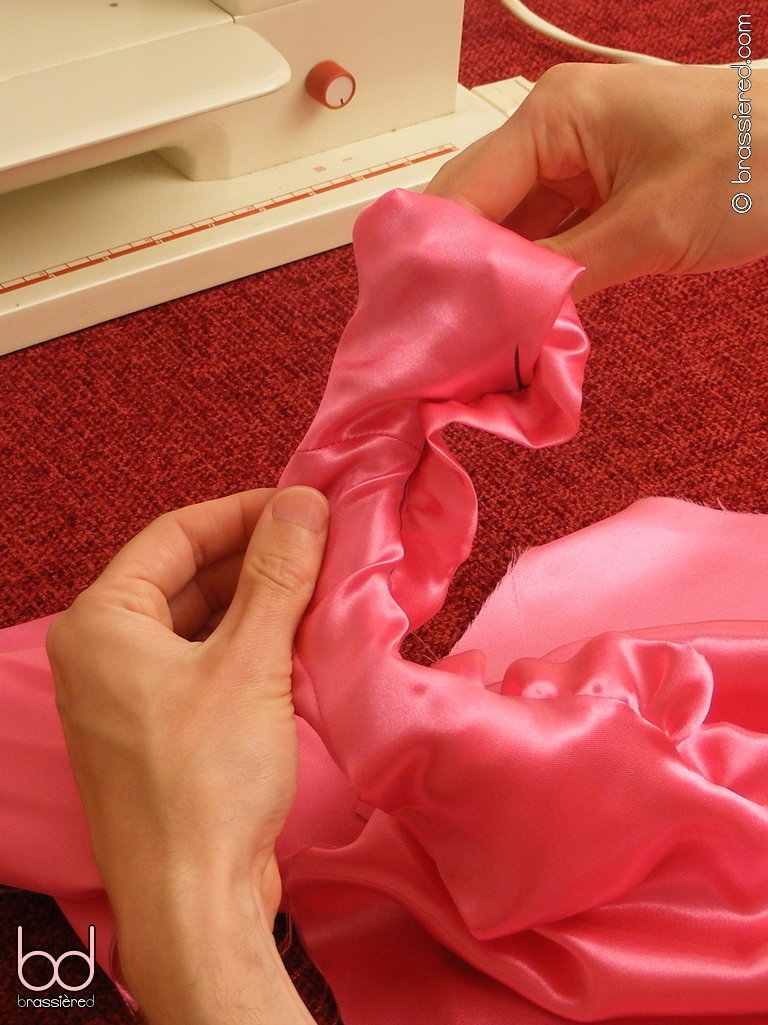
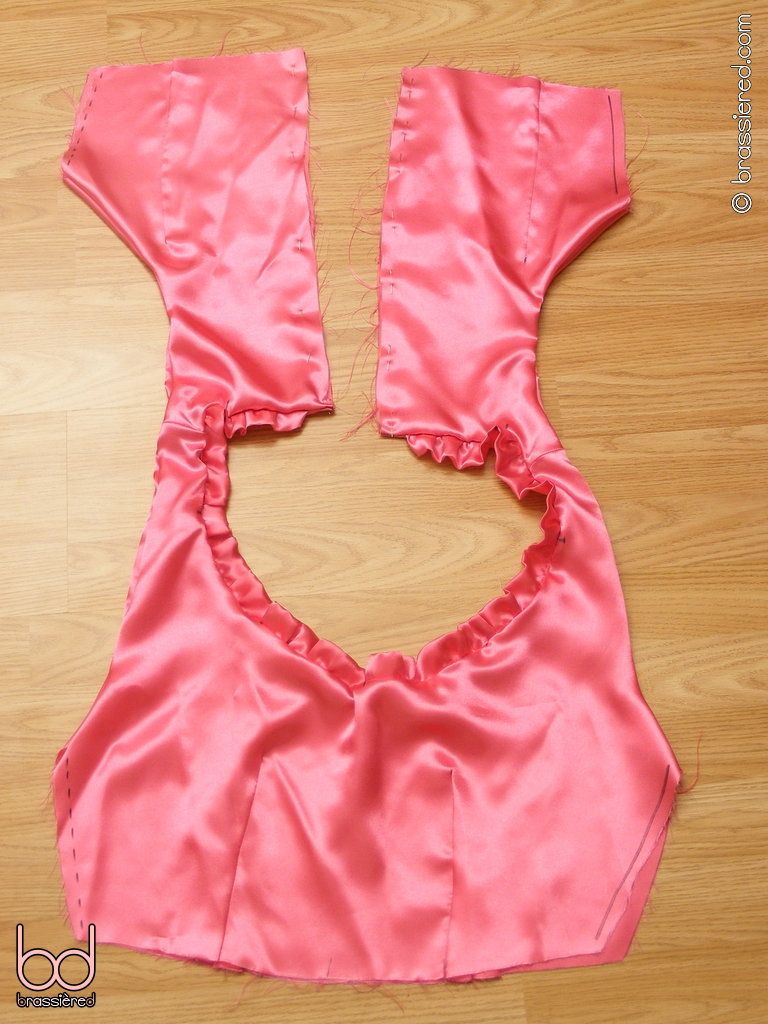
Believe it or not, it's now possible to turn the entire bodice right side out, albeit one half at a time. Doing so requires the bodice back pieces to be pulled through the corresponding shoulders, which is why we left these reasonably wide when drafting our pattern. The end result is shown in Figure 12.51, where my husband has marked the side seams of the bodice. These need to be stitched together, the dotted line at the top left to the dotted line at the bottom left, the solid line at the top right to the solid line at the bottom right, in a way that won't expose any of the seams when we've finished. Again, that might seem impossible at first glance, especially if you're thinking of sewing through four layers of fabric, but opening out the two waistcoats will show you that it's surprisingly straightforward.
Pin the two parts of the bodice together with their right sides touching and the lines he marked earlier aligned. In Figure 12.52, my husband has forgotten to press the armhole seam open first, but otherwise he's on the right track.
It's then simply a case of sewing the side seam from one edge to the other, using a regular stitch along the seam allowance. In Figure 12.53, both the top and bottom of the material will in due course come together at the waist of the bodice - once again, something that will make more sense when you have your own in your hands. A less forgetful maid would ensure the both sets of armhole seams stayed flat as he sewed over them.
With the bodice still open, press the side seams open as my husband remembers to do in Figure 12.54.
Finally, press the armholes as shown in Figure 12.55. Having done so, you can continue as before, sewing together and overlocking the remaining edges.
The finished bodice is shown in Figure 12.56. Despite its lack of sleeves and the use of ruffle rather than lace, it's still similar to the one we prepared in Chapter 6, allowing a skirt and zipper to be attached exactly as before. Take a moment to try it on for size first, especially if you're using a new pattern.
A full circle skirt
If you've already made a full petticoat, you'll realised that the skirts we've seen so far won't suffice - the four-layered affair flares out to such an extent that any skirt worn with it needs far more in the way of material too. Indeed, when my husband measured around the many ruffles tickling his thighs, he found that the bottom of the petticoat was 150cm / 60” in circumference, with the hem of his skirt needing to be around twice in order to have the wave the waves of fabric one expects from such an outfit. Nevertheless, his waist won't take much more in the way of gathering, with the corset that I want my husband to wear with this uniform making it even narrower!
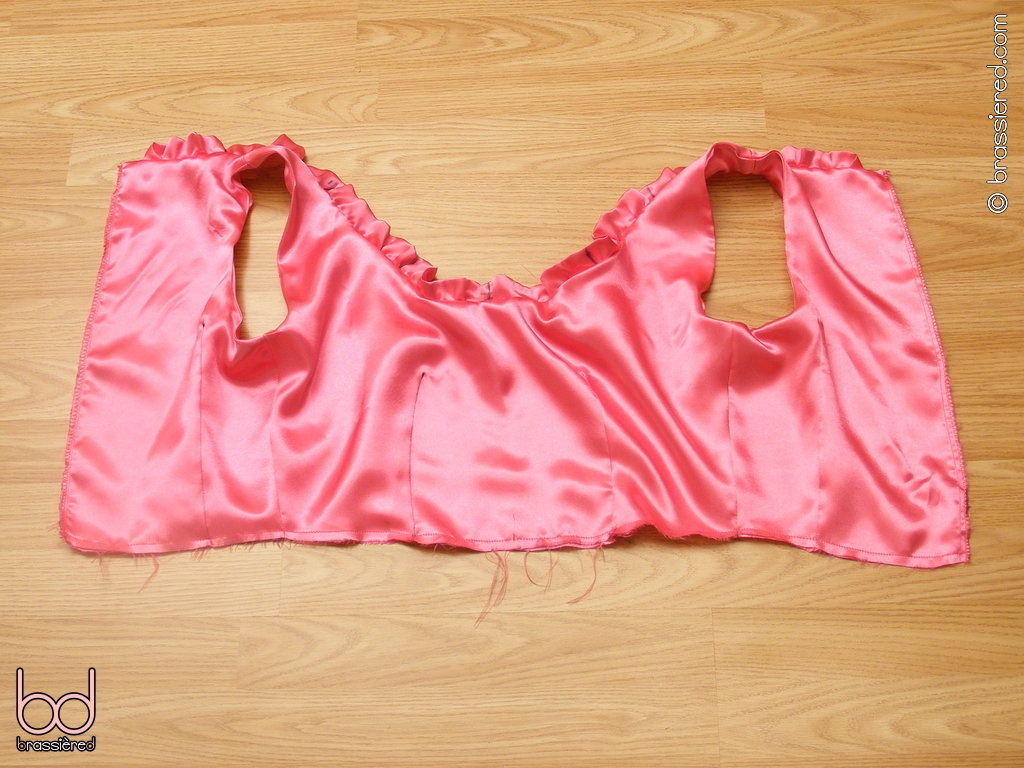
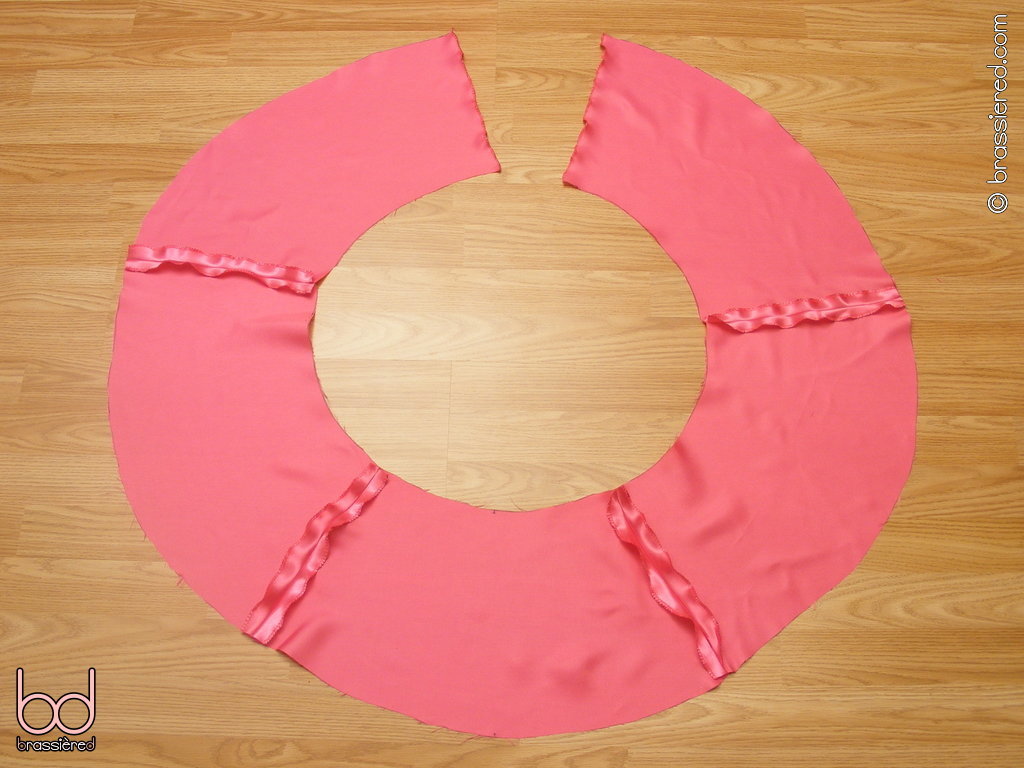
Figure 12.57 shows a solution to this problem, sewing together five separate pieces to create an almost full circle of material. Its inner circumference is approximately 150cm / 60”, which allows it to be gathered exactly as before, whereas its outer circumference is approximately 300cm / 120”, providing the amount of material the petticoats need. As before, my husband has overlocked all of the side edges before stitching the pieces together, pressing the resulting seams open. The only difference is that both hem and waist now curve, but the material still remains reasonably straight over the kind of distances you'll be gathering in any one go. It's merely more of the same, albeit in a different way, edges to be pinned, basted and stitched - either to the bodice, or to a length of trim, in this case requiring four 150cm / 60” strips to make a sufficiently long ruffle.
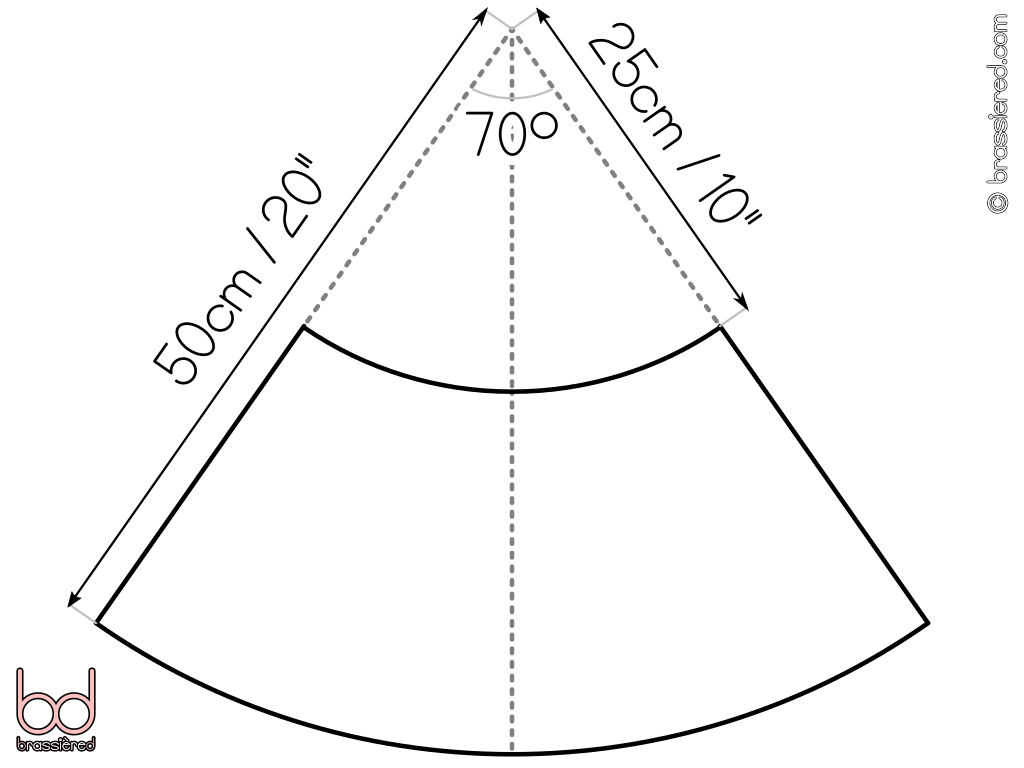
Figuring out the formula was no mean feat for my husband, but the calculations aren't actually that difficult - especially if you want the hem to be twice the circumference of the waist, where you merely need two circles, one whose radius is the desired length of your skirt, the other being twice that. Noting that circumference = 3.14 * radius * total angle / 180, you can then plug in numbers until you find something that works - in this case, a radius of 25cm / 10” and five 70° angles coming to slightly over 150cm / 60”, the extra being absorbed by the seams. Because everything is being gathered, we don't need to be too exact, simply requiring an easy to draw approximation.
A skimpy apron
After the work involved in the petticoat and maid's dress, the skimpy little apron is no more than afterthought. Scaling everything down, the bib pieces become 30cm / 12” by 20cm / 8”, their corners a 7.5cm / 3” curve. We've already seen how a ruffle can be used as trim, with a single 150cm / 60” strip being more than sufficient here. When gathering the bib onto the waistband, reduce the former's top to 15cm / 6”.
The choker and headpiece similarly requiring nothing the way of new skills, being something you should be able to easily throw together by now. All that's left is to give everything a quick wash, and the sleeveless satin showpiece is ready to live up to its name - presenting your panties for your mistress's pleasure!