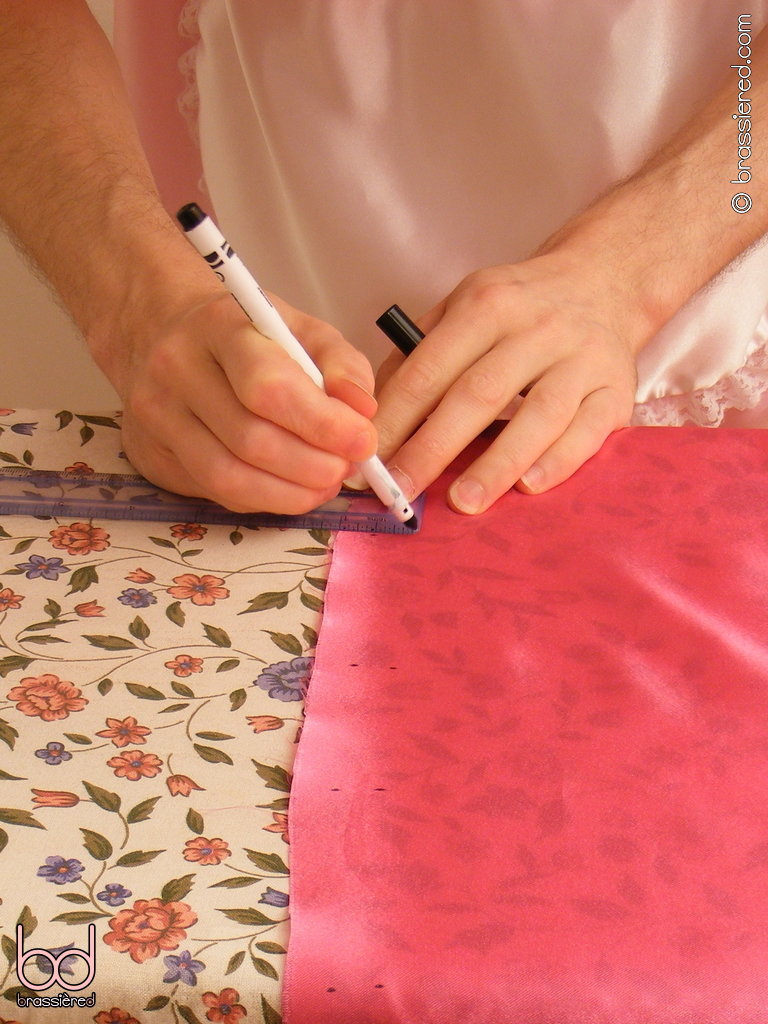
Fitting the zipper
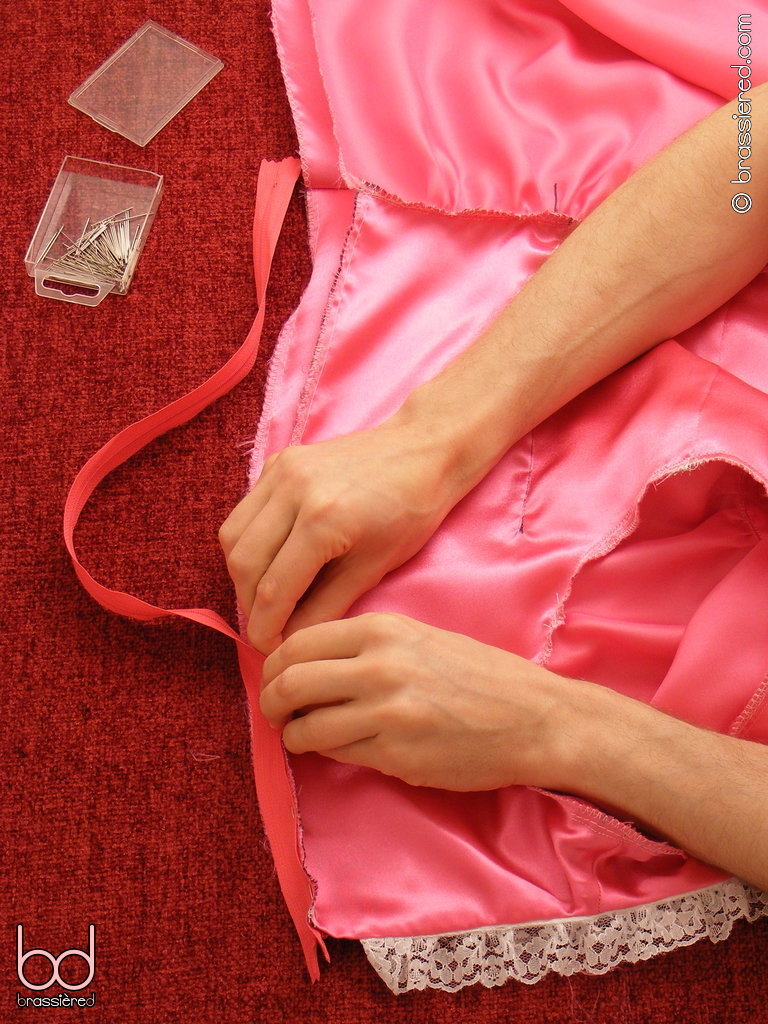
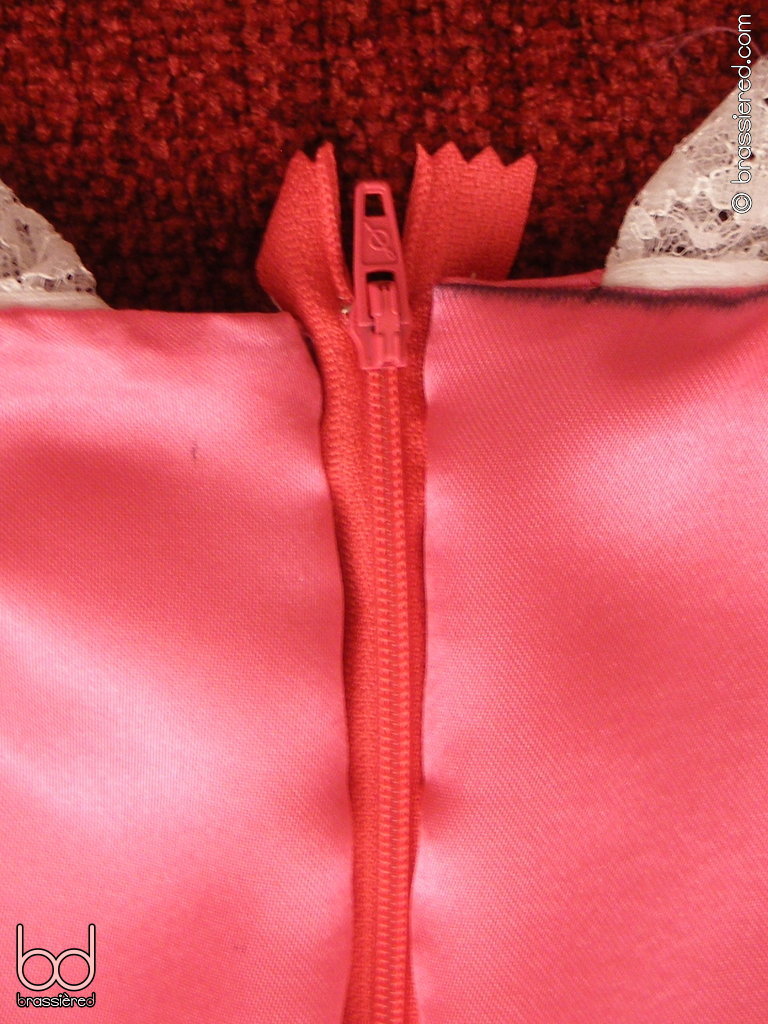
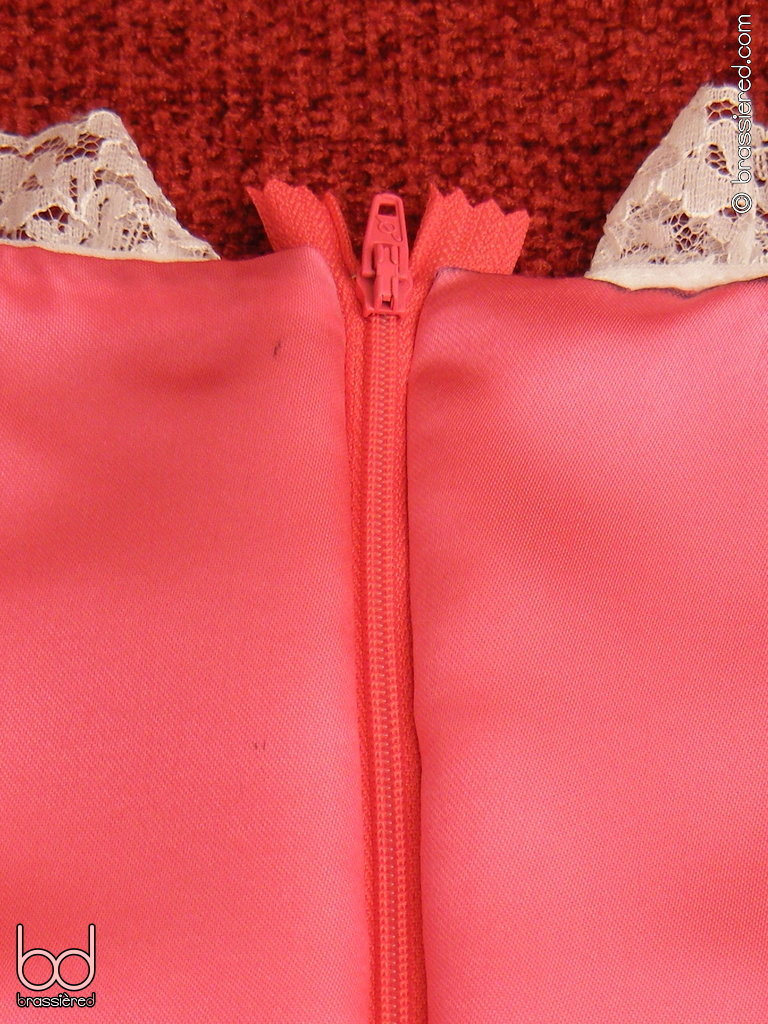
With the dress inside out, so that the lace-trimmed bands of its sleeves are touching, begin by pinning the zipper to the overlocked edges of the material, folding the latter over by your seam allowance in such a way that the zipper's teeth touch what will be the outside of the dress. Figure 8.1 illustrates this, with the inside of the dress being visible. Position the top of the zipper so that the open end of its track is aligned with the very top of the dress, leaving two loose tabs - we'll deal with these in due course.
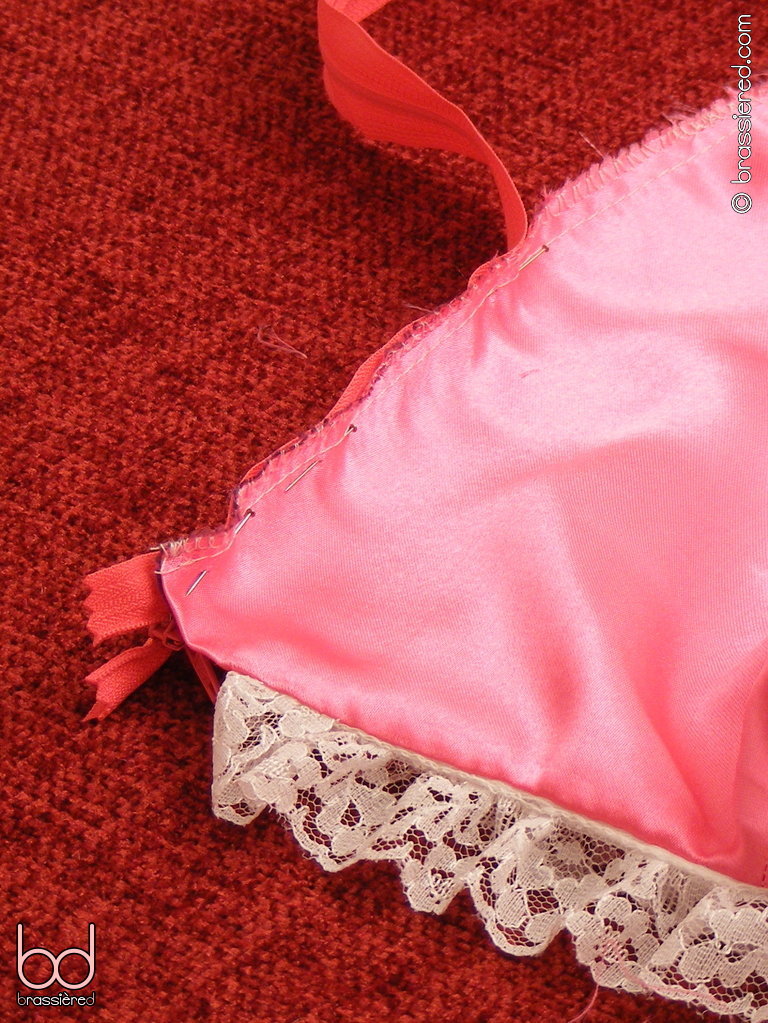
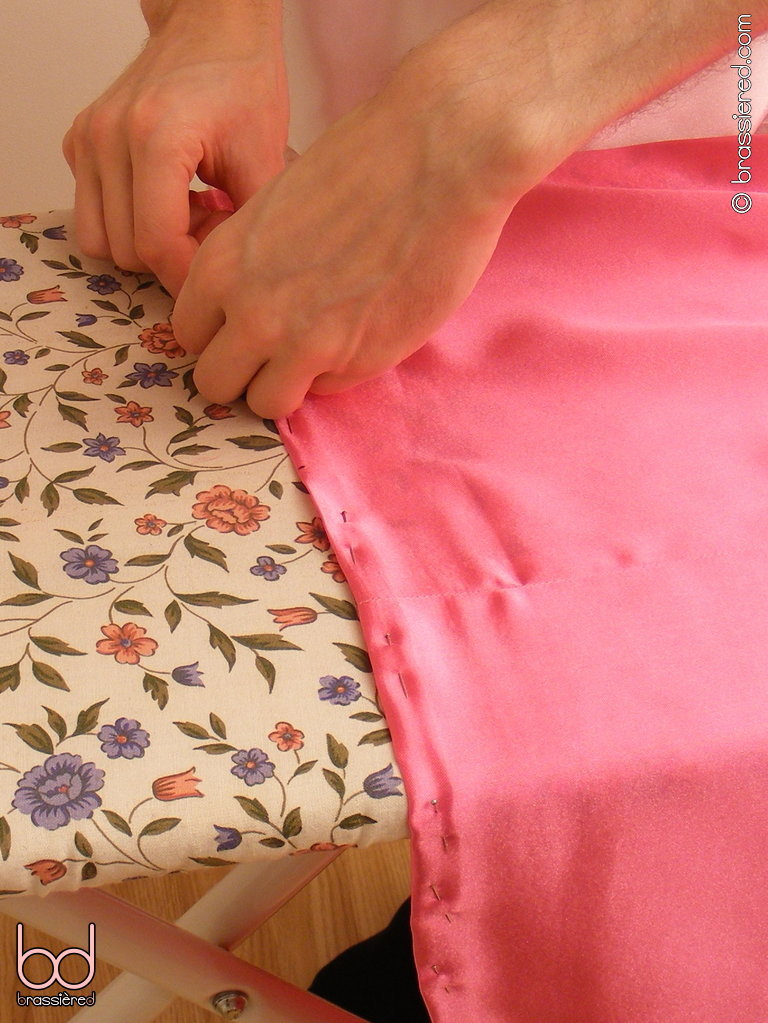
Do so on both sides, putting the pins so they point towards the top of the dress, their heads on the fabric side, not that with the zipper. Figure 8.2 shows the zipper pinned in place.
If you temporarily turn the dress right side out, you should be able to see how the zipper will work - as Figure 8.3 illustrates, the overlocked seam is folded back inside the dress, concealing the edge of the zipper.
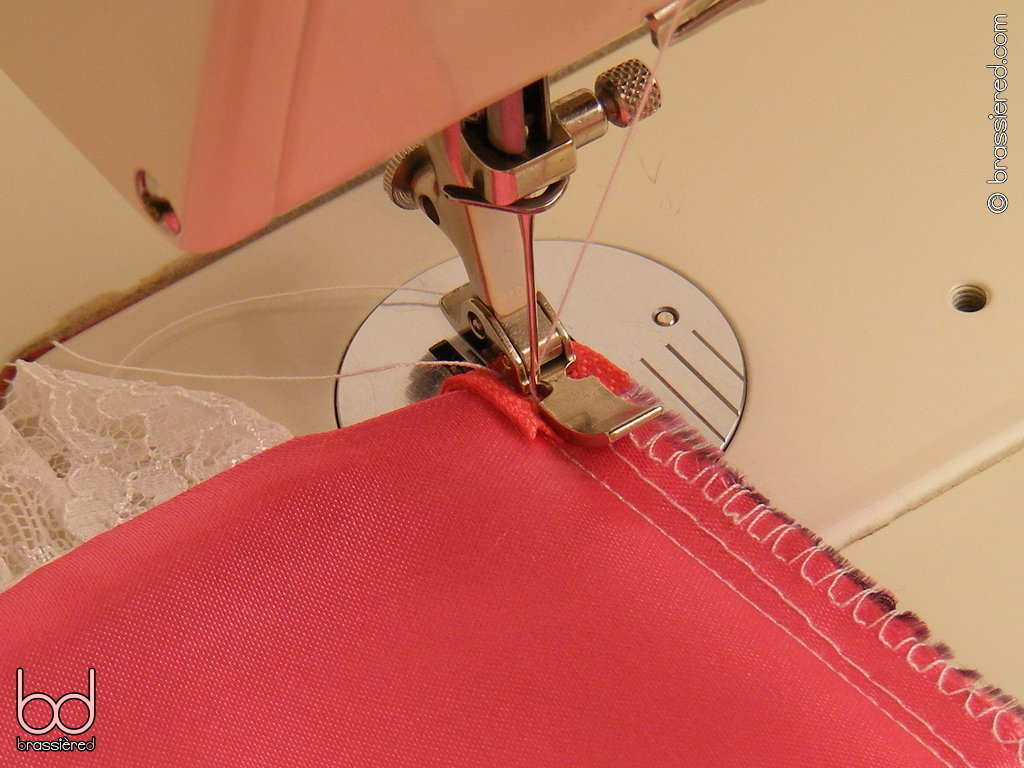
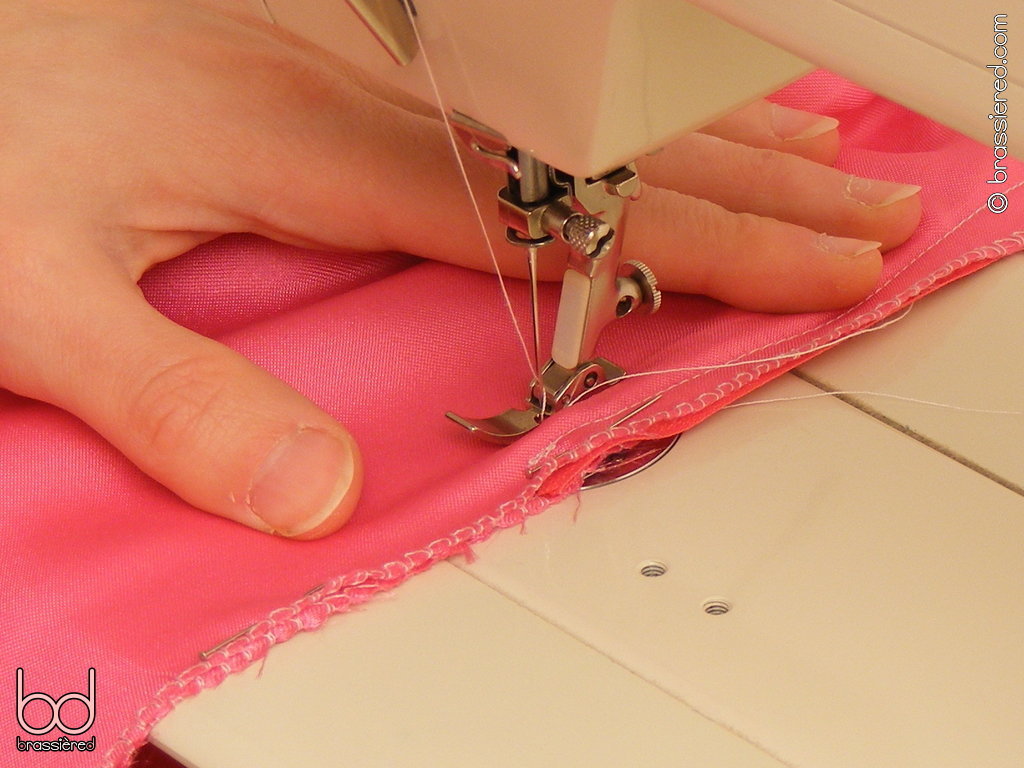
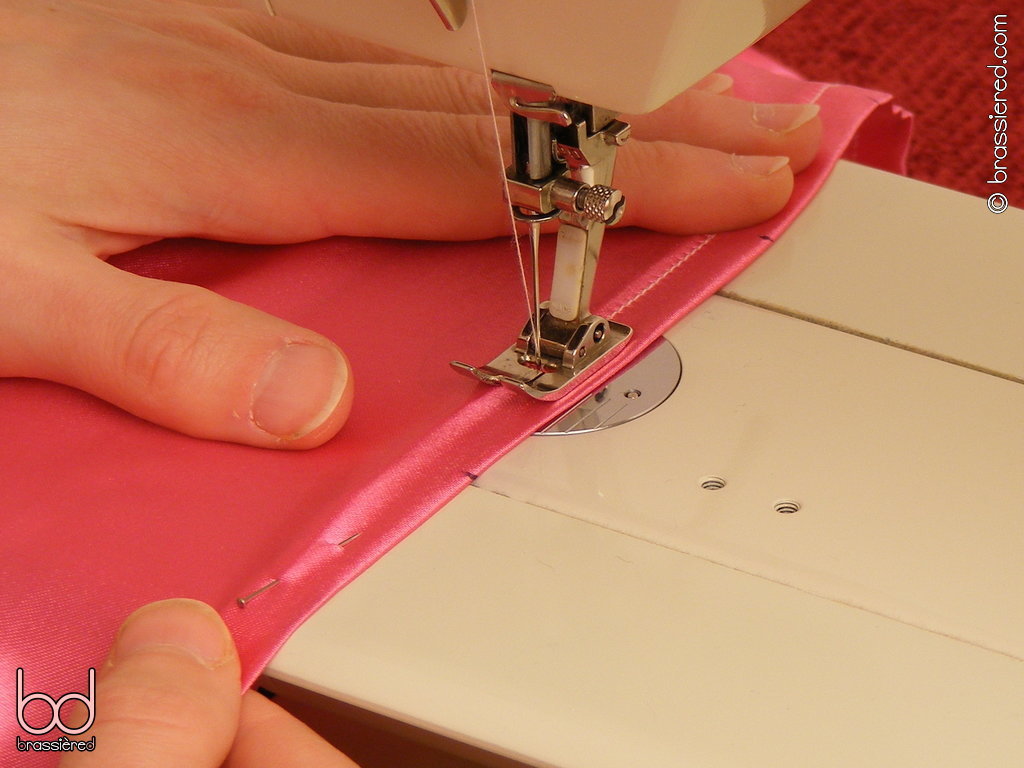
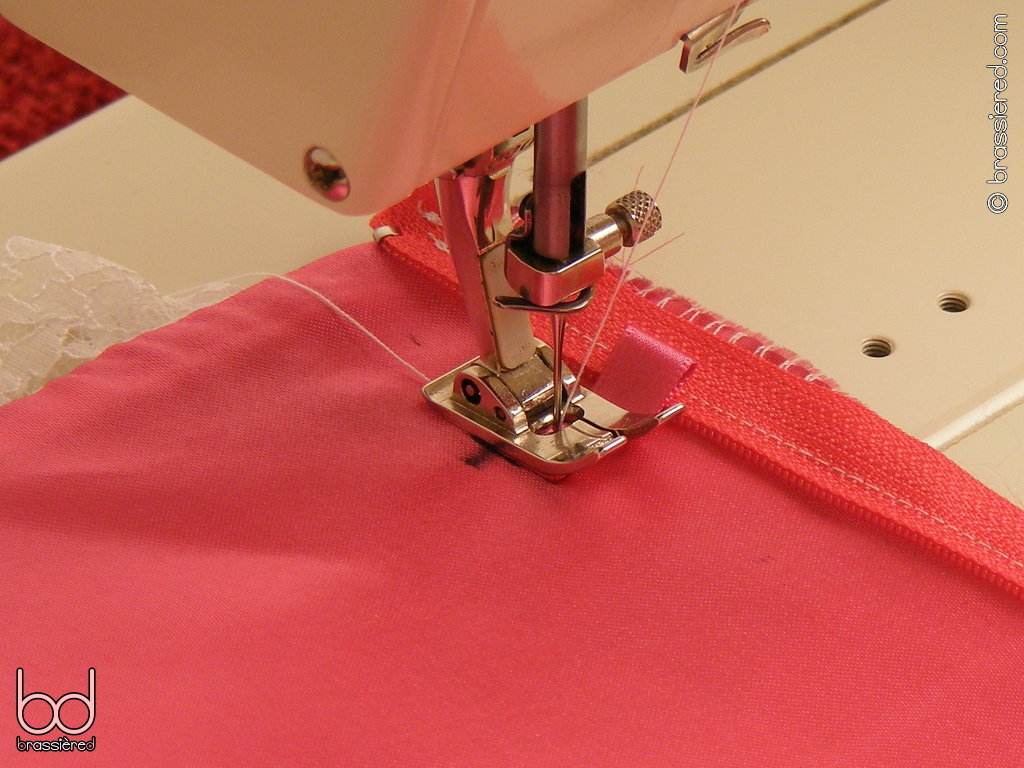
We now simply need to sew the two together. If you try doing so with a regular presser foot, however, you'll run into a problem - too much pressure is put on the teeth of the zipper, preventing the fabric from moving as you sew. To avoid this, you'll need to use your sewing machine's zipper foot - one that has small holes on either side to allow the needle to sew close to its edge, the latter running alongside the teeth of the zipper. Depending on the design of your sewing machine, there may be a setting to move the needle across, or you may need to adjust the foot itself, unscrewing and sliding it into position. Do whatever you need to do to get the needle on its left.
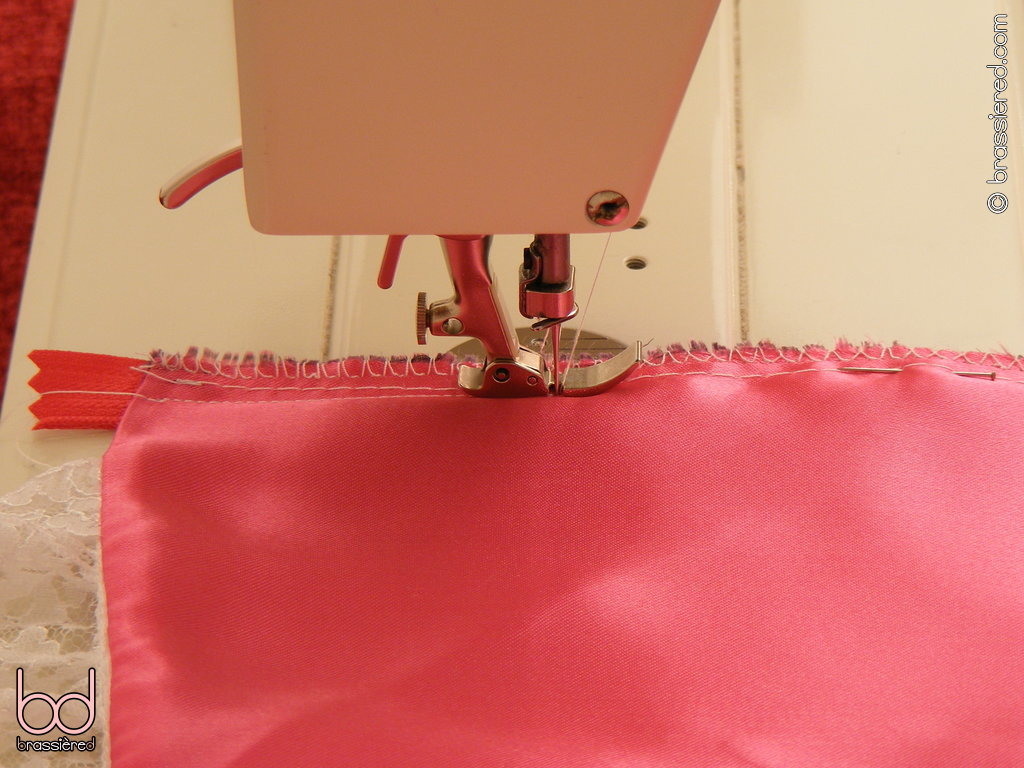
Before beginning to sew, pull the zipper all the way down. It should now be straightforward to run one side through the machine, starting at the top and working down. In Figure 8.4, the inside of the dress is on top, with the zipper beneath. The needle is positioned to the left of the foot, with the teeth of the zipper running immediately alongside. Note the position of the regular stitch compared to the basting and overlocking of the bodice, and how the pin can be easily removed thanks to being on the inside of the dress.
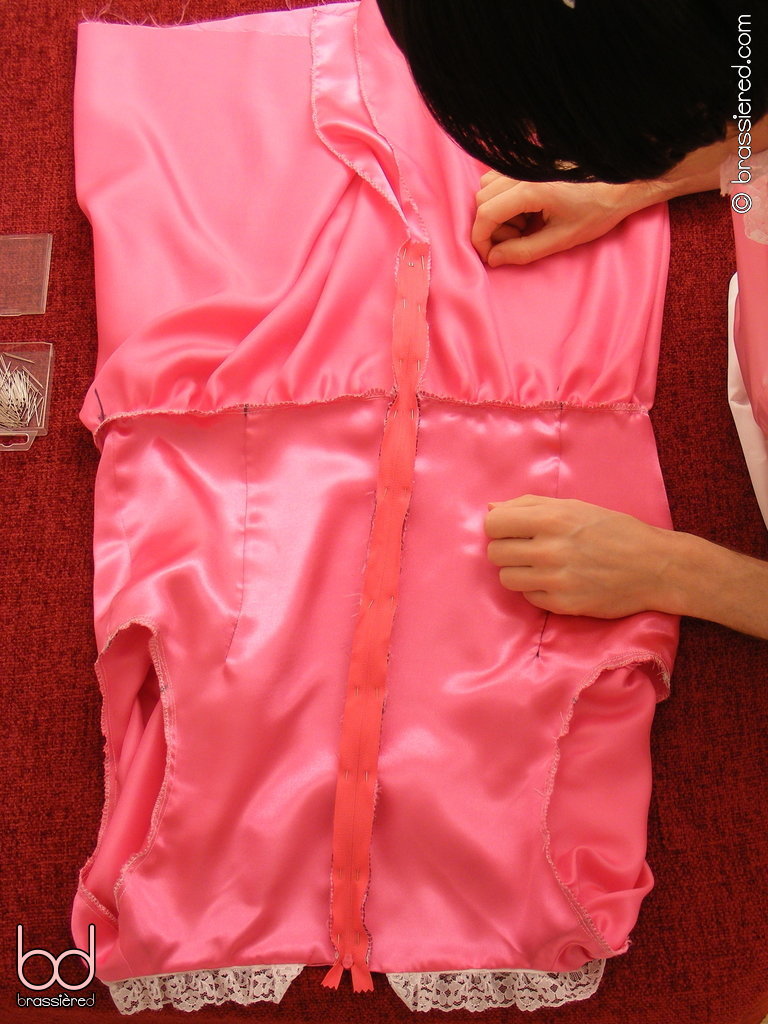
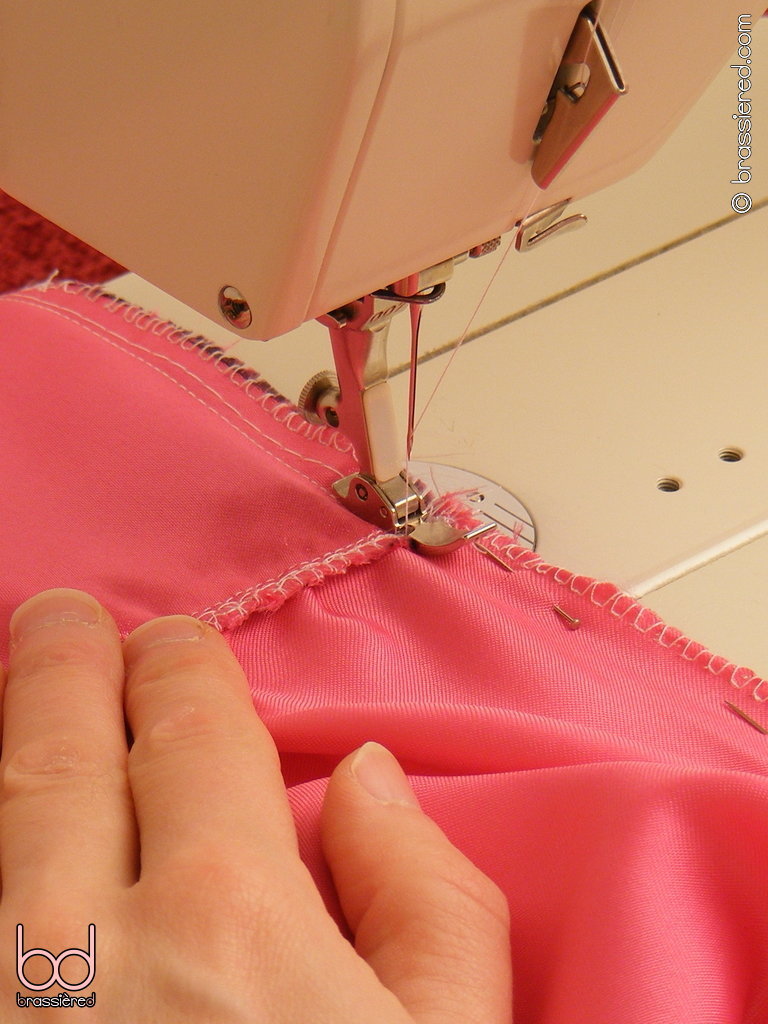
Keep the waist seam pressed down as you approach it, stopping your stitch just after it, as my husband does in Figure 8.5. We'll come back to the remainder of this side of the zipper shortly, but first we'll sew the top part of the other half.
After making the necessary adjustments to put the needle on the right of the zipper foot, repeat the process along the other side of the zipper (Figure 8.6). Doing so will be slightly more cumbersome thanks to having to manoeuvre the entire dress through the machine, but it's nevertheless worth the trouble of starting from top of the zipper, as doing so allows it to be better aligned.
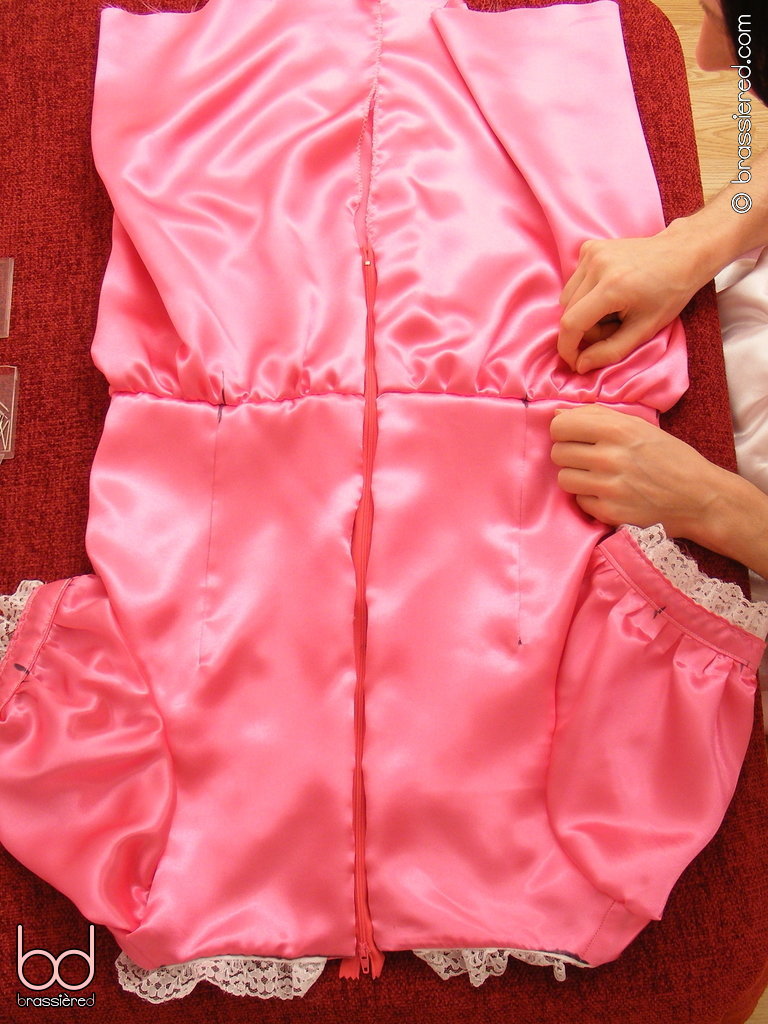
Temporarily turn the dress the right side out, and check that you can do the zipper up without it snagging, as my husband does in Figure 8.7. Leaving the zipper done up, turn the dress inside out again.
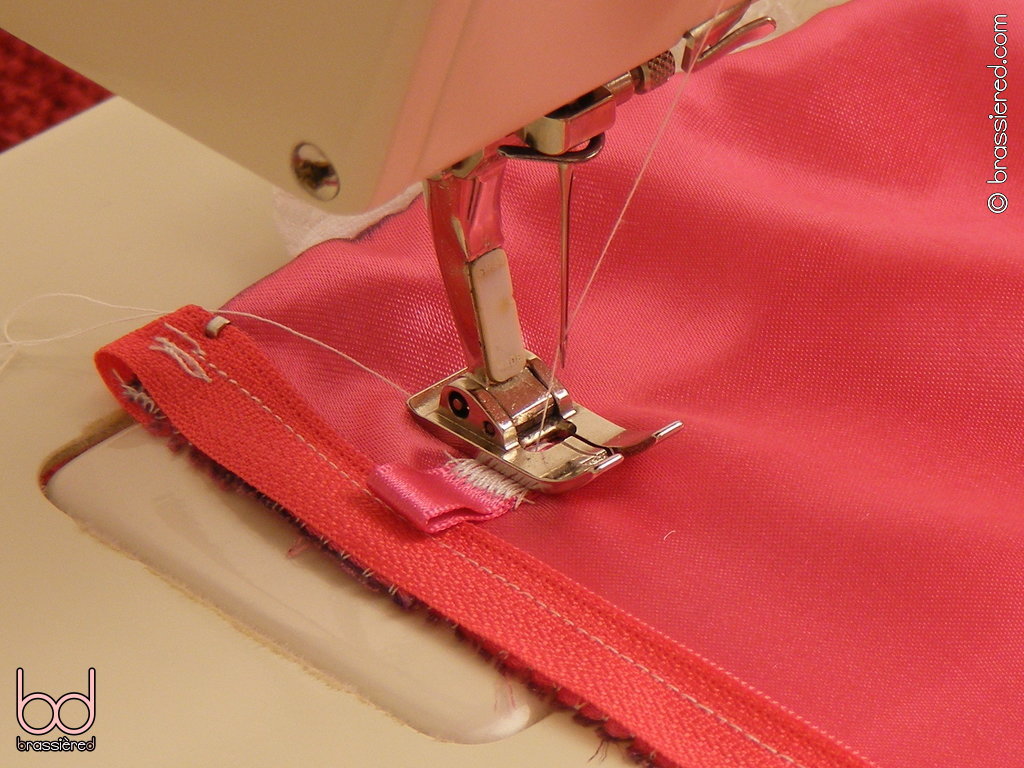
Continue from where you left off at the waist seam, overlapping your stitching at the start before sewing down to the bottom of the zipper. You should be able to feel where the track of teeth comes to an end through the fabric - sew slightly past this, onto the fabric tail of the zipper. Do so on both sides (Figure 8.8).
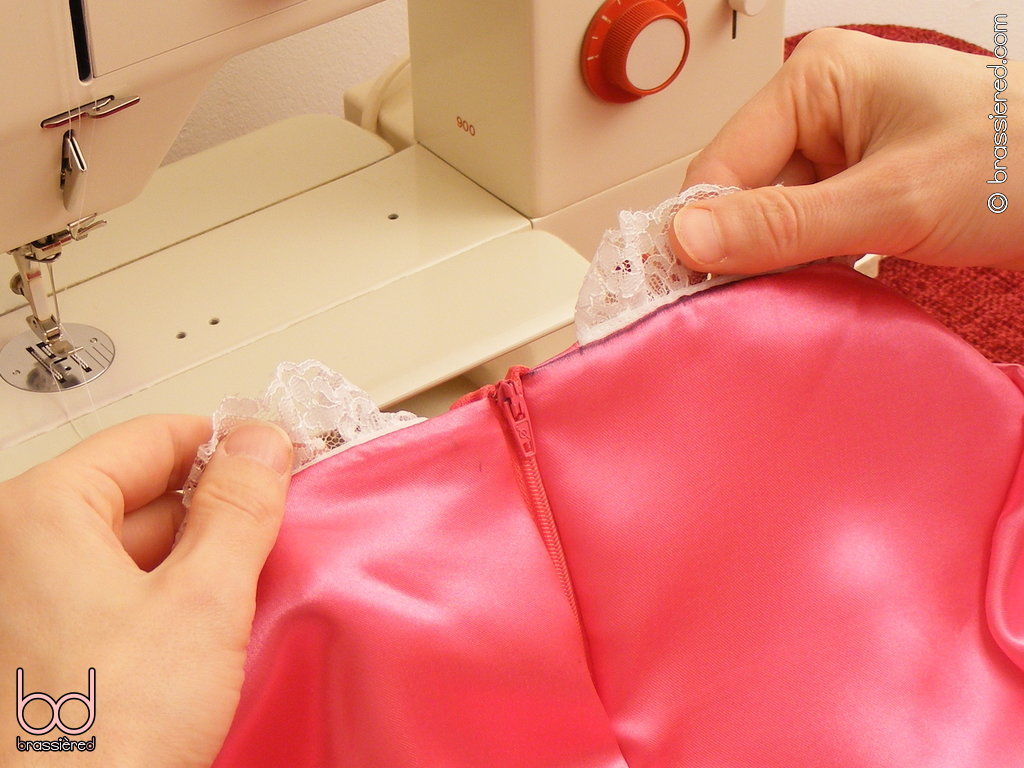
Again, check that you can undo the zipper without it snagging. Leave it undone, then return to the tabs at the top, folding each of these down on the inside of the dress before sewing them in place. In Figure 8.9, the teeth of the zipper are once again just to the left of the needle, with the stitches that my husband is sewing ones that will be hidden inside the dress when it is worn.
With the dress inside out, pin together the bottom of the skirt, folding the fastened zipper in on itself in the process. Putting the needle on the right of the zipper foot, press the later against the bottom of the zipper and sew down. As you can see in Figure 8.10, the resulting stitching will be slightly further in than that for the zipper, but this won't be a problem - in fact, it will hide the tail of the zipper when the dress is turned the right way out.
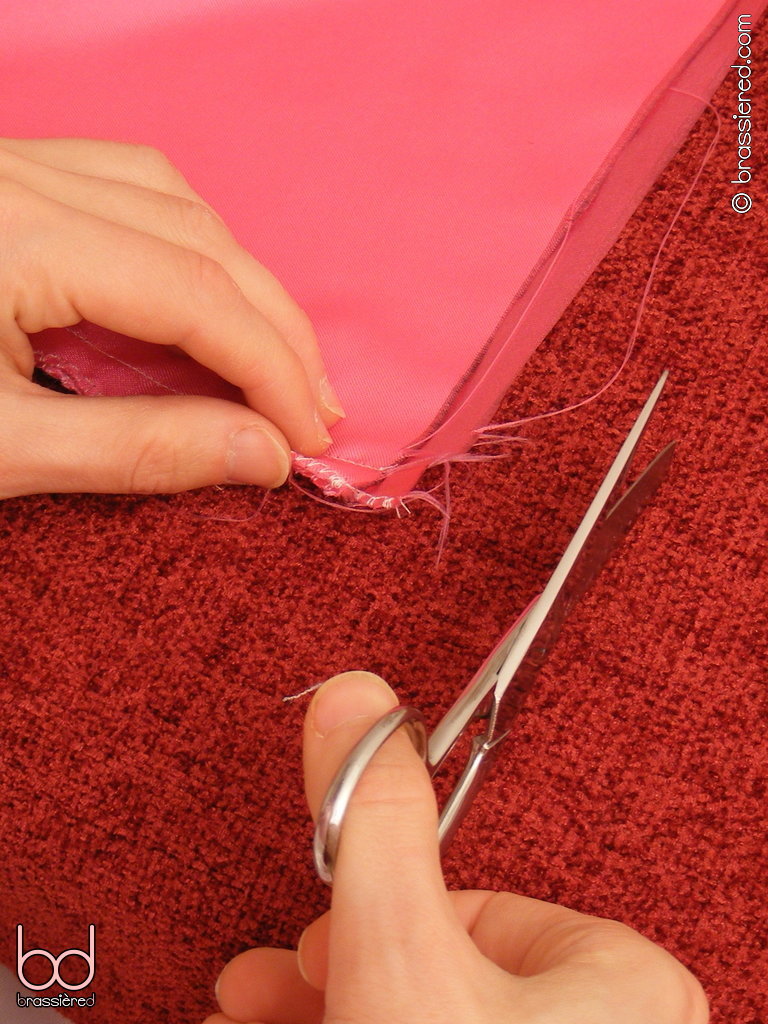
If you've done everything perfectly, the two sides of the skirt should align at this stage. If there's a slight difference between them, as my husband's dress has in Figure 8.11, trim the excess on one side in a smooth, shallow line.
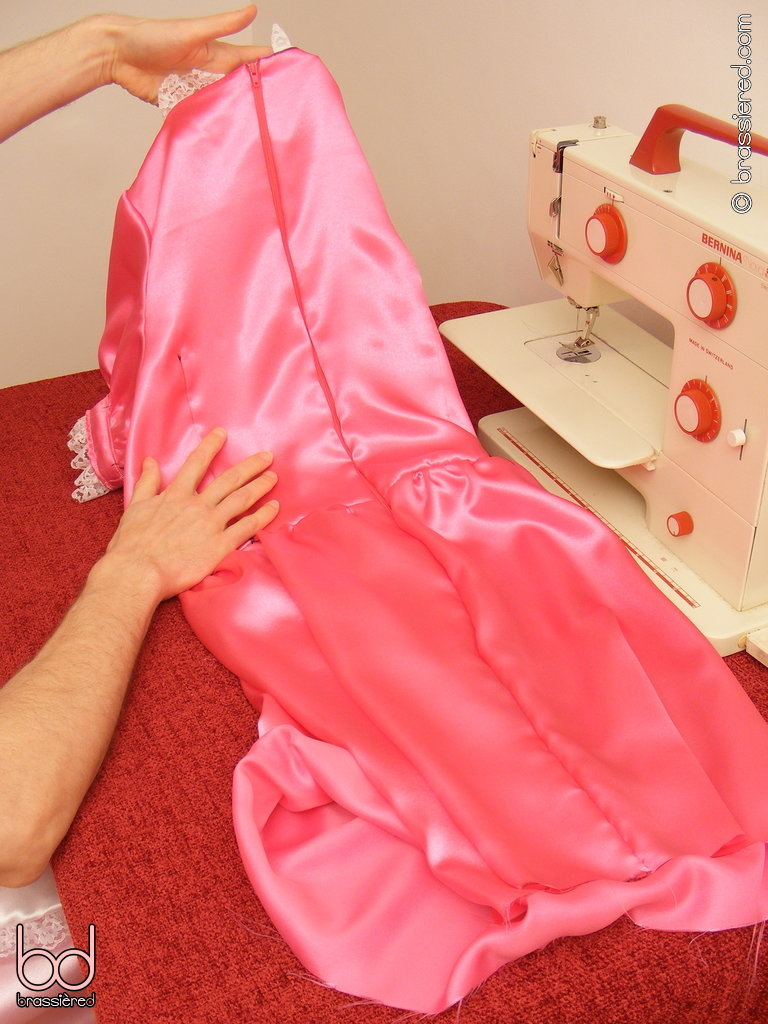
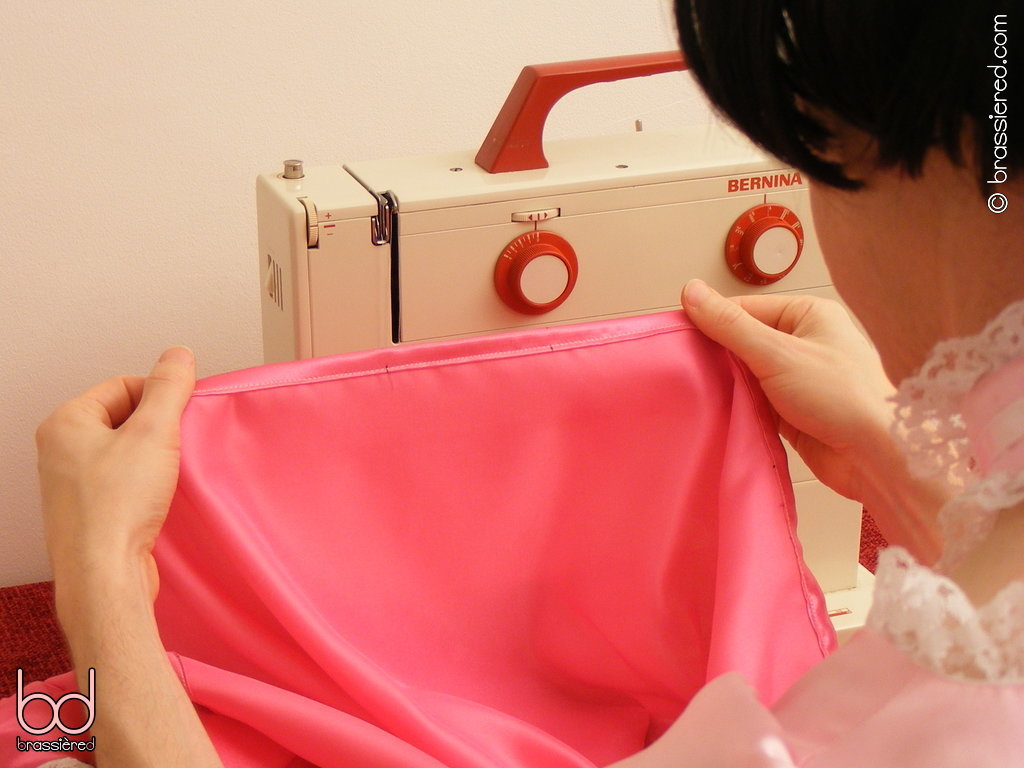
The finished zipper is shown in Figure 8.12.
Hemming the skirt
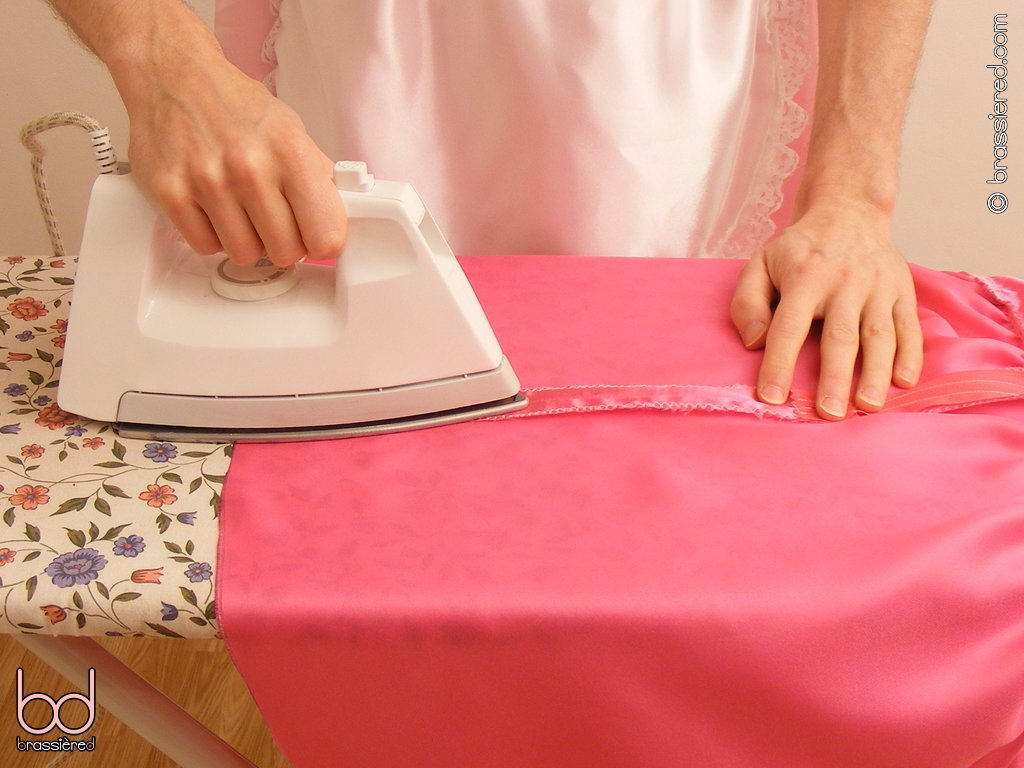
On the inside of the dress, open out the bottom of the rear seam and press it flat (Figure 8.13).
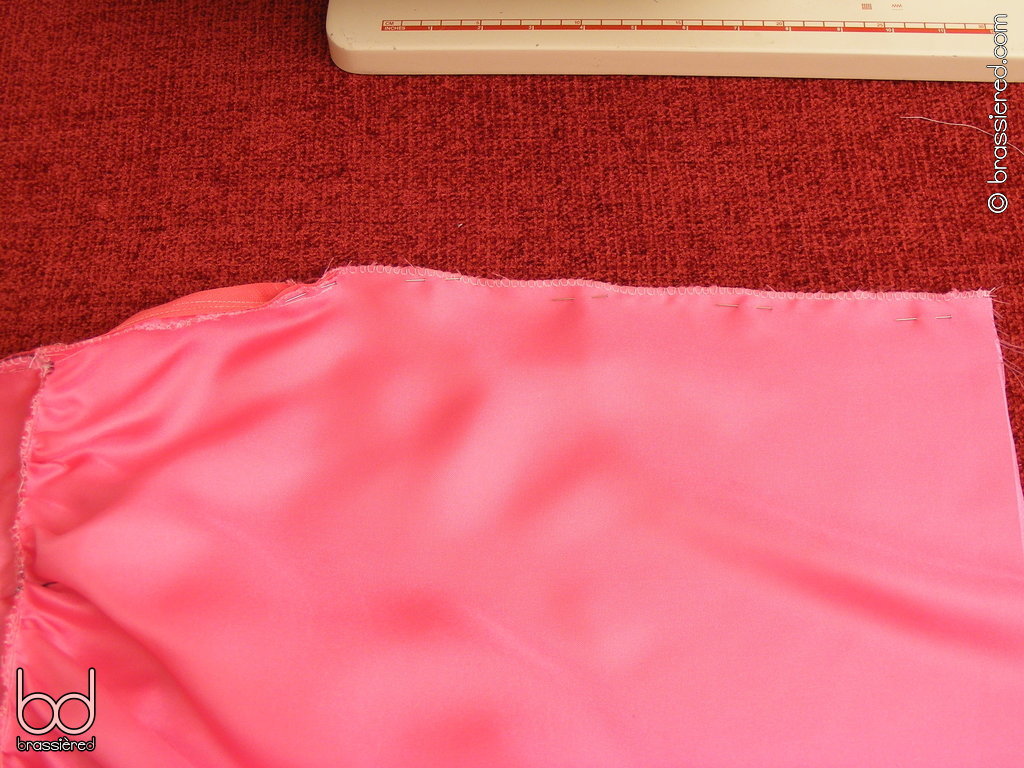
Turn your maid's dress right side out, and use your ruler to mark two points in from the bottom of the rear seam - one that's your seam allowance from the rough edge, the other twice that distance. Do so at regular intervals all the way around the bottom of the skirt, as my husband does in Figure 8.14.
Turn the dress inside out again, and slip it over your ironing board. Working your way around the bottom of the skirt, fold the rough edge of the fabric in to the first set of the marks and press. Repeat the process using the second set of marks, then pin the hem in place as per Figure 8.15, putting the pins such that they point forward when the dress is to your left.
Starting from the rear seam, and with the right side of the dress uppermost, sew a regular stitch all the way around the hem, slightly inside your seam allowance. In Figure 8.16, my husband places his stitching at ⅜” from the edge, leaving himself ⅛” leeway. As he did with each of the sleeves, he then turns the dress inside out to check that everything is sewn the way it should. It should go without saying that he'll unpick and restitch any parts that fail to hold the hem in place, but by now he's getting reasonably good at this.
Last, but by no means least, sew lace along the inside edge of the hem, again starting at the rear seam (Figure 8.17). There's a lot of lace needed here, but a sissy maid needs a frilly skirt! Overlap the lace a little at the end, then cut.
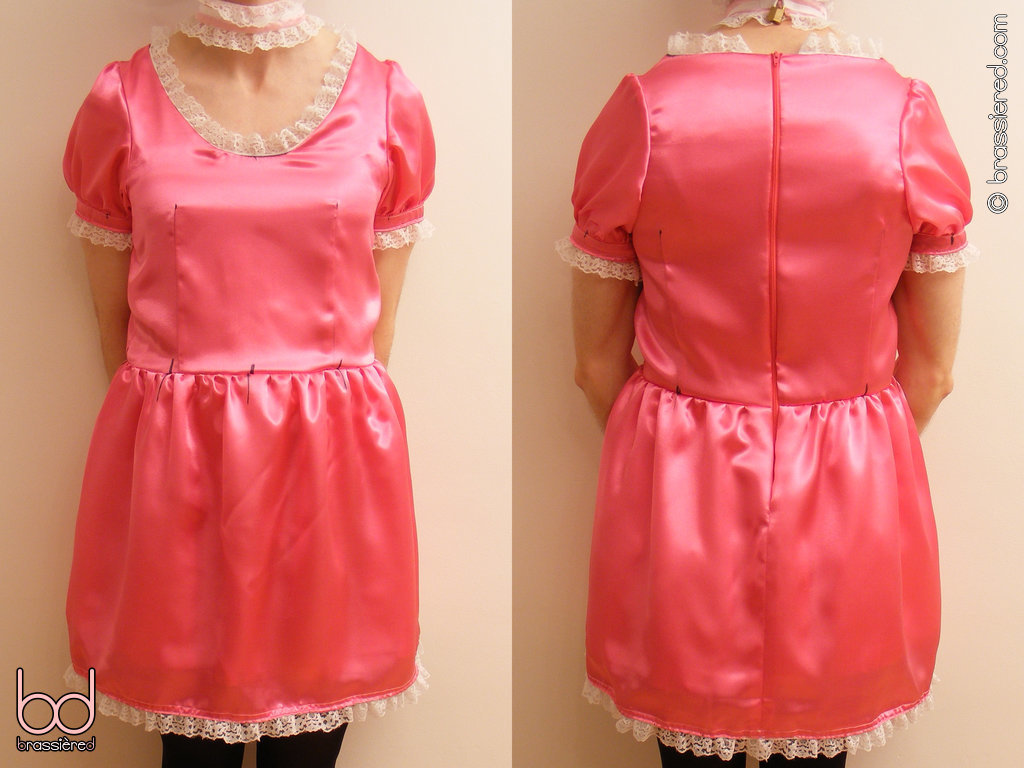
Apart from needing a quick wash to remove the various marks, your maid's dress is now ready to wear. In Figure 8.18, my husband proudly models his work, and you'll want to try on yours for size too - if only to savour the satisfaction that comes from completing such a garment. A maid's dress is an impressive thing to make from scratch! Combined with the apron you made in previous chapters, you've now got enough of a uniform to get down to work, even without the headpiece, choker and petticoat that are still to come.
Fitting lockable loops
For most sissies, getting dressed for domestic service isn't difficult, but staying that way can sometimes be more of a challenge - especially when there seems no end to the chores. Some men have barely broken a sweat in their maid's uniforms before they're wanting to shirk their responsibilities, but that's not how it should work - a maid's job is to serve!
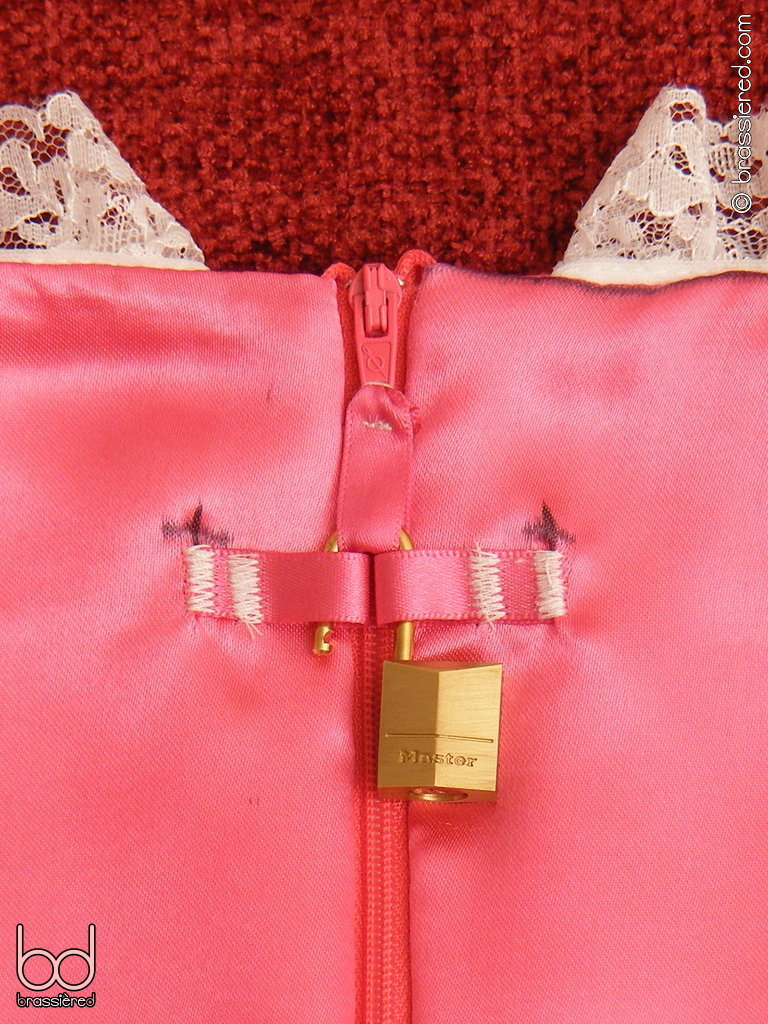
There's no better way to ensure you complete everything to your mistress's satisfaction than to make your maid's dress lockable, leaving you little choice but to wear it until she says otherwise. We'll do this by sewing loops of ribbon into the zipper, through which may be threaded a small padlock of the kind used to secure luggage. Once this is clicked closed, the only way to escape without the key would be to cut your way out - something that by now you should know would come at the cost of many hours of work, quite apart from any other punishment your mistress might impose.
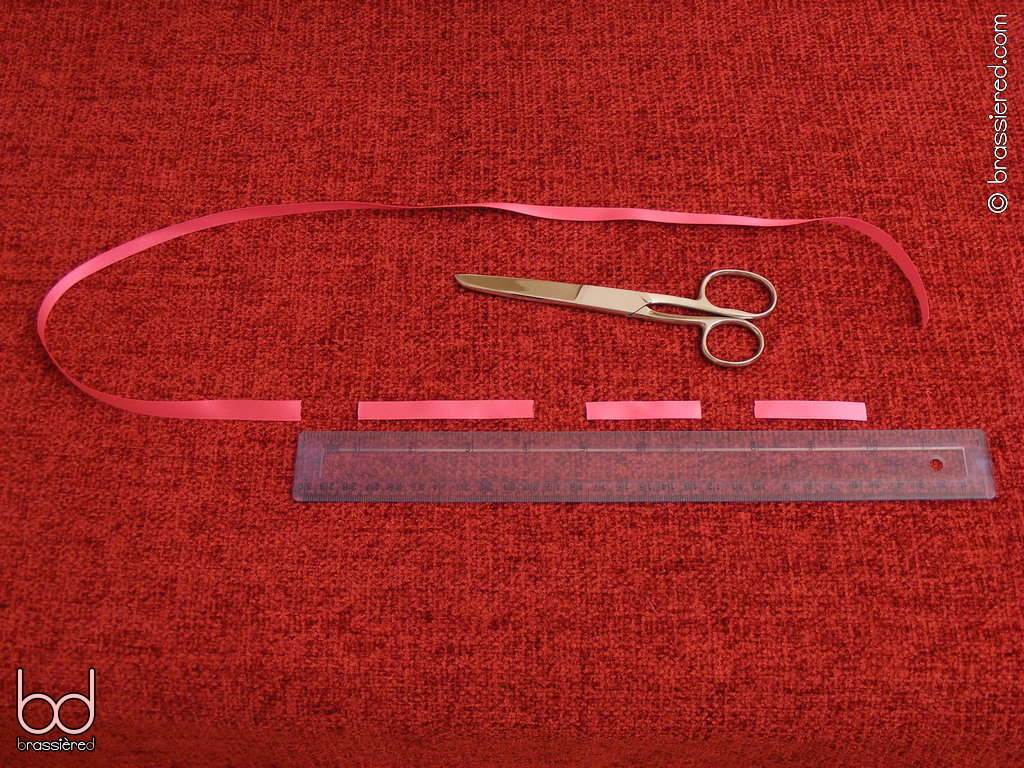
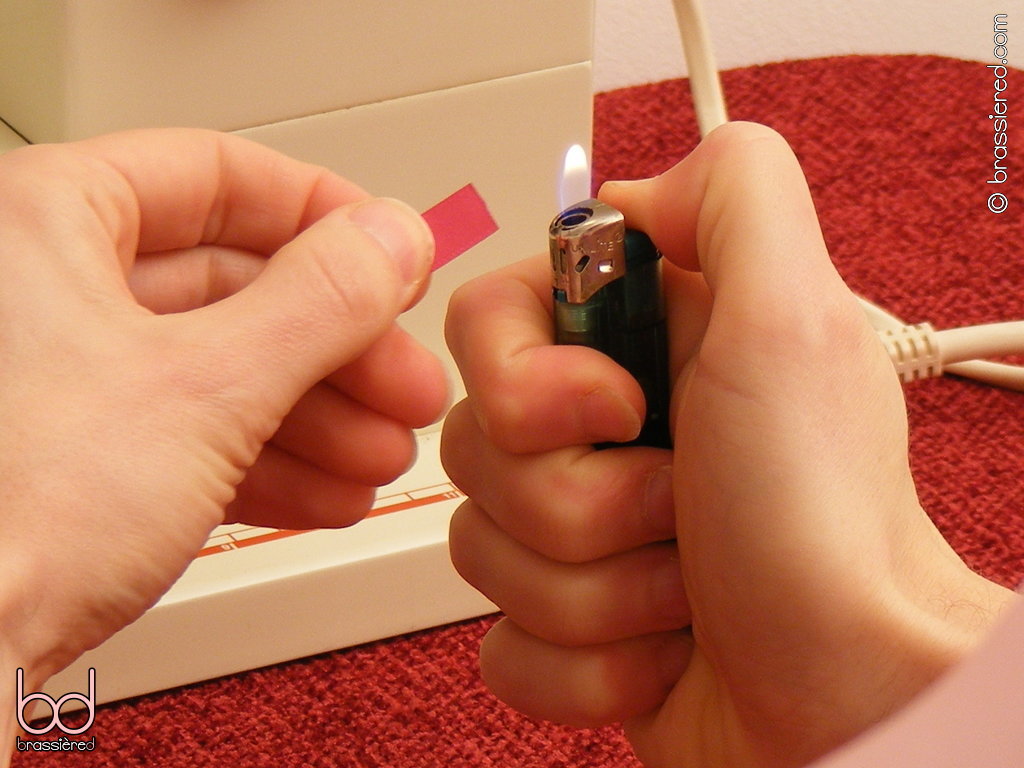
Start by cutting three lengths of ribbon, the same colour as your satin. You'll want two that are 5cm / 2”, and one that is 7.5cm / 3” in length. To stop the ends from fraying, briefly move them through the flame of a lighter - long enough to slightly melt them, but not so much as to burn or char them (Figure 8.19).
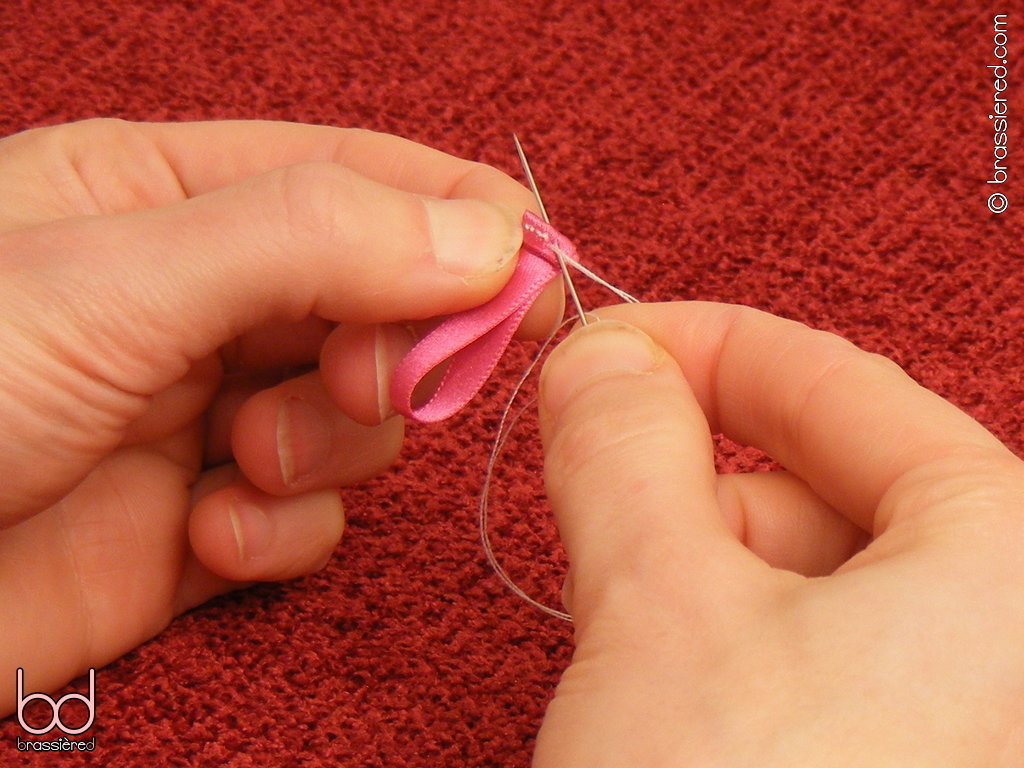
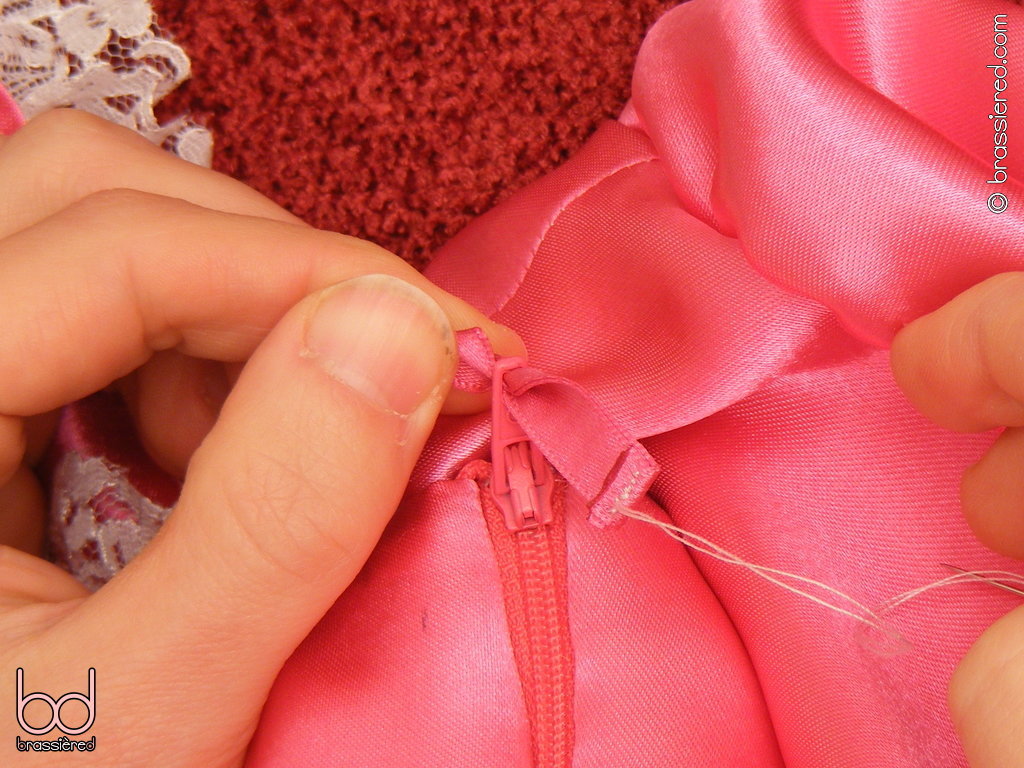
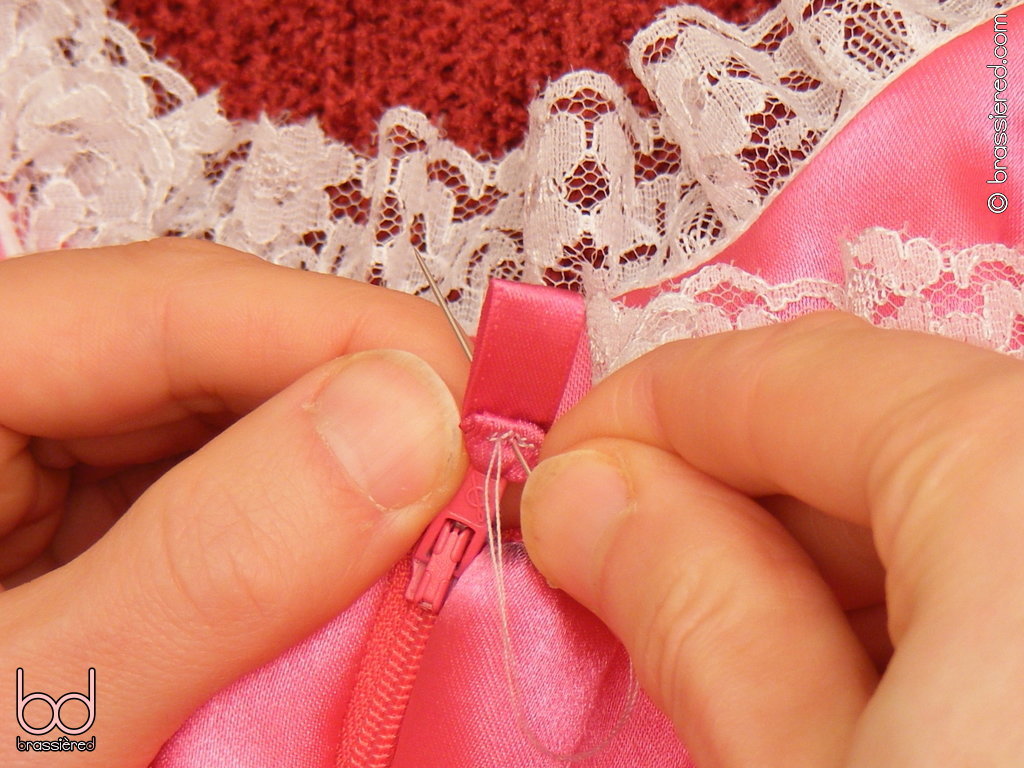
Take the longer piece of ribbon and fold it in half, then fold the loose ends over again by a fraction before sewing them down. It's difficult to this with a sewing machine because of the small size of the resulting loop, so thread a hand needle and run a series of small stitches along the edge, putting the knot on the folded down side (Figure 8.20). Rather than cutting your thread at the end, leave the needle hanging - we'll be stitching more in a moment.
Squeeze the loop through the hole at the bottom of zipper's puller, doing so from the underside to leave the folded down side facing the teeth. Use a pair of fine pointed scissors or tweezers if necessary to persuade the start of the loop through, then continue to pull until the thicker section stops you. Having done so, fold the ribbon over again, and sew it once more, as my husband does in Figure 8.21. You should be left with a loop attached to the puller that's approximately 2.5cm / 1” in length.
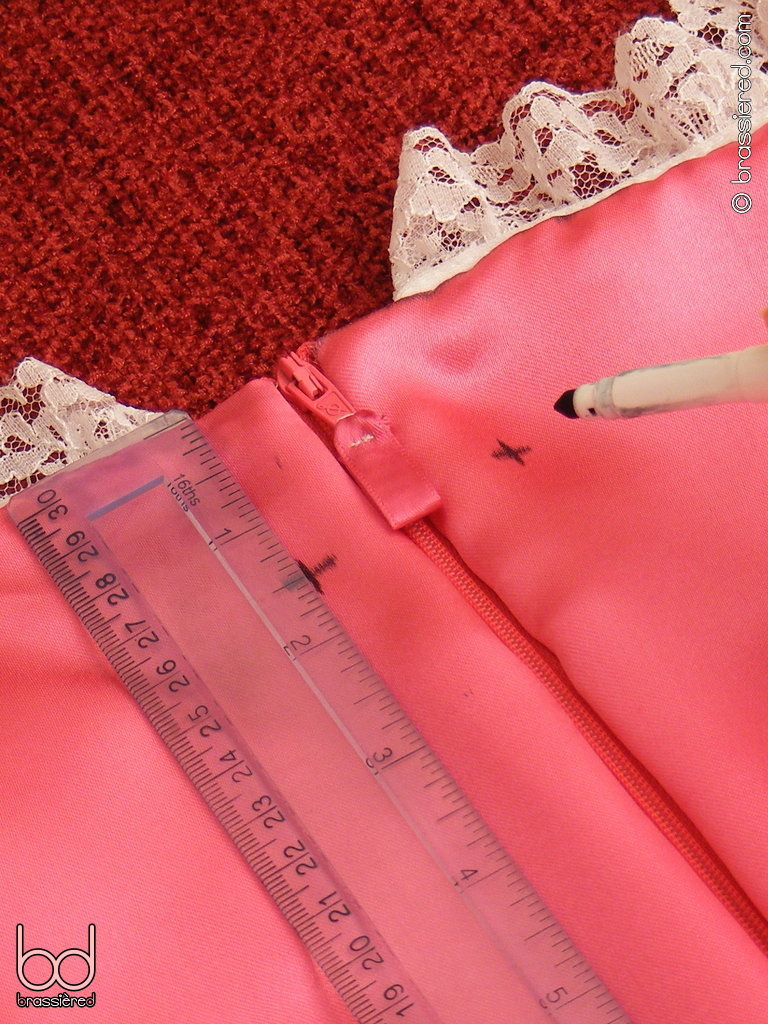
Lay the dress flat, and consider where the other two loops will need to go in order to support the padlock you'll be using. When the zipper is fastened, the bottom of its loop should align with the middle of both side loops, the latter in a position to accept the lock's shackle. Make marks accordingly - in Figure 8.22, my husband has marked one of the corners of each side loop, using a ruler to ensure they will be placed symmetrically.
Using your marks as a guide, baste the side loops to the dress. In Figure 8.23, my husband has aligned the edge of the presser foot with the end of the ribbon to ensure the stitching is consistently positioned. You'll need no more than a couple of stitches to temporarily secure the loop, so leave the ends of the thread long and unlocked.
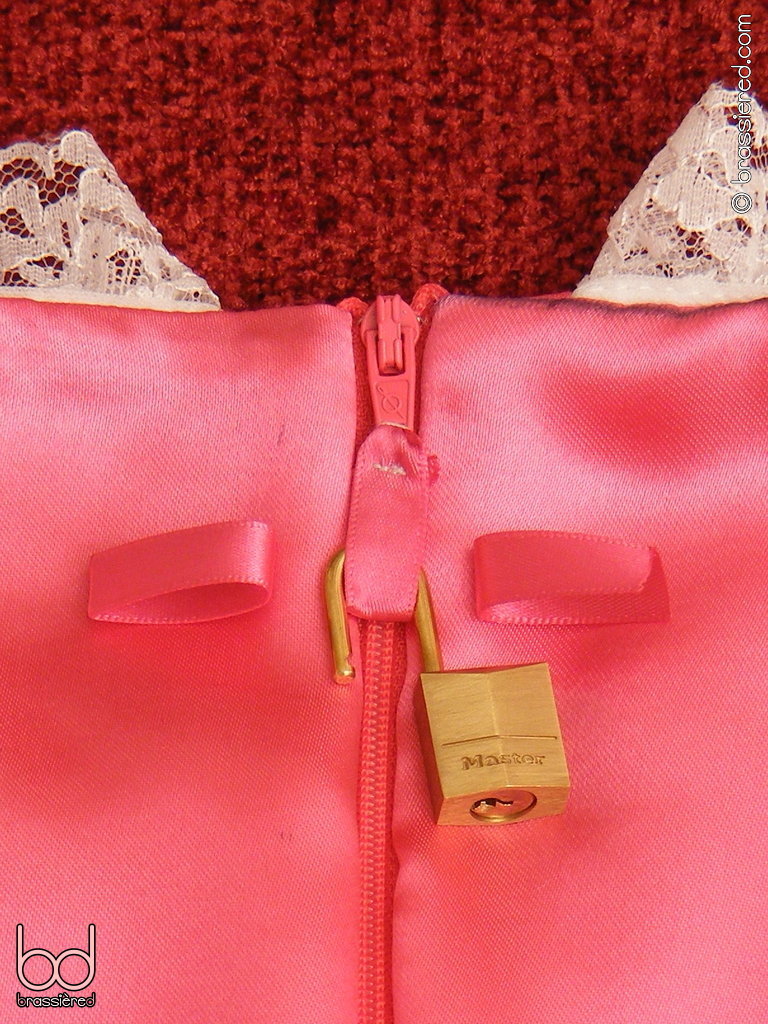
Take a moment to check that the padlock can be threaded through all three loops, unpicking and repositioning the side ones if necessary. In Figure 8.24, the two side loops that will in due course trap my husband in his maid's dress just touch at the centre of the zipper - make sure that yours are similarly symmetrical.
When you're satisfied that your maid's dress can be suitably secured, sew the side loops in place with a very short, wide zigzag stitch (Figure 8.25). My husband does so twice for each loop, once centred on the line of basting stitches, the other close to the end of the ribbon. There's no way even the most frantic of fingers could pull the padlock off while the dress is being worn, and while he could cut through the ribbon, unpicking so much in the way of stitching to make things right is next to impossible without ruining the satin in the process. Like it or not, my sissy maid will be staying in his dress until the chores are done!